You want to get stronger, and that Pull Up Bar for Doorway seemed like the perfect place to start. But you’re not exactly sure what to do with it.
Whether you're aiming to build serious upper body strength or just want to master your first pull up, knowing how to use the bar correctly makes all the difference.
This guide breaks it all down, step by step, so you can train with confidence and get real results, right from your doorway.
How to Use a Doorway Pull Up Bar

Using a doorway pull up bar is simple, but getting the setup right is key. A secure fit and proper form will help you avoid injuries and get the most from your workouts. Here’s how to start strong:
Step 1: Check Door Frame Compatibility
Before installing anything, make sure your doorway is safe and suitable:
Doorframe Size
Most pull up bars fit doorways between 24 to 36 inches wide. Measure your doorframe to ensure it falls within this range.
Trim Strength
Your doorframe’s trim (the molding around it) should be sturdy—ideally made of solid wood. Avoid using pull up bars on flimsy or decorative trims, as they can break under pressure.
Clearance Above and Around the Door
Make sure there’s enough space above the frame so your head doesn’t hit the ceiling. Also, check for any obstructions like shelves or walls nearby that might restrict your movement.
Step 2: Install the Bar Correctly
Now that your doorway checks out, it’s time to install your pull up bar the right way:
Follow Manufacturer Instructions
Every bar has a slightly different setup process. Some twist and lock into place, while others use brackets or leverage. Follow the manual step-by-step to ensure proper installation.
Use a Level Surface
Make sure the bar is aligned evenly across the top of the doorframe. A crooked bar can affect your form and create uneven stress on your shoulders and arms.
Test Stability Before Using
Before jumping into a full pull up, gently hang on the bar to test its stability. If it wobbles, creaks, or slips—stop and readjust. Better safe than sorry.
Step 3: Warm-Up Before You Begin
Don’t skip this. Warming up is a must before using your pull up bar. Jumping into a workout with cold muscles increases the risk of strain or injury.
Dynamic Stretches for Arms, Shoulders, and Back
Spend 5–10 minutes moving through active stretches. Arm circles, shoulder rolls, band pull-aparts, and gentle spinal twists will help loosen up your upper body. The goal is to increase blood flow and prepare your joints for the movement ahead.

Step 4: Use Proper Grip Techniques
Your grip makes a big difference in how effective and safe your pull up workout is. The right grip can target different muscles and reduce unnecessary stress on your joints.
Grip Variations
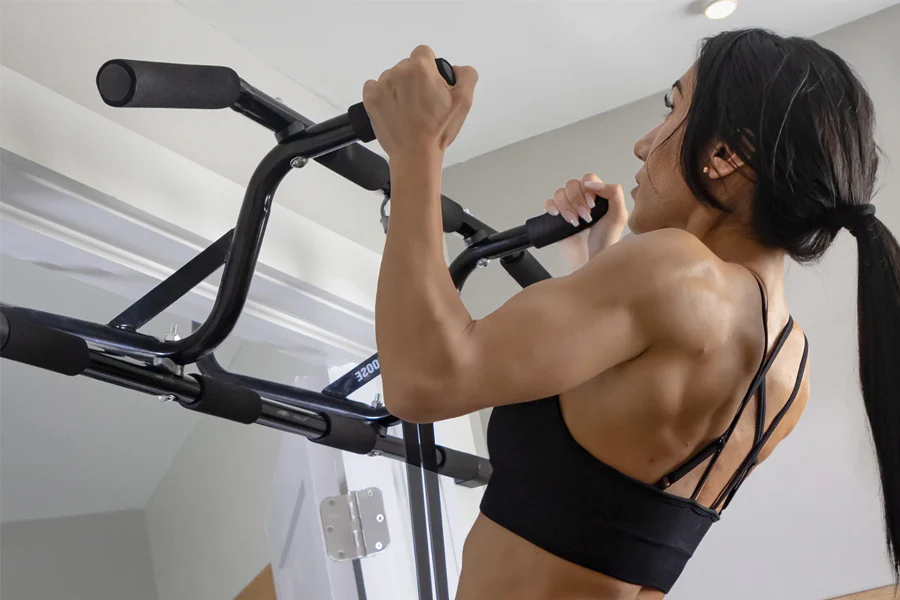
Overhand Grip (pronated): Palms face away from you. This is the standard grip for traditional pull ups and targets your back, shoulders, and arms.
Underhand Grip (supinated): Palms face you. This variation puts more emphasis on your biceps and is often easier for beginners.
Neutral Grip: Palms face each other (if your bar supports this). It’s easier on the wrists and shoulders and still highly effective for upper back and arm strength.
Shoulder-Width vs Wide Grip
Shoulder-Width: This is the most natural and safest position for most users. It provides a strong base and reduces joint strain.
Wide Grip: Increases focus on the upper lats but puts more tension on your shoulders. Use with caution and only if you’ve built up strength and control.
Step 5: Perform Controlled Movements
Now that you’re set up and warmed up, it’s time to put that pull up bar to work. But here’s the key: quality over quantity. Controlled movements are what build real strength and protect your joints from strain.
Engage Your Core
Don’t let your body go limp. Brace your core as if you’re about to take a punch. This keeps your body stable and prevents unnecessary swinging or arching of the lower back.
Don’t Swing or Kip
Avoid using momentum to get above the bar. Swinging or kipping (jerking your legs for a boost) not only reduces the effectiveness of the exercise but also puts stress on your shoulders and spine.
Pull Until Chin Clears the Bar, Then Lower Slowly
Use your upper body to pull yourself up until your chin is over the bar. Pause briefly at the top, then lower yourself back down with control—don’t just drop. This slow negative movement is just as important as the pull itself and helps build even more strength.
Tips for Using a Doorway Pull Up Bar Effectively and Safely

A doorway pull up bar is a powerful tool when used correctly. Follow these tips to stay safe and get the most out of every rep.
- Always Test Before Each Use: Give the bar a quick tug or light hang before every workout to ensure it’s still secure. Over time, bars can shift slightly, especially if you leave them up.
- Stick to Your Weight Limit: Every bar has a max load—usually between 250 to 300 lbs. Don’t push it. And if you’re using weighted vests or bands, factor that into the total weight.
- Avoid Sudden or Jerky Movements: Fast, uncontrolled reps might feel impressive, but they increase your risk of injury. Focus on slow, controlled movement to engage muscles properly and protect joints.
- Keep the Area Clear: Make sure there’s no clutter around or under you. A fall onto shoes, bags, or uneven flooring can turn a minor slip into a serious injury.
- Use Proper Footwear: Grippy, stable shoes help you maintain control if your feet touch the ground mid-rep. Barefoot or slippery soles can mess with your balance.
- Don’t Leave It Up Permanently (Optional for Safety): While many people leave their bars up, consider removing them if you have kids around or if the bar blocks door movement. Regularly taking it down also gives you a chance to inspect it.
- Inspect for Wear and Tear: Look for cracks, loosened padding, or any bending in the metal. If anything feels off, replace or repair it before using it.
FAQs
1. How do I grip the bar properly for pull ups?
Start with an overhand grip, slightly wider than shoulder-width. Keep your thumbs wrapped around the bar for better control and safety.
2. Where should I place my hands for different results?
A wider grip targets your lats more, while a shoulder-width grip balances biceps and back. Narrow grips emphasize arms. Choose based on your training goals.
3. Should my legs be bent or straight during pull ups?
Bend your knees and cross your ankles behind you to avoid touching the floor. This keeps your body compact and helps maintain proper form.
4. How do I stop my body from swinging during reps?
Engage your core and keep movement slow and controlled. Avoid using momentum, focus on pulling up and lowering down in a straight line.
5. How many pull ups should I do as a beginner?
Start with 2–3 sets of as many clean reps as you can do, no swinging. If you can’t do one yet, work on negatives or assisted pull ups.
6. Can I use the pull up bar for hanging exercises too?
Yes. Exercises like dead hangs, scapular pulls, and hanging leg raises are great for grip strength, posture, and core development. Just ensure your bar is secure before trying them.
Conclusion
A doorway pull up bar can be one of the most effective tools in your home workout arsenal, if you know how to use it right.
From setup to form, every detail matters when it comes to training safely and seeing real progress. Whether you're working toward your first pull up or adding reps to your routine, consistency and proper technique are key.
For a bar that’s built for stability, comfort, and long-term use, check out the DMoose Doorway Pull Up Bar. It’s designed to fit most doorframes, supports multiple grip positions, and gives you the confidence to train hard.
Reading List

Finally! Gain The Most Muscle Mass And Strength Possible in Just 12 Weeks!
Get Our FREE GUIDE That Includes a 12-Week Muscle-Building Workout Program, Hidden Strategies and Meal Plans Including Shopping List & Recipes.
Your privacyis important to us