EXERCISES BY MUSCLE GROUPS
Want to give your triceps some love or build up your quadriceps? Our exercise guides have you covered. Learn how to perform these moves in the best form.
No products in the cart
You May Also Like:


$20,000 Transformation Challenge
Free Shipping on Orders $75+
90 Day Money Back Guarantee
1 Year Equipment Warranty
$20,000 Transformation Challenge
Free Shipping on Orders $75+
90 Day Money Back Guarantee
1 Year Equipment Warranty
$20,000 Transformation Challenge
Free Shipping on Orders $75+
90 Day Money Back Guarantee
1 Year Equipment Warranty
$20,000 Transformation Challenge
Free Shipping on Orders $75+
90 Day Money Back Guarantee
1 Year Equipment Warranty
$20,000 Transformation Challenge
Free Shipping on Orders $75+
90 Day Money Back Guarantee
1 Year Equipment Warranty
$20,000 Transformation Challenge
Free Shipping on Orders $75+
90 Day Money Back Guarantee
1 Year Equipment Warranty
$20,000 Transformation Challenge
Free Shipping on Orders $75+
90 Day Money Back Guarantee
1 Year Equipment Warranty
$20,000 Transformation Challenge
Free Shipping on Orders $75+
90 Day Money Back Guarantee
1 Year Equipment Warranty
Want to give your triceps some love or build up your quadriceps? Our exercise guides have you covered. Learn how to perform these moves in the best form.

Explore the effectiveness of ab rollers vs. planks for core workouts and discover which exercise best suits your fitness routine. Find out whether you prefer the dynamic ab roller or the stability-focused plank.

Learn How long does it take to get a six pack and how can you speed up the process. Achieve amazing results by following this guide.

Discover effective abs and oblique workouts with the DMoose ab roller wheel. Strengthen your core and sculpt your sides. Learn how in this detailed guide!

Ab Roller vs Sliders unbiased comparison. Learn ab slider exercises & slider workouts, benefits of slider exercises & ab slider workouts & where to buy tips

Exercise Description Main Target Muscles Abs Force Type Isometric Workout Type Strength Training Gym Gear Band Fitness Level Beginner Compound/Isolated Compound Target Muscle: Abs Banded Pallof Press Overview The banded Pallof press is a great exercise for strengthening the core muscles and stabilizing the spine. It can be done with a variety of equipment, including a resistance band, cable machine, or TRX system. The exercise works the muscles of the abdomen, hips, and lower back. It also helps to strengthen the stabilizing muscles of the shoulder girdle. The banded Pallof press is a great exercise for athletes who need to develop core strength and stability, such as tennis players, golfers, and baseball players. It is also an excellent exercise for people who have lower back pain or other injuries that limit their ability to perform other exercises. How to Do It Attach the band to an anchor point at chest level. Grab the opposite ends of the band in both hands and step away from the anchor point, facing your back towards it. Stand sideways and slowly extend the band in front of your body. Hold for a second, then slowly bring it back to your chest. Repeat for the desired number of reps. Banded Palloff Press Tips: Keep your motion slow and controlled. Do not allow your body to twist towards the anchor point.

Exercise Description Main Target Muscles Core, Lower Rectus Abdominal Muscles Secondary Target Muscles Hip Flexors Force Type Pull Workout Type Cardiovascular Gym Gear Bodyweight Fitness Level Beginner Compound/Isolated Compound Targeted Muscles: Core Flutter Kicks Overview Exercises like flutter kick target your core muscles, particularly the lower rectus abdominal muscles and your hip flexors. They are carried out on dry land, although they resemble swimming strokes. You can carry out these exercises while lying on your back or if you wish to improve your back muscles while lying on your stomach. How to Do It? Lie down with your back to the ceiling. Put your hands beneath your buttocks. Lift the right leg off the floor just past hip height while keeping your lower back firmly planted on the floor. Lift the left leg just a few inches off the ground. Hold for 2 seconds, then change the leg positions and kick with a flutter. Lift your head and neck off the floor to make the exercise more challenging. Continue doing this for up to 30 seconds. Flutter Kicks Tips Keep your legs straight and together as you kick. Point your toes and keep your knees slightly bent. Keep your back and hips straight, and do not arch your back. Do not hold your breath while kicking; breathe regularly. Kick from the hip, not the knee. Practice regularly to improve your technique and increase your endurance.

Exercise Description Main Target Muscles Abs Secondary Target Muscles Obliques Workout Type Strength Gym Gear Dumbbells, Kettlebell or None Fitness Level Beginner Compound/Isolated Isolated Power Move Pull Target Muscle Group: Abs Sit-Ups Overview Sit ups are one of the most effective and common exercises for abs. They work by using your body weight to tone and strengthen your abdominal muscles. Sit ups can also help to improve your posture and relieve back pain. Sit-ups can be done as part of the ab exercise or total body workout. How To Do It? Simple Sit-ups Start by lying on your back with your knees bent and your feet flat on the floor. Place your hands behind your head and slowly curl your upper body towards your knees, keeping your lower back pressed firmly against the floor. Return to the starting position and repeat. Completion of the number of repetitions required. Sit-ups With Kettlebells Start by sitting on the ground with your knees bent and feet flat on the floor. Place the kettlebell in front of you, between your legs. Lie back onto the ground, keeping your back straight. Reach forward and grab the kettlebell with both hands, keeping your arms straight. From this position, lift the kettlebell up overhead and then back down again behind your head. Reverse the motion, bringing the kettlebell back up overhead, and then sit all the way up, contracting your abs as you do so. Return to the starting position and repeat for 12-15 reps. Sit Up Tips To improve your mind-muscle connection, exhale as if you are blowing out candles. You can choose to do more anti-extension or anti-rotation movements if your lower back is bothering you.

Exercise Description Main Target Muscles Abs Secondary Target Muscles None Workout Type Strength Gym Gear Kettlebell Fitness Level Beginner Compound/Isolated Isolated Power Move Pull Targeted Muscles: Abs Kettlebell Side Bends Overview Kettlebell side bends exercise the obliques as well as the side muscles of the body. This exercise is frequently incorporated into routines to assist tone and reduce waist circumference. Kettlebell side bends can also strengthen the core and increase stability. How to Do It? Start by taking a tall stance and spreading your feet apart. Your right hand should be on your hip while your left hand is holding a kettlebell. Bend as far to the side as you can while maintaining a straight back while keeping your core active. Repeat on the other side, then go back to your starting position. Complete 10–12 repetitions on each side. Kettlebell Side Bends Tips Maintain a strong core throughout the entire exercise. Avoid jerky motions by moving gently and under control. Keep your back straight and only bend as far as you can. Instead of swinging the kettlebell, concentrate on using the side muscles of the body to move.

Exercise Description Main Target Muscles Abs Secondary Target Muscles None Workout Type Strength Gym Gear Kettlebell Fitness Level Beginner Compound/Isolated Isolated Power Move Push Targeted Muscles: Abs Kettlebell Ab Pullover Crunch Overview The ab muscles can be strengthened with the kettlebell ab pullover workout. The move is descended from the family of plank moves. As an anti-extension abdominal workout, the kettlebell ab pullover requires you to maintain spinal stability while progressively lowering the kettlebell overhead. How to Do It? Holding a kettlebell by the horns, position yourself supine with your legs bent 90 degrees at the hips and knees and your arms reaching upward. As you exhale, lower the kettlebell overhead while keeping the hips contracted. Once you've completed the required amount of total repetitions, return to your starting position and repeat. Tips for Kettlebell Ab Pullover Crunch Breathing should not be held in, as you shouldn't be using it to make up for instability. Learn to keep your stance while moving without needing to breathe. Move methodically and slowly. Instead of finishing repetitions, the objective is to control the given space. Make sure to breathe out as the arms rise overhead. The intention is to keep the ribs down and avoid hyperextending the lower back. Like ab wheel rollouts, start with what you have and gradually expand over time. You might not have a full range of motion at first.

Exercise Description Main Target Muscles Abs Secondary Target Muscles Shoulders Workout Type Strength Gym Gear Barbell Fitness Level Intermediate Compound/Isolated Compound Power Move Push Target Muscle Group Ab rollout is an exercise that targets the core muscles. This includes the rectus abdominis (lower back), and the obliques (rectus abdominis). The ab rollout targets the upper back and shoulders as well. Barbell ab rollouts are similar to planks, except that you don't place your arms or hands on the mat. Instead, you place them on the barbell. The barbell's instability means that the core muscles have to work harder. This is why the barbell-ab rollout is considered to be an intermediate or advanced move. Do a traditional plank for 30-60 seconds before you attempt this move. How to Do It Place your knees on the mat or floor and grab the barbell with a grip that is wider than your shoulder width. Each side should have 5-10lb plates. Keep your back straight and your arms straight. Next, roll the barbell in front of your body until your arms are fully extended. Tendon your abs and gently roll the barbell towards your knees. Ab Rollout Tips Always keep your back and arms straight. Slowly do the exercise and focus on using your abdominal muscles for pulling the barbell towards you. Standing barbell rolls can be added intensity.

Exercise Description Target Muscle Group Core Secondary Muscles Shoulders Glutes, Hamstrings Exercise Type Strength Equipment Required Core Slider Experience Level Beginner Compound/Isolated Compound Force Type Pull Target Muscle: Core Core Slider Ab Pike Overview Performing the core slider ab pike is an excellent way to work your rectus abdominis muscles. The sliding pike will improve your posture, balance, and overall flexibility. Adopting a correct V posture might be difficult at first, but you'll quickly get used to it if you persevere. Be sure to use controlled movements and engage your abs throughout the entire exercise to get the most benefit from it! How to Do Commence in a high plank position, with your hands placed on the floor and your feet on top of the core slider. Keeping your abs engaged, slide your feet forward so that your body forms a "V" shape. From here, pike your hips up towards the ceiling, using your abs to pull your knees into your chest. Reverse the movement back to the starting position, and repeat for 10-12 reps. Core Slider Ab Pike Tips Keep your abs engaged throughout the entire exercise to ensure that you are targeting the muscle group effectively. Use a controlled movement when sliding your feet forward and piking your hips up - don't let the momentum carry you through the exercise. If this exercise is too challenging, start in a modified plank position on your knees instead of your toes. You can keep your hands on an elevated surface as well (such as a chair or bench) to make the exercise easier. Add a weight vest or ankle weights to make the exercise more challenging. You can also keep your hands on an unstable surface, such as a stability ball.

Exercise Description Target Muscle Group Core Secondary Muscles Shoulders, Arms Exercise Type Strength Equipment Required Core Slider Experience Level Beginner Compound/Isolated Compound Force Type Pull Target Muscle: Core Core Slider Double Arm Push Out Overview The Core Slider Double Arm Push Out is a great exercise for toning your arms and shoulders. It also works your core muscles, making it a great all-around workout. It is an excellent workout to include in your workout routine to add some challenge and twist. How to Do It Lower your body on your fours, holding the core slider under both hands. Bend your elbows and get as low as you can, without touching the floor From here, push the slider out in front of you, extending your arms fully Reverse the motion and bring the slider back to your chest. That's one rep. Aim for 12-15 reps and 3-4 sets. If you find this exercise too easy, try adding weight by holding dumbbells or a weight plate. Core Slider Double Arm Push Out Tips Keep your core braced throughout the entire movement. Don't let your shoulders shrug up to your ears - keep them down and back. Breathe smoothly and evenly throughout the exercise.

Exercise Description Main Target Muscles Core Secondary Target Muscles None Workout Type Strength Gym Gear Bodyweight Fitness Level Beginner Compound/Isolated Compound Power Move Pull Target Muscle: Core Burpees Overview Burpees are a simple but effective way to get your heart rate up and tone your muscles. The key to doing this exercise correctly is to keep your core engaged the entire time. It is an excellent way to pump up your blood and shed off your belly fat. How to Do It Start in a standing position with your feet shoulder-width apart. Lower into a squatting position, then place your hands on the ground in front of you. Kick your legs back so that you end up in a push-up position. Quickly return to the squatting position and then jump up into the air as high as you can. Repeat this process for 30 seconds to 1 minute for a great cardio workout. If you want to add more of a challenge, do 2 or 3 sets of this exercise. Burpees Tips Keep your core engaged the entire time to get the most out of this exercise. Make sure to jump up high enough to extend your arms overhead fully. Land softly on your feet to avoid injury. If you want more of a challenge, do 2 or 3 sets of this exercise.

Exercise Description Main Target Muscles Core Secondary Target Muscles None Workout Type Strength Gym Gear Battle Rope Fitness Level Beginner Compound/Isolated Compound Power Move Pull Target Muscle: Abdominals Battle Rope Overview Battle ropes are a great way to add intensity to your workouts. They can be used for a variety of exercises, including upper body and core work. This exercise will strengthen your core, improve your upper body strength, increase your grip strength, and enhance agility. How to Do It? Start by standing in the center of the rope Hold the rope with both hands, one hand on each side Keep your arms extended and your shoulders down and back Engage your core and move your arms in a wave-like motion Repeat for the desired number of reps Exercise Tips Use a variety of exercises to target different muscle groups. Incorporate battle ropes into your cardio workouts for an added challenge. Start with a lightweight rope. You can always move to heavier ropes and increase the speed as you get stronger. Focus on using good form. This will help prevent injury and ensure that you are getting the most out of each exercise. Make sure to warm up before your workout and cool down afterwards. This will help prepare your body for the workout and reduce the risk of injury.

Exercise Description Target Muscle Group Core Secondary Muscles Glutes, Legs, Triceps, Shoulders Exercise Type Strength Equipment Required Core Slider Experience Level Beginner Compound/Isolated Compound Force Type Pull Target Muscle: Core Core Slider Mountain Climber Twist Overview The Core Slider Mountain Climber Twist is a great way to work your core muscles. The mountain climber twist is a dynamic exercise that works several muscle groups at the same time and raises your heart rate, which causes the metabolism to speed up to convert more calories into energy. This exercise improves your aerobic fitness, agility, and flexibility. How to Do Start off with a plank position; resting your body on your palms opened slightly more than shoulder width and toes upon the core sliders, opened shoulder width apart Once your body is straight aligned from head to toe, bring in your left knee towards your right elbow, return your knee back to its original position and then bring in your right knee towards your left elbow continue alternating your legs until desired repetitions. Exercise Tips Keep your body in a straight line throughout the entire exercise. Do not allow your hips to sag or rise as you twist from side to side. Exhale as you twist to extend your knee and inhale as you return to the starting position.

Exercise Description Target Muscle Group Core Secondary Muscles Shoulders, Glutes, Triceps, Legs Exercise Type Strength Equipment Required Core Slider Experience Level Beginner Compound/Isolated Compound Force Type Pull Target Muscle: Abdominals Core Slider Mountain Climber Overview The core slider mountain climber exercise is a great way to work your abs and obliques while also getting a good cardio workout. Using a slider can add an extra challenge to the exercise. Just be sure to keep a good form, move slowly and control to avoid injury. If you start to feel fatigued in your arms, take a break and rest for a few seconds before continuing. How to Do Commence in a tall plank position with your feet on the sliders, keeping them shoulder-width apart. Keeping your core engaged, slide one knee at a time towards your chest, then back to the starting position. Repeat with the other knee. Continue with this movement as quick as possible while maintaining good form for 30 seconds to 1 minute. Exercise Tips Make sure to keep your abdominal muscles engaged throughout the entire exercise to get the most benefit from it. Use a slow and controlled movement when sliding your hands back and forth to avoid injuring yourself. If you feel fatigue in your arms, take a break and rest for a few seconds before continuing.

Exercise Description Target Muscle Group Core Secondary Muscles Triceps, Forearms, Deltoids, Upper Pecs Exercise Type Strength Equipment Required Core Slider Experience Level Beginner Compound/Isolated Compound Force Type Pull Target Muscle: Abdominals Core Slider Spider-Man Push-Up Overview The core slider is a great way to get a full-body workout in a short amount of time. The slider is compact and easy to store, making it perfect for small spaces. The Spider-Man Push Up is a challenging exercise that works the chest, shoulders, and triceps. This exercise is sure to give you a fantastic pump! How to Do Place the Core Slider under your feet. Start by getting in a high push-up position with your palms grounded on the floor and your legs extended behind you. While lowering into a push-up, extend your right knee towards your right elbow. Push back up and slide your leg back to the starting position. Then repeat with your left knee towards your left elbow. Repeat for the desired number of reps. Exercise Tips: Ensure to keep your core braced throughout the entire exercise. This will help you stay stable and avoid injury. Emphasize on contracting your chest muscles as you push up. Breathe out as you push up and inhale as you lower back down. Begin with 3 sets of 10 repetitions and work your way up from there!

Exercise Description Target Muscle Group Core Secondary Muscles Obliques, Triceps, Hamstrings, Glutes Exercise Type Strength Equipment Required Core Slider Experience Level Beginner Compound/Isolated Compound Force Type Pull Target Muscle: Abdominals Core Slider Double Knee Tuck Overview The core slider double knee tuck exercise is a great way to work your core muscles. Knee tucks are a bodyweight core exercise that works your abs and hip flexors. This move also challenges your balance and coordination. How to Do Start in a push-up position with your hands grounded on the floor and your legs stretched behind, in a straight position Keeping your core engaged, slide both your knees in toward your chest. Return to the starting position and repeat. Continue for 30 seconds till you reach fatigue. Exercise Tips Keep your back straight and avoid arching your lower back. Engage your core muscles throughout the move. Move slowly and in a controlled manner. If you feel any pain, stop and consult a doctor or physical therapist.

Exercise Description Main Target Muscles Abs Secondary Target Muscles Forearms Workout Type Strength Gym Gear Bodyweight Fitness Level Advanced Compound/Isolated Isolation Power Move Pull Target Muscle: Abs Hanging Leg Raises Overview Hanging leg raises are a spectacular way to build strength in your upper body, particularly in your shoulders, back, and lats. It enhances your hip flexor strength, flexibility, and functional strength. If your fitness goal is to improve leg definition and build core strength, hanging leg raises are perfect. How to Do It Step up on an elevated platform to hang; it can be a chin-up bar or a tree. Tense your midsection as soon as you are in the hanging position. Start by keeping your legs straight, then slowly lift them up. Lift them as high as possible. Pause for a second, then lower your legs back to the starting position. Repeat for the desired number of reps. Hanging Leg Raises Tips Make sure you do not swing your legs. Using momentum will not benefit your abs. Keep your torso as still as possible. You can add the weight of a dumbbell on your feet as well for an advanced level.

Exercise Description Main Target Muscles Abs Secondary Target Muscles None Workout Type Strength Gym Gear Exercise Ball Fitness Level Intermediate Compound/Isolated Isolation Power Move Pull Target Muscle: Abs Ball Crunch Overview The balance ball eliminates the impact of the hard surface and allows you to perform your movements way much more efficiently. The exercise is fantastic in enhancing lower body strength, promoting better posture, and minimizing lower back injury risk. Whether you perform core exercises or full-body workouts, this would be an excellent addition to your routine. How to Do It Sit on the ball and place your feet on the floor. Step forward to let your lower back roll on the ball. Keep the tips of your fingers on the sides of your head. This is the starting position. Pull the torso up to aim your elbows towards your knees to perform a crunch. Make sure to keep your abs braced. Lower your upper body back to the initial position. Repeat for the desired number of reps. Ball Crunch Tips Hold the crunch to the count of 2 at least to work harder on the abs.

Exercise Description Main Target Muscles Abs Secondary Target Muscles None Workout Type Strength Gym Gear Bodyweight Fitness Level Beginner Compound/Isolated Compound Power Move N/A Target Muscle: Abs Decline Abdominal Reach Overview This is an extraordinary exercise to develop core strength, enhance body balance, and strengthen the shoulders. It also provides better stability and mobility, positively affecting your fitness and daily routine. Along with the core formulation, it reinforces your oblique as well. Therefore, it must be a staple part of your fitness routine. How to Do It Adjust the decline bench at 30 to 45 degrees. The higher the bench, the more challenging it will be. Place your head at the lowest end of the bench. To get in the starting position, place your hands together, point them at the ceiling, raising your shoulder blades slightly off the bench. Keeping your hands together, reach straight towards the ceiling as far as possible. Get back to the starting position. Repeat for the desired number of reps. Decline Abdominal Reach Tips Increase the intensity by including a dumbbell and pausing for two seconds at the top of the movement. Don’t let your shoulder blades get in contact with the bench throughout the movement.

Exercise Description Main Target Muscles Abs Force Type Isometric Workout Type Strength training Gym Gear Cable Fitness Level Beginner Compound/Isolated Compound Targeted Muscles: Abs Pallof Press Overview The Pallof press is a popular workout for strengthening the abdominal and obliques muscles. It strengthens the core by applying isometric stress to weight as you move it through a short range of motion. It's a highly adaptable workout that has spawned a slew of versions to challenge the core in a variety of ways and aid in the achievement of various objectives. The pallof press must be a regular in your core workouts if you want to improve core strength. How to Do It? Stand straight and secure a handle at chest level to a cable stack. Grip the handle to your chest, having feet wide open (shoulder-width apart) in an athletic base position. Squeeze the handle horizontally to extend as you exhale. Go back to the initial position for fulfilling desired reps. Pallof Press Tips Stand straight and secure a handle at chest level to a cable stack. Grip the handle to your chest, having feet wide open (shoulder-width apart) in an athletic base position. Squeeze the handle horizontally to extend as you exhale. Go back to the initial position for fulfilling desired reps.

Exercise Description Main Target Muscles Abs Secondary Target Muscles None Force Type Pull Workout Type Strength Training Gym Gear Bodyweight Fitness Level Beginner Compound/Isolated Isolated Targeted Muscles: Abs Floor Toe Reach Overview The straight leg toe touch, also called floor toe touch, is an exercise that isolates the abdominal muscles. It is a version of the abdominal crunch. As you go through flexion with the upper portion of your abs, the stretched leg toe touch keeps continual stress on the lower abs. How to Do It? Lay supine so that your arms and legs are straight and in a relaxed position. Raise your legs to the point where they are perpendicular to the ground. As you exhale, extend straight up to your toes. Gradually lower yourself back to the initial point once your abs are fully tightened, and your back's upper part is off the floor. Repeat the steps for the specified number of reps. Floor Toe Reach Tips To strengthen the mind-muscle connection, exhale deeply as if you were blowing out candles. If your lower back hurts during this exercise, use more anti-extension and anti-rotation motions. Avoid putting your hands behind your head since this puts too much tension on your neck.

Exercise Description Main Target Muscles Abdominals, Glutes, Chest Secondary Target Muscles Triceps, Shoulders Workout Type Cardio Gym Gear None Fitness Level Beginner Compound/Isolated Compound Power Move Explosive Bodyweight Exercise Target Muscles: Full Body, Shoulders, Core Mountain Climber Overview If you plan to build your cardio endurance, it is best to start with a mountain climber. It also works well to build your core strength and burns fat in your abdominal area. The exercise works your entire body generally. It is also known as running planks by some. The exercise also targets your quads. With your arms and shoulders, you stabilize your upper body. The core then plays a great role in stabilizing the rest of the body. The move is great for beginners to build cardio endurance, and advanced trainers can bring in some variations to the exercise, such as a sliding mountain climber with a core slider. Increasing the speed of mountain climbers is the key to burning more fat. Remember to engage your core the entire time. How to Do It Come to a high plank position. Distribute your weight evenly between your toes and hands. Your hands should be shoulder-width apart and directly under your shoulders; your back should be flat, core engaged. Your neck should be in alignment. Avoid dropping your neck. Now start by pulling your right knee to the chest as fast as possible. Switch legs by bringing the other knee in and moving the other to the original position. Your hips should not be dropping. Mountain Climber Tips Remember to breathe throughout the exercise. Make sure that you are sliding your toes, and so they should be on the ground the entire time. Similarly, it would help if you were not bouncing your toes.

Exercise Description Main Target Muscles Abs Workout Type Strength Gym Gear Kettlebell Fitness Level Beginner Compound/Isolated Isolated Power Move Isometric Target Muscle Group: Abs Kettlebell Pullover Overview A kettlebell pullover is an exercise that strengthens the abdominal muscles. This exercise is part of the plank family tree. The kettlebell pullover is an abdominal exercise that prevents you from extending your spine. You must maintain stability while slowly lowering the kettlebell overhead. How to Do it Hold a kettlebell with the horns while you are in a supine posture. Keep your hips flexed and lower the kettlebell overhead while you exhale. Return to your starting position, and then repeat the process for as many repetitions as you wish. Kettlebell Pullover Tips You shouldn't hold your breath while doing this exercise. You can learn how to move and maintain your position without relying on your breath. Do it slowly but steadily. Control within space is the goal, not just the completion of repetitions. As your arms move overhead, exhale. Keep your ribs low and keep your lower back from hyperextending. As with ab wheel rollouts, you might not have the full range of motion at first, but you can work with what you have and gradually increase it over time.
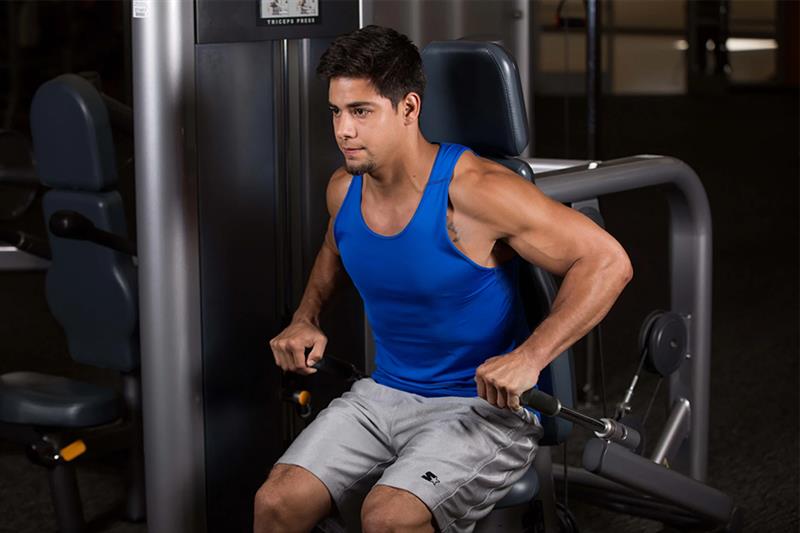
Exercise Description Main Target Muscles Biceps Secondary Target Muscles None Workout Type Strength Gym Gear Machine Fitness Level Beginner Compound/Isolated Isolated Power Move Pull Target Muscle: Biceps Machine Dip or Extension Overview If you want to work on your biceps to get bigger arms, then machine dip would be best. It targets your triceps, strengthens them, and widens your chest and shoulders. It can help you achieve your goal of bigger arms. The dip machine will save you a lot of time because it’s easy to use. Also, it has a selector pin or plates that help you select the weight you want to work with. However, if you don’t know how to use the machine, you should ask the gym instructor first. How to Do It? Sit properly on the machine, choose the weights and hold the handles. Now keep your elbows at your side to focus on the triceps. You should bend your elbows at a 90-degree angle Extend your arms while you contract the triceps and exhale. Now bring back your arms to the normal position as you inhale. Follow repeating the same process. Machine Dip Tips Focus on your arm movement. Use and adjust weights according to the instructions of a trainer. Do the workout slowly and in a controlled manner.
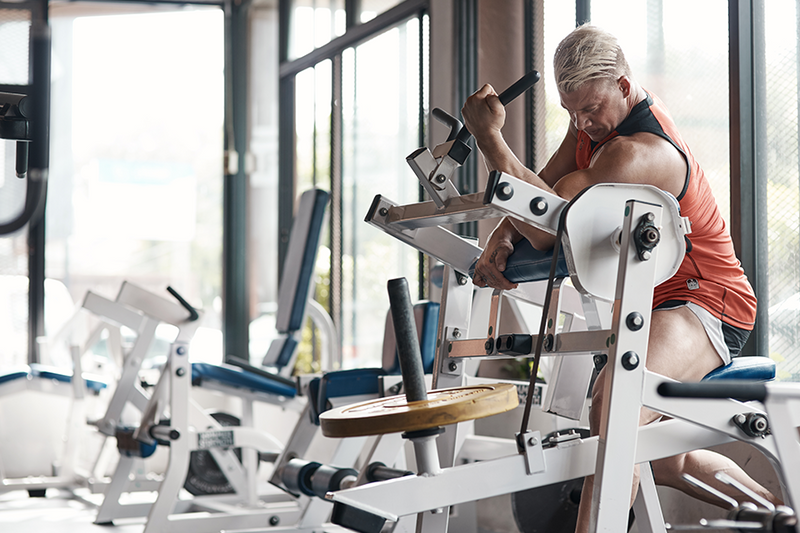
Exercise Description Main Target Muscles Bicep Secondary Target Muscles None Workout Type Strength Gym Gear Machine Fitness Level Beginner Compound/Isolated Isolated Power Move Pull Target Muscle: Biceps Machine Bicep Curl Overview The machine bicep curl is an exercise that focuses on your upper arms and strengthens them. It is designed to give your muscles a well-defined shape. Strengthening your arm muscles, such as biceps and triceps, make you capable of lifting weights. In addition, you can perform this workout with the help of a bicep curl machine. How to Do It? Adjust the machine seat and ensure you align your elbows with the rotation axis. Your arms should be pressed against the pads when you sit on the machine. Now grab the handles with your hands facing upwards. Slowly curl the forearms until you squeeze the biceps at the top of the movement. Return your arms to the starting point. Repeat for desired numer of reps Machine Bicep Curl Tips Use a range of motion by allowing the weight to go as far as possible without hitting the stack. Control the weight and keep the rep timing slow. If you have a training mate, you can use a bicep machine for heavy negative curls.
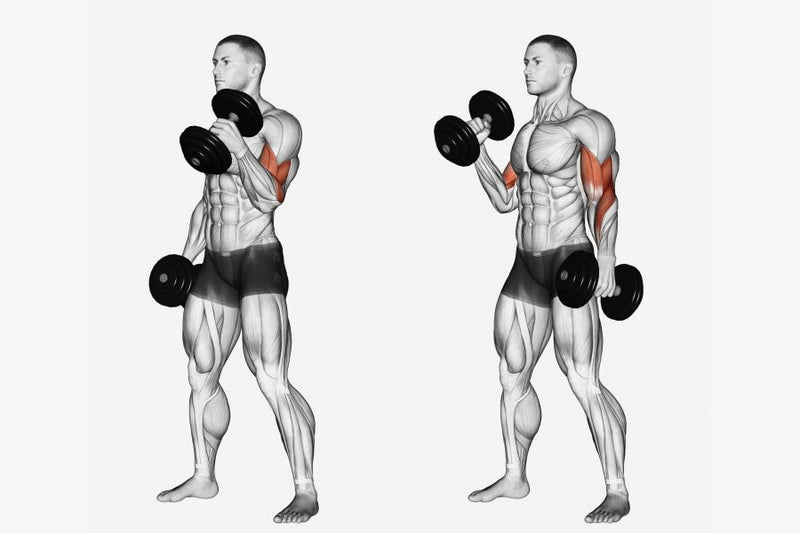
Exercise Description Main Target Muscles Biceps Secondary Target Muscles Abs, Shoulders, Triceps Workout Type Strength Gym Gear Dumbbell Fitness Level Advanced Compound/Isolated Compound Power Move Pull Targeted Muscle: Biceps Alternating Dumbbell Curls Review Alternating dumbbell Curls are a great way to work biceps. The benefits of alternating dumbbell curls are many. This exercise is great for working the biceps, as well as the shoulders and triceps. Additionally, it helps to build core stability and improve balance. Furthermore, it can also help to increase grip strength. Plus, it’s the best exercise for correcting size and strength imbalances as it engages and activates each muscle individually. How to Do It? To do this exercise, start by holding a dumbbell in each hand with your palms facing forward. From here, slowly lift one dumbbell up towards your shoulder while keeping your elbow and upper arm stationary. Once the weight is at shoulder level, pause for a moment and then slowly lower it back to the starting position. Repeat with the other arm. Tips on Alternating Dumbbell Curls Keep your body firm and straight throughout the exercise. Contract and engage biceps throughout. Start with the weaker arm; this helps cover strength imbalances.
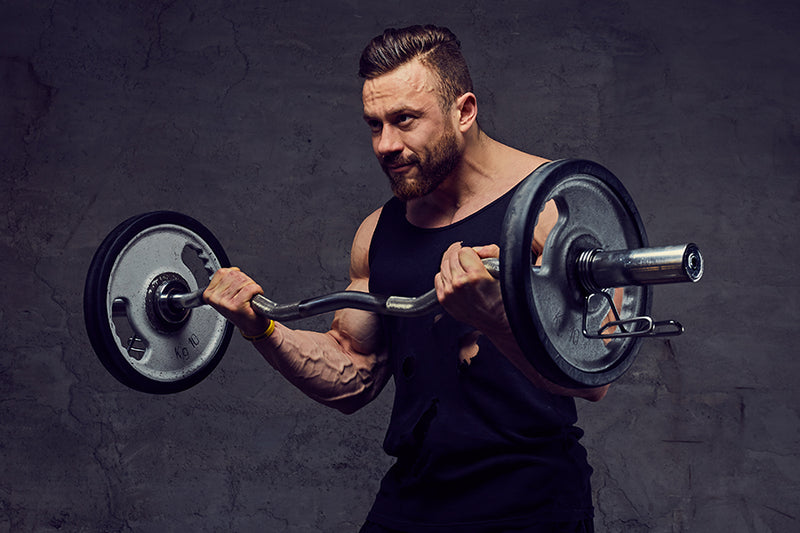
Exercise Description Target Muscle Group Biceps Secondary Muscles Forearms Exercise Type Strength Equipment Required Barbell Experience Level Beginner Compound/Isolated Isolated Force Type Pull (Bilateral) Targeted Muscles: Biceps Barbell Drag Curl Overview A barbell drag curl is a form of the barbell curl used to develop the biceps muscles. Many gym-goers who attend because of their aesthetics have massive biceps. You can develop broad, well-balanced biceps by including a variety of curl variations in your bicep workout, including the barbell drag curl. How to Do It? Pick your weight, put it on the bar, and then stand with your shoulders wide. Take a deep breath and curl the barbell toward your shoulders using a supinated (palms up) grip. Keep the bar close to your torso as you draw it up by letting the elbows stray behind the body. Slowly decrease the weight to the starting position once the biceps have entirely contracted. Repeat for the desired number of reps. Tips for Barbell Drag Curl Keep the elbow slightly bent at the bottom of the exercise to sustain tension in the biceps. Tension and the mind-muscle connection can be improved by performing the exercise with a slow eccentric (lowering component). Use an EZ curl bar or dumbbells if using a barbell causes you to pain in your wrists or forearms.
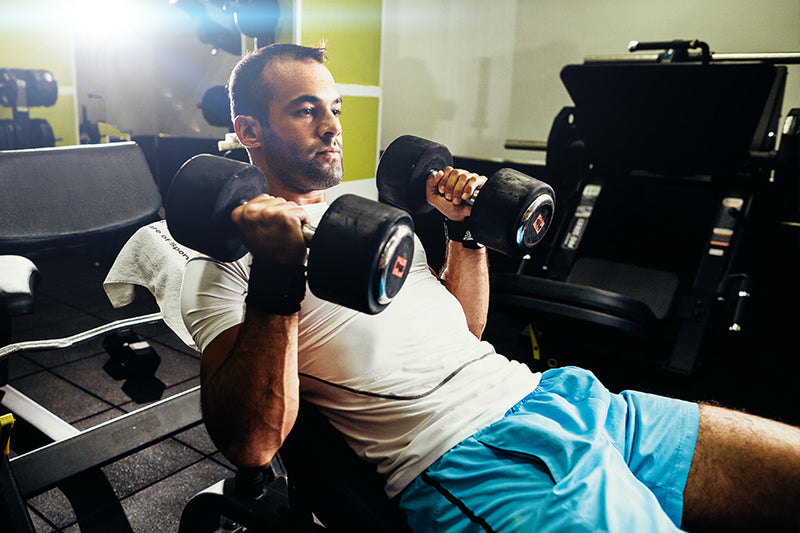
Exercise Description Target Muscle Group Biceps Secondary Muscles Forearms Exercise Type Strength Equipment Required Dumbbell Experience Level Beginner Compound/Isolated Isolated Force Type Pull Targeted Muscles: Biceps Seated Hammer Curls Overview Seated hammer curls are a good workout for developing the biceps because you can lift more weight while sitting, which more fully overloads your arms. It is because, in contrast to a typical hammer curl, your torso is already supported by a bench's backrest, removing the need for your core muscles to stabilize it. You can do it using weights, such as dumbbells, barbells, etc. How to Do It? Grab a flat bench or an adjustable bench and arrange a set of dumbbells at one end to prepare for the seated hammer curl. Adjust the back of the bench, if it is adjustable, to a 90-degree angle. Kneel on the end of the bench with your feet out in front of you. Your palms should be facing your body when you pick up the dumbbells from the floor and let them hang by your sides (neutral grip). To transfer the strain to the biceps, bend your arms a little. It is where the exercise will begin. Slowly curl the dumbbells up as high as possible while maintaining a straight back and tucked-in sides. Seated Hammer Curls Tips Maintain a tucked-in side position for your elbows. Throughout the entire action, maintain tension on the biceps. Slowly space out each rep while controlling the weight as it comes off. Finally, avoid swinging back when curling the weight up on a flat bench. Remember to keep your forearms from moving at all.
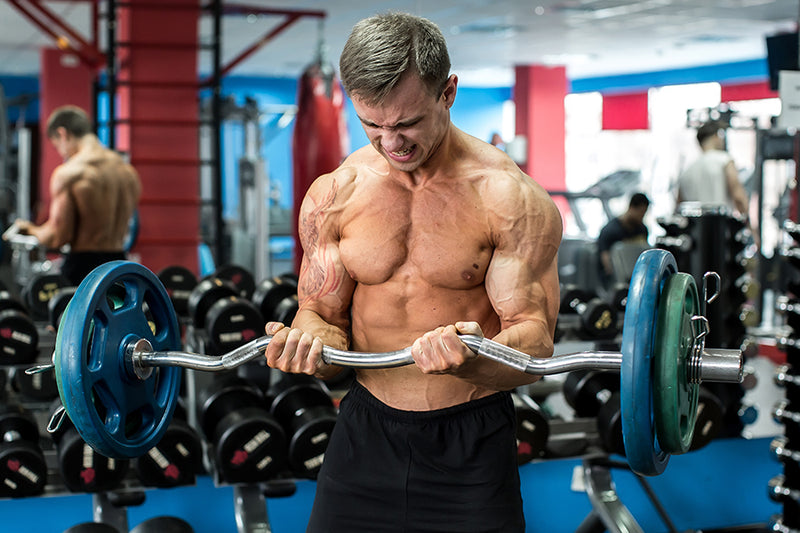
Exercise Description Target Muscle Group Biceps Secondary Muscles Forearm Exercise Type Strength Equipment Required Barbell Experience Level Beginner Compound/Isolated Compound Force Type Pull Target Muscles: Bicep Brachii and Forearm Barbell Concentration Curls Overview The biceps muscle is in charge of moving the palm upward and flexing the elbow. Although it is a tiny muscle, it is necessary for lifting heavy objects, carrying bags or parcels, and opening doors. You can accomplish these tasks more quickly and painlessly by working your biceps. The biceps muscle is the primary focus of the concentration curl, a weightlifting exercise. The workout can be carried out with a cable machine or free weights. Choose a weight you can lift for 8–10 reps to complete the concentration curl. How to Do It? Sit at the end of a bench, opening your legs in a V Lean forward, hold the barbell and rest your elbow on the inside of your thigh Putting your other elbow on the other thigh for stability, start curling your hands towards the shoulder When you reach the top, hold the barbell for a few seconds, feeling the biceps working, and then return to your original position, completing one rep Do not rest the hand on the floor until you finish all 12-15 reps. Barbell Concentration Curls Tips When you are performing the barbell concentration curl, be sure to keep your back straight and your head up. Do not allow your elbow to move past your shoulder. Stop if you experience pain in your elbow or shoulder.
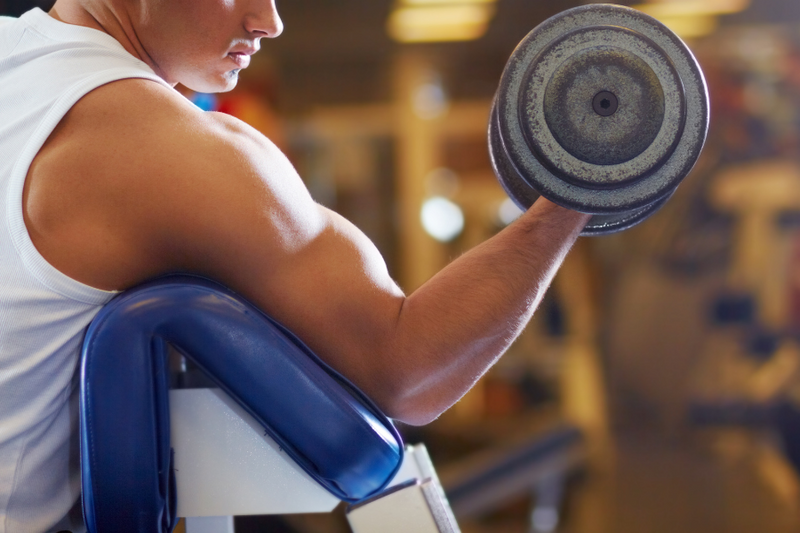
Exercise Description Target Muscle Group Biceps Secondary Muscles Forearms Exercise Type Strength Equipment Required Dumbbell Experience Level Beginner Compound/Isolated Isolated Force Type Pull (Bilateral) Targeted Muscles: Biceps, Forearm Dumbbell Preacher Curl Overview A dumbbell preacher curl is a form of the preacher curl that targets the biceps directly. Preacher curl variations can be done at an angle that allows for a more concentrated concentric section of the curl. This is useful when attempting to develop bicep peaks and encourage the biceps to pump. Bodybuilders would essentially employ the dumbbell preacher curl workout to help develop larger biceps. If your objective is to develop a more aesthetically pleasing body, this solitary exercise is best performed toward the end of your workouts. How to Do It? Choose the weight you want to use from the rack, then sit up straight with your chest against the preacher bench. Use a supinated (palms facing up) grip and firmly press your upper arm into the pad. Breathe deeply, then gradually raise the dumbbell away from your shoulder. Curl the weight back to the starting position once the bicep has reached its entire length. Repeat on both sides for the desired number of times. Dumbbell Preacher Curl Tips Keep the elbow slightly bent at the bottom of the exercise to sustain tension in the biceps. Tension and the mind-muscle connection can be improved by performing the exercise with a slow eccentric (lowering component).
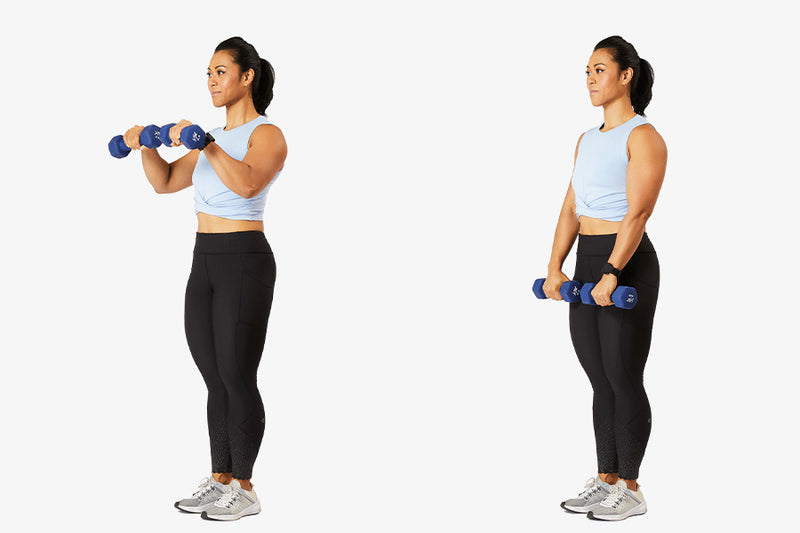
Exercise Description Target Muscle Group Biceps Secondary Muscles Forearms Exercise Type Strength Equipment Required Barbell, Dumbbells, or EZ Curl Bar Experience Level Intermediate Compound/Isolated Isolated Force Type Pull Target Muscles: Biceps and Forearms Reverse Bicep Curl: Overview Working our bicep muscles is important because they are responsible for some of the most common movements that we do every day. Bicep muscles help us lift objects, open jars, and perform other tasks that require strength and dexterity. Additionally, well-defined biceps can give your arms a more toned and sculpted appearance. Reverse bicep curls target the muscles on the back of your upper arm. These are the same muscles that are used when you do a standard bicep curl but in reverse motion. To do reverse bicep curls, you will need to use a weight that is comfortable for you to lift. You can either use a barbell or dumbbells. How To Do It Start with your feet hip-width apart and hold a dumbbell in each hand with your palms facing downward. Bend your elbows and curl the weights up towards your shoulders, keeping your palms facing forward the entire time. Pause for a moment at the top of the curl and then slowly lower the weights back to the starting position. Repeat for the desired number of repetitions. Performing Reverse Curl Biceps Tips First, make sure to use a weight that is comfortable for you to lift. Second, always keep your back straight and avoid arching it while lifting the weight. Finally, lift the weight in a controlled manner and do not swing the weight up or down, as this can lead to injury.
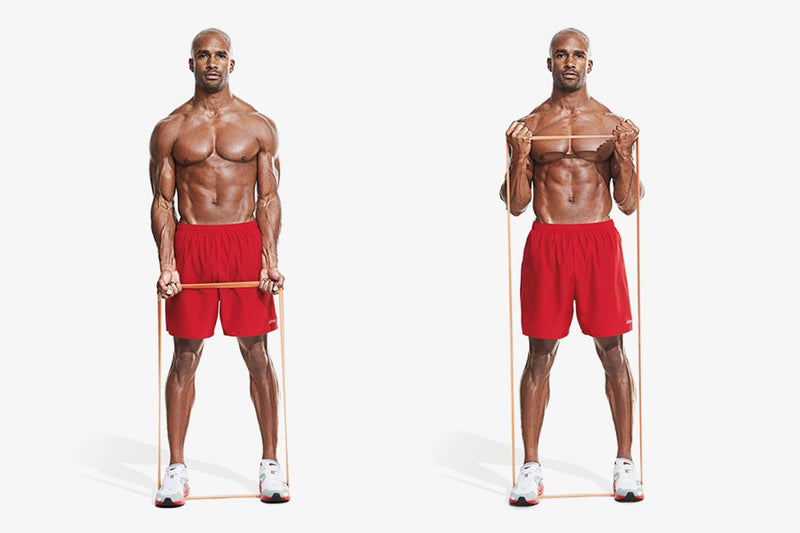
Exercise Description Main Target Muscles Biceps Secondary Target Muscles Forearms Workout Type Strength Gym Gear Bands Fitness Level Beginner Compound/Isolated Isolation Power Move Pull Target Muscle: Biceps Banded Hammer Curls Overview Hammer curls with resistance bands are a great way to build strength in your arms. By using a resistance band, you can increase the amount of resistance your muscles have to work against, leading to better results. Additionally, hammer curls with resistance bands are a great way to add variety to your workout routine. How to Do Loop the resistance band under your feet. Hold the band in your hands with your palm facing each other. Slowly bend your elbows and curl the band up towards your shoulders without moving your upper arms. Make sure your palms keep facing each other throughout the exercise. Pause at the top of the movement for a second. Then, return to the initial position. Repeat for the desired number of reps. Exercise Tips Use a band with the appropriate level of resistance. If the band is too light, you won’t get an effective workout. If it’s too heavy, you might not be able to do the exercise in proper form. Keep your upper arms stationary and only move your forearms. This will ensure that you work the correct muscles. Don’t swing your arms as you curl the band. This takes tension off of your biceps and puts it on your shoulders. Use a slow and controlled motion. Avoid using momentum to curl the band. This will make the exercise easier and take away from its effectiveness.
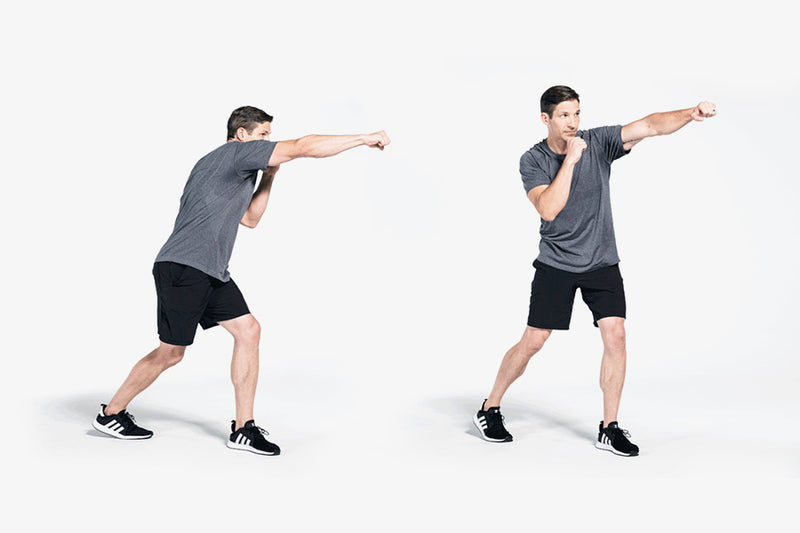
Exercise Description Main Target Muscles Biceps Secondary Target Muscles Abs, Shoulders, Triceps, Calves, Glutes Workout Type Strength Training Gym Gear Bodyweight Fitness Level Beginner Compound/Isolated Compound Power Move Push Target Muscle: Biceps Shadow Boxing Drill Overview Shadow boxing is a great way to pull a workout without having to use any equipment. All you need is a little space and you can get started. Shadow boxing is a great cardio workout and it also helps to improve your coordination and fitness. It is also a great stress reliever. If you are looking for a way to get fit without going to the gym, then shadow boxing is a great option. How to Do? First, find a comfortable place to stand. Raise your fists in front of your face, keeping your elbows close to your body. Begin throwing punches in the air, alternating between left and right. As you punch, twist your torso and hips with each throw. Exercise Tips Keep your punches tight and controlled. Don’t forget to breathe! Remember to keep your core engaged as you move. Be mindful of your form and technique. Use shadow boxing as an opportunity to practice footwork and movement. Stay light on your feet and move around the space.
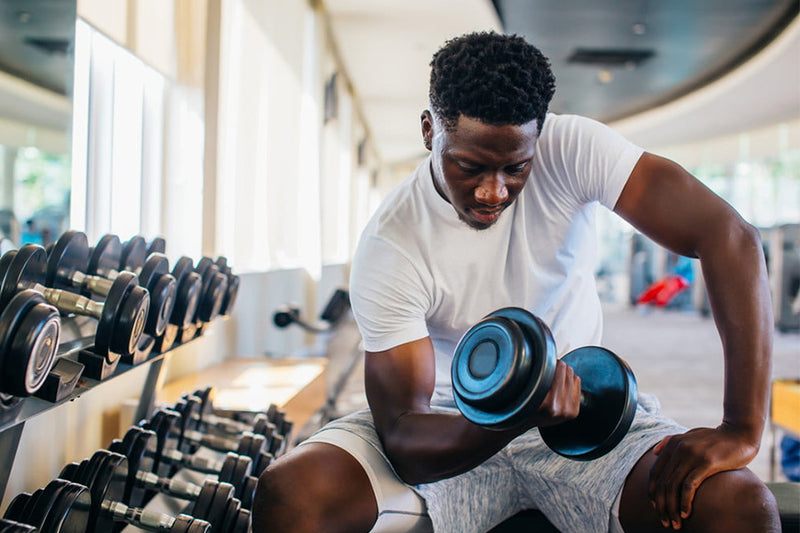
Exercise Description Target Muscle Group Bicep Secondary Muscles Forearm Exercise Type Strength Equipment Required Dumbbell Experience Level Beginner Compound/Isolated Compound Force Type Pull Target Muscles: Bicep Brachii and Forearm Concentration Curls Overview The biceps muscle is responsible for flexing the elbow and turning the palm up. It is a relatively small muscle, but it is important for activities such as lifting weights, carrying groceries or packages, and opening doors. Working your biceps can help you to perform these activities more efficiently and with less pain. The concentration curl is a weightlifting exercise that primarily targets the biceps muscle. The exercise can be performed with either free weights or a cable machine. To perform the concentration curl, you will need to select a weight that you can lift for 8-10 reps. How to Do It Sit at the end of a bench, opening your legs in a V Lean forward, hold the dumbbell in one hand and rest your elbow on the inside of your thigh Putting your other elbow on the other thigh for stability, start curling your hands towards the shoulder When you reach the top, hold the dumbbell for a few seconds, feeling the biceps working, and then return to your original position, completing one rep Do not rest the hand on the floor until you finish all 12-15 reps. Concentration Curls Tips When performing the concentration curl, be sure to keep your back straight and your head up. Do not allow your elbow to move past your shoulder. If you are using free weights, be sure to use a weight that is comfortable and does not cause pain. If you are using a cable machine, adjust the weight so that it is challenging but not impossible to lift. Never use momentum to lift the weight; instead, use your muscles to lift the weight. Stop if you experience pain in your elbow or shoulder.

Exercise Description Main Target Muscles Biceps Secondary Target Muscles Shoulder Workout Type Strength Gym Gear Barbell Fitness Level Intermediate Compound/Isolated Isolated Power Move Pull Target Muscle: Biceps EZ Bar Curls Overview The EZ bar curl is a biceps exercise that alleviates wrist strain and engages the biceps more. The bar used in this curl is curved, and it serves the special purpose of eliminating the wrist from the equation, directing all strain to your biceps. How To Do It? Grip the EZ curl bar keeping a comfortable grip Stand straight, with neutral shoulders and a comfortable stance. Curl the bar up to your chest and squeeze your biceps momentarily Next, lower the bar under control but keep bending your elbow so your elbows keep feeling the pressure Repeat as many times as you can. Tips on EZ Bar Curl Keeping the elbows static is the key here; this will allow for a harder bicep challenge. Place your hands on the bar close to each other if you want to increase resistance. Curling is all about modest weights: do not lift too heavy, but do not lift too light either. Maintain a balance.
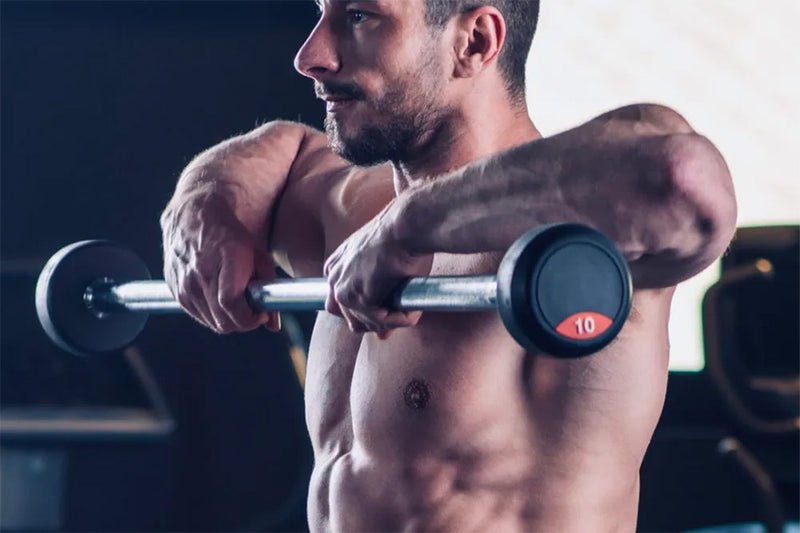
Exercise Description Main Target Muscles Back Secondary Target Muscles Biceps Workout Type Strength Gym Gear Barbell Fitness Level Intermediate Compound/Isolated Compound Power Move Pull Target Muscle Group: Traps Wide Grip Upright Row Overview The wide-grip upright rows are a strength-training exercise. It targets your arm muscles and shoulders. You can use a barbell for a wide-grip upright row or set dumbbells for a dumbbell upright row. Incorrect form can lead to shoulder impingement or pain. How to Do it You will need to load a barbell with the appropriate weight and then stand with your feet about shoulder-width apart. Grab the barbell in an overhand grip (palms down) and your hands slightly wider than your shoulders. Grab the bar and bend at the knees. Keep your back straight. Keep your head straight, your eyes forward, and your back straight. Lift the bar straight up while keeping your body as close as possible to the bar. Slowly lower the bar to its original position. Repeat for desired reps. Wide Grip Upright Row Tips Keep your elbows up higher than your forearms. The elbows are the ones that push the motion. Throughout the set, keep your body straight. Do not lean forward when you lower the bar. Keep your back straight as you raise it. The upright row is easier when your body moves so that you won't get the best out of it. If you need to intensify the exercise, you can pause and squeeze the traps at the top of the movement.
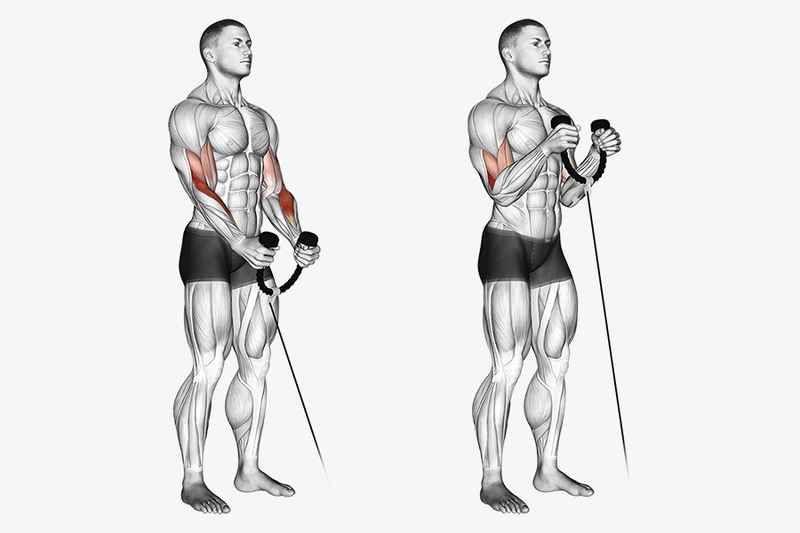
Exercise Description Main Target Muscles Biceps Secondary Target Muscles Forearms Workout Type Strength Gym Gear Cable Fitness Level Beginner Compound/Isolated Isolation Power Move Pull Target Muscle: Biceps Cable Curl Overview The exercise primarily targets the biceps brachii. This is the two-headed muscle located in the front of your arm. This muscle plays a big functional and aesthetic role in the movement of your upper body. When it comes to training this muscle the right way, there’s no exercise that does a better job than the cable curl. Whether your objective is to build strength or increase size, this is the best way to attain them. The exercise works spectacularly in improving the bicep’s appearance by regulating skin metabolism. It also ensures more fluidity in your day-to-day life. You can perform it by sitting or standing and with different grip positions. Related Article: Tips to Fix Issues of Loose Grip During Weight Lifting How to Do It Attach the rope extension to the low pulley cable. Select the weight you want to use on the stack. With your legs shoulder-width apart, stand facing the cable machine. Grasp the rope extension with thumbs facing the body. Take a deep breath, put your elbows by your sides, and slowly curl the rope up as far as possible. Squeeze your biceps muscles when you reach the top of the movement, and then slowly return the weight to the start position. Keep on repeating the reps without a gap. Cable Curl Tips The biggest mistake that you can do is bridging your elbows forward when you curl up the weight. They must remain tucked in throughout the movement. Do not rest as you lower the weight. Immediately move on to the next rep. Keep full control over the weight and the rep timing slow to make the most out of this exercise. Related Article: Machine Bicep Curl

Exercise Description Main Target Muscles Biceps Secondary Target Muscles None Workout Type Strength Gym Gear Dumbbell Fitness Level Beginner Compound/Isolated Isolation Power Move Pull Target Muscle: Biceps Dumbbell Curl Overview Dumbbell curls are a highly popular exercise that focuses on your biceps primarily. If your fitness goal is to build bigger biceps, then this is the ideal exercise for you. It targets both the long head and short head of the bicep brachii. The exercise improves your grip strength and improves your performance during compound exercises which require great grip strength. There are several variations to this exercise: Hammer curls Barbell curls Preacher curls Concentration curls Incline dumbbell curls Seated dumbbell curls No matter which variation you adopt, it is important to have full control of your body and opt for the best technique. How to Do It Stand straight and hold both the dumbbells in both your hands. Make sure your palms face upwards. Keeping your biceps tense, curl the dumbbells as far up as possible. Squeeze the biceps, then go back to the starting position. Dumbbell Curls Tips Keep the tension in your biceps intact the entire time. Keep full control of the weight and slow down your rep timing to enhance the intensity of the exercise. When curling the weight upwards, make sure your body remains still. It should not swing as your curl. Keep your focus on moving the forearms only. Your dumbbells should not touch your body.

Exercise Description Main Target Muscles Biceps Secondary Target Muscles Forearms Workout Type Strength Gym Gear Dumbbell Fitness Level Beginner Compound/Isolated Isolated Power Move Pull Target Muscle: Biceps Dumbbell Curl Overview This is a variation of dumbbell curl that focuses on your biceps primarily. If your fitness goal is to build bigger biceps, then the inclined version of this exercise can help you manipulate the range of motion and build bigger biceps. The exercise improves your grip strength and improves your performance during other compound exercises as well. Whether you’re looking for deeper strength or enhanced aesthetics, this exercise serves all. No matter which variation you adopt, it is important to have full control of your body and opt for the best technique. Other variations include: Seated dumbbell curl Barbell curl How to Do It Position the inclines bench at 55 - 65 degrees. Sit straight and hold both the dumbbells in both your hands using a supinated or palms-up grip. Keeping your biceps tense, curl the dumbbells as far up as possible. Squeeze the biceps, then go back to the starting position. Repeat. Dumbbell Curls Tips Keep the tension in your biceps intact the entire time. Keep full control of the weight and slow down your rep timing to enhance the intensity of the exercise. When curling the weight upwards, make sure your body remains still. It should not swing as you curl. Keep your focus on moving the forearms only. Make sure your elbows don’t shift behind your body. Your dumbbells should not touch your body.

Exercise Description Main Target Muscles Biceps Secondary Target Muscles None Workout Type Strength Gym Gear Dumbbells, Bench Fitness Level Beginner Compound/Isolated Isolation Power Move Pull Target Muscle: Biceps Seated Dumbbell Curl Overview Seated Dumbbell curls engage your biceps and help you achieve bigger, and stronger arms. Curls are isolation exercises that focus all challenge and resistance in one muscle group. If you are trying to build sturdy, massive arms, seated dumbbell curls are a definite part of your workout plan. How to Do It Sit at the edge of the bench with your knees together. Pick up your dumbbells and let them hang by your sides Your palms should be facing up. Bend the arms a little to engage your biceps. This is the starting position for the exercise. Keep the back straight, and your elbows tucked. Now slowly curl both dumbbells up till your chest or as far as you can go. Squeeze the biceps at the top position. Slowly lower the weight back to the starting position. Repeat for the desired number of reps. Tips on Seated Dumbbell Curls Focus on your forearms. Keep the elbow static and locked in. Perform it in a slow and controlled manner.
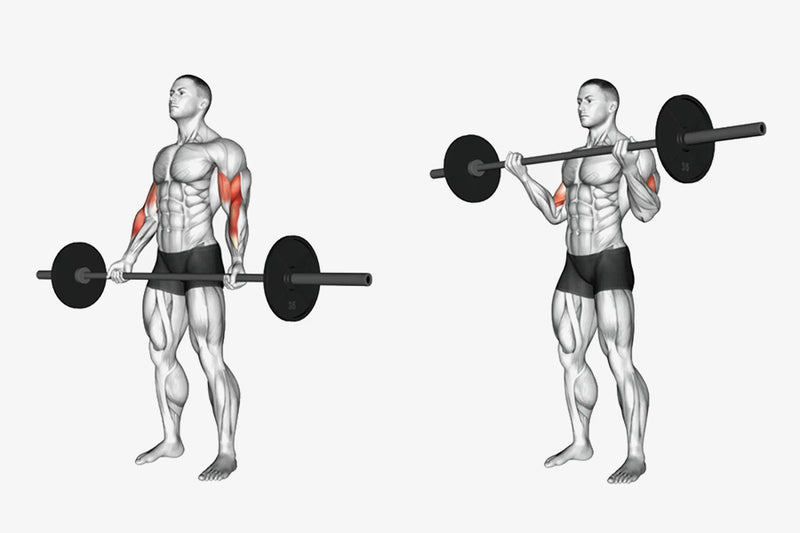
Exercise Description Main Target Muscles Biceps Secondary Target Muscles None Workout Type Strength Gym Gear Barbell Fitness Level Beginner Compound/Isolated Isolation Power Move Pull Target Muscle: Biceps Barbell Curl Overview This biceps exercise can put a lot of strain on the wrists and elbows. Here’s how to perform the barbell curl safely and effectively. You can use dumbbells if you want the same level of resistance but a higher level of safety. How to Do It Stand tall with your chest up and core engaged, hold the barbell with your hands using an underhand grip. Keeping your chest up and your elbows by your sides, start the move by pulling your hands slightly up so you feel your biceps become engaged. While maintaining tension in your biceps, bring the bar up to shoulder height. Give your biceps a bit of squeeze. Lower the bar again slowly and in a controlled fashion. Tips on Barbell Curls Contract your biceps for greater muscle engagement. Lifting too heavy is counter productive.
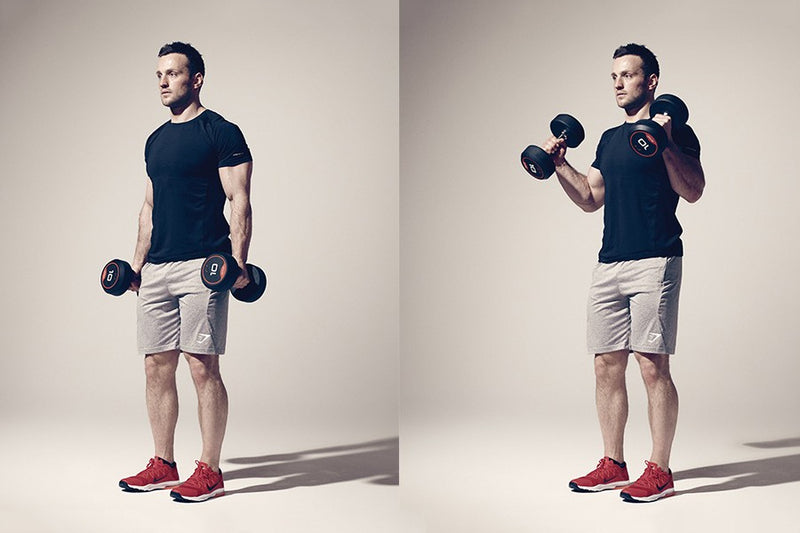
Exercise Description Main Target Muscles Biceps Secondary Target Muscles Forearm Workout Type Strength training Gym Gear Dumbbell Fitness Level Beginner Compound/Isolated Isolation Power Move Pull Target Muscles: Upper and Lower Arm Hammer Curls Overview Hammer curl specifically targets the muscles of your lower and upper arm. It is a variation of a dumbbell curl. It is important to do the exercise with dumbbells. You need to start with a lesser weight when doing hammer curls. It is a great exercise to include in your upper body workouts. It strengthens your upper body and increases muscle mass. How to Do It Stand with your legs and back straight. Knees should be under the hips. Keep your arms at your side. Hold a dumbbell in each hand. Weights should be resting on the outer thigh. Bend the elbows to lift the lower arms and pull the weight towards the shoulders. Your upper arms should not be moving. Hold the position for a second at the top. Your thumbs should be close to your shoulders and palms facing you. Return to the starting position by lowering the weight. Hammer Curls Tips Engage your abs to prevent injury in the lower back. Those having lower arm injuries should avoid doing hammer curls. To get familiar with the exercise, start practicing without weight.

Exercise Description Main Target Muscles Calves Secondary Target Muscles Quads, Shoulders, Chest Workout Type Strength Training Gym Gear Bodyweight Fitness Level Beginner Compound/Isolated Compound Power Move Push Target Muscle: Calves Jumping Jack Overview Jumping jacks are a simple, yet effective, exercise that provide a number of benefits. They are a great way to get your heart rate up and improve your cardiovascular health. They also strengthen your leg muscles and improve your flexibility. Additionally, jumping jacks are a great way to burn calories and promote weight loss. And finally, they're also a great way to reduce stress and improve your mood. So next time you're looking for a quick and easy workout, reach for the jump ropes and give jumping jacks a try! How to Do It To begin, stand straight with legs together and hands by your sides. Bend your knees slightly to jump up high in the air. As you jump, spread your legs to shoulder-width distance and stretch your arms over your head. Jump back to the initial position. Repeat for the desired number of reps. Jumping Jack Tips Remember to land lightly on your feet to avoid injury. Keep your abdominal muscles pulled in so that you move as a single unit. If you have any joint problems, check with your doctor before doing this exercise.

Exercise Description Target Muscle Group Calves Secondary Muscles - Exercise Type Strength Equipment Required Dumbbell Experience Level Beginner Compound/Isolated Isolated Force Type Static Target Muscles: Calves Standing One Leg Calf Raise Over View One of the main reasons why we need to train calves is for the purpose of injury prevention. The calf muscle, which is located at the back of the lower leg, is responsible for plantar flexion (pointing the foot downwards). This action is performed whenever we walk, run or jump. Therefore, if the calf muscles are weak, we are at a greater risk for sustaining an injury to this area. In addition, strong calf muscles can also improve our balance and help to prevent falls. Finally, well-developed calves can give your legs a more aesthetic appearance. How to Do It? To do a calf raise, stand on the edge of a calf raise block or step and grab a dumbbell in your right hand. Take your right leg and bring it around to the back of your left. Take a step out to the right, with your left heel as far toward the floor as possible. This is where we begin. Raise your left heel as high as possible, keeping your body straight. Stop, squeeze the calf muscle and then slowly lower your heel back down to its fullest extent. Repeat for desired reps, and then repeat on the right leg. Tips for Performing Standing One Leg Calf Raise Always start with your left side. The majority of people's weakest side is their right. Pushing up as high as you can and letting your heel drop as far as possible is the best technique to use. Maintain a slow pace while controlling the weight on its way down.

Exercise Description Main Target Muscles Calves Secondary Target Muscles Forearms Workout Type Conditioning Gym Gear Jump Rope Fitness Level Beginner Compound/Isolated Compound Power Move Push Target Muscle: Calves Jump Rope Overview Jump rope is a popular workout that is super effective for building strength and is super fun at the same time. It is an excellent way to burn calories, improve coordination, strengthen muscles, and improve heart health. How to Do Start with the basic two-foot jump. This is also called the “jogger’s skip.” Begin by standing with your feet together, holding the rope behind you with both hands at about waist level. Swing the rope above your head and jump when it reaches your feet, landing on both feet at the same time. Use your arms and wrists to keep the rope twirling as you jump. As you get better at this exercise, you can increase your speed and add in variations like crossing your arms in front of your body or jumping on one foot at a time. Exercise Tips Wear easy-to-wear shoes and clothes that won’t get in the way of your jump roping. Choose a smooth, level surface on which to jump rope. A hardwood floor or concrete surface is ideal. Start slowly and escalate your speed as you get more comfortable with the exercise. Jump rope for two to three minutes at a time to start, and work out for an extended period of time as you get more fit. Cool down after your workout by stretching your muscles.

Exercise Description Main Target Muscles Calves Secondary Target Muscles None Workout Type Strength Gym Gear Machine Fitness Level Beginner Compound/Isolated Isolation Power Move Push Muscle Group: Calves 45 Degree Leg Press Calf Raise Overview This is a variation to machine calf raise that focuses on the muscles of your calves. Since the calf is a very stubborn muscle, it requires a high training frequency to train. It helps with injury prevention, strengthens bones, and improves lower body development. The exercise enhances flexibility and endurance as well. You can easily incorporate this exercise on full-body workout days and leg days. How to Do It Load the weight on the machine and sit down. Place your feet on the sled and take a shoulder-width stance. Keep the safeties locked if possible, and extend your legs. Let your heels hang after placing your feet at the base of the platform. Dorsiflex your ankles until your calves are fully stretched. Flex the calves and extend the ankles to get back to the starting position. Repeat for the desired number of reps. 45 Degree Leg Press Calf Raise Tips Keep your feet positioned at the base of the platform. Keep your reps slow and controlled. In case of any pain at the back of the knee joint, avoid complete lockout. Try your best to move through the ball of your foot instead of the base of the toes.

Exercise Description Main Target Muscles Calves Secondary Target Muscles Ankle Workout Type Strength Training Gym Gear None, Dumbbell (Optional) Fitness Level Beginner Compound/Isolated Isolation Power Move Plantar Flexion Target Muscles: Calves, Ankles Standing Calf Raise Overview The standing calf raise is a simple exercise that you can do anywhere. You can do it easily with or without any equipment. It is the best exercise to train and develop your calves. Doing the exercise will strengthen the muscles and improve their functions. Your lower leg muscles are responsible for plantar flexion and ankle extension. You need to focus on the exercise to gain the most out of it. Standing Calf Raise Variations Single leg calf raise Weighted calf raise Bent-knee calf raise How to Do it Stand straight with your feet hip-width apart and hands by your side. Now lift yourself by pushing through the balls of your feet. Raise your heel until you are standing on your toes. Pause here for a second and stretch your calves. Return to the starting position. Weighted Calf Raise Hold a dumbbell in each hand. You can also use a barbell here, position it on the top of your shoulder and do the same. Single-Leg Calf Raise Stand straight and lift one leg. Do the same as a simple standing leg raise. Alternate legs and hold weight for an enhanced challenge. Bent-Knee Calf Raise Stand straight and when lifting yourself through the ball of your feet, give a slight bend to your knees. Return to the starting position and extend your legs. Standing Calf Raise Tips It is better to start with a simple leg raise first. It can also be added as a stretch after leg workouts.

Exercise Description Main Target Muscles Calves Secondary Target Muscles None Workout Type Strength Gym Gear Dumbbell Fitness Level Beginner Compound/Isolated Isolated Power Move Push Target Muscle Group: Calves Seated Calf Raise Overview The seated calves raise is an extension of the machine-calf raise. It's used to isolate the calf's muscles. Calves can be stubborn muscles for many people. It's important to try different angles when doing calf raises. A high-frequency training program may be an option. You can incorporate the seated calf raise into your leg exercises or full-body workouts. How To Do It? Sit up tall in your chair, with your feet hip-width apart. Bring your feet back, so your heels are behind your knees. From this position, lift your heels up off the floor, coming up onto your toes. Hold briefly and gently lower your heels back down. Repeat for the set repetitions. Tips for Seated Calf Raise Slow down and keep the repetitions controlled. To emphasize contraction, limit momentum and pause at the top. If you feel any kind of stretching in the soles of your feet during this exercise, limit the depth of your heels. Move through the ball of your foot, not the base of your toes.
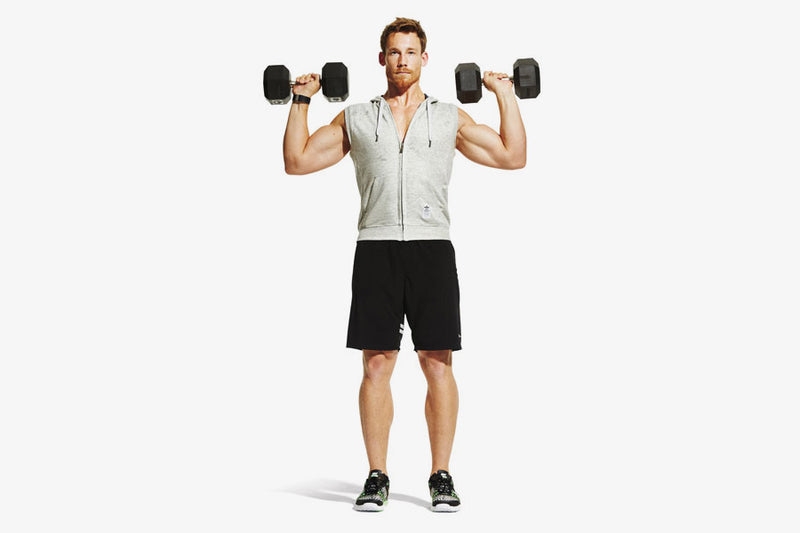
Exercise Description Target Muscle Group Chest Secondary Muscles Shoulders , Arms Exercise Type Strength Equipment Required Dumbbell Experience Level Beginner Compound/Isolated Compound Force Type Pull Target Muscles: Chest Standing Chest Fly Overview The main muscles targeted in standing chest flyes are the pectoralis major and minor. These muscles make up the bulk of the chest and are responsible for its shape and size. By working these muscles with chest flyes, you can develop a strong, toned chest. Additionally, standing chest flyes also work the shoulders and triceps. As such, they are a great exercise for developing upper body strength. How to Do It Start by standing with your feet shoulder-width apart and your knees bent. Hold a dumbbell in each hand at shoulder level with your palms facing in. From here, open your arms out to the sides and then bring them back together in front of you. Repeat this motion for the desired number of reps. Standing Chest Fly Tips First, be sure to keep a slight bend in your knees throughout the exercise. This will help you maintain balance and stability. Secondly, be sure to keep your core engaged and your back straight. This will help you avoid injuries and keep your form in check. Finally, be sure to keep your palms facing each other throughout the exercise. This will ensure that you are properly working the chest muscles. If you are new to this exercise, start with light dumbbells and gradually increase the weight as you get stronger. Additionally, be sure to perform the exercise slowly and with control. This will help you avoid injury and ensure that you are properly working the muscles.

Exercise Description Main Target Muscles Chest Secondary Target Muscles Shoulder, Triceps Workout Type Strength Gym Gear Dumbbell Fitness Level Intermediate Compound/Isolated Isolated Power Move Push Target Muscles: Chest Dumbbell Chest Press Overview The dumbbell chest press is a great exercise to build your upper body strength. With dumbbells, you need to be more focused while performing exercises. You need to stabilize the weight in each hand, and hence, the exercise works great for both sides of your chest. The exercise helps in developing strength in your entire torso. It also prepares you well for other exercises such as overhead press, barbell bench press, etc. The exercise also helps in improving your range of motion and induces massive muscle gains. How to Do It Lie on a bench with a dumbbell in each hand. Your hands should be on the sides of your shoulders. Press your feet into the ground. Press the weight above your chest by extending your arms completely. Bring them down, and you can lower them below shoulder level. Do the same for ten reps. Dumbbell Chest Press Tips Avoid colliding your dumbbells at the top of the movement. Make sure that your back is not arching. You must press your feet to the ground too. Start with a lightweight and increase it gradually. Pay attention to your breathing throughout the exercise.
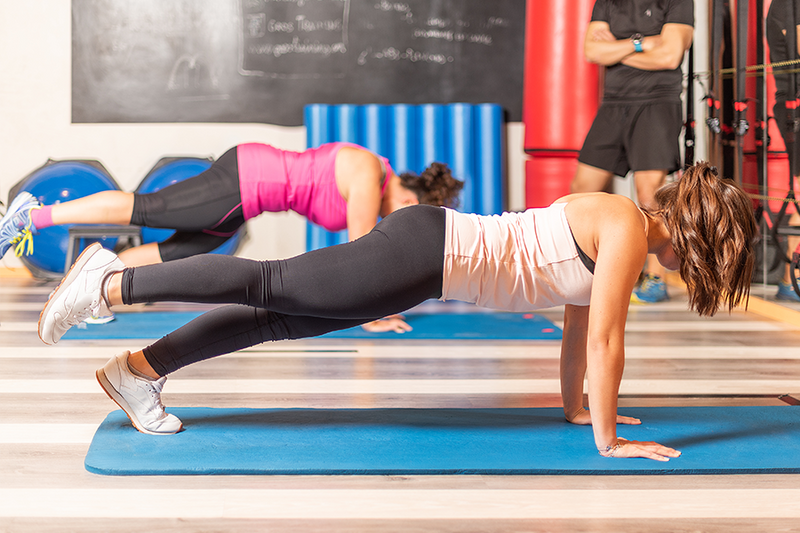
Exercise Description Main Target Muscles Chest Secondary Target Muscles Abs, Shoulders, Triceps Workout Type Strength Gym Gear Bodyweight Fitness Level Intermediate Compound/Isolated Compound Power Move Push Target Muscles: Chest, Core, Shoulders, Triceps Walk the Floor to Pushup Overview The walk the floor to pushup is a slight variation of traditional pushups. It’s a plyometric exercise that targets the chest, shoulders, core and triceps. This workout is effective for pushing muscles of the upper body. Its purpose is to strengthen the upper parts of the body. How to Do It? Place your hands on the floor by bending at the hips. Your shoulders should be width-apart with a couple of inches in front of your feet. With your body in a pushup position, walk your hands forward and do a pushup. Now get back to standing by walking your hands to your feet. Walk the Floor to Pushup Tips First of all, take a standard pushup position. Your hands should be on the ground under your shoulders. Start the push up by bringing your right feet 6 inches forward and performing a push up. Do the same for the left hand and feet, and do a pushup. Repeat for desired number of reps

Exercise Description Main Target Muscles Chest Secondary Target Muscles Back Workout Type Strength training Gym Gear Pulley machine Fitness Level Beginner Compound/Isolated Isolated Power Move Pull Target Muscles: Chest Cable Fly Overview The cable fly is a modified version of the chest fly. It involves the muscles of your chest, triceps, and shoulders and strengthens them. It is important to work on your core strength first before starting this exercise. Without core stability, you might not be successful in doing this. The cable fly is great for increasing the muscle mass in your chest. You can include this exercise in your chest, upper body, or full-body workouts. You need a pulley machine to do this exercise. How to Do It Set the pulleys at shoulder height and add weight to the stack. Grasp both handles with a neutral grip and take a step forward. Press into handles, flex the pecs, and extend your elbows. With a slight bend to your elbows, move your arms to open them and take them to the side; this will help stretch the pecs. Return to starting position while flexing pecs and bringing both arms to your chest. Slowly lower your arms to the starting position. This makes one complete rep. Cable Fly Tips Avoid squeezing the handles too much as it will reduce the engagement of your pecs. Do not allow your back to arch and keep your core engaged throughout the exercise. Avoid banging the handles together at the peak movement.
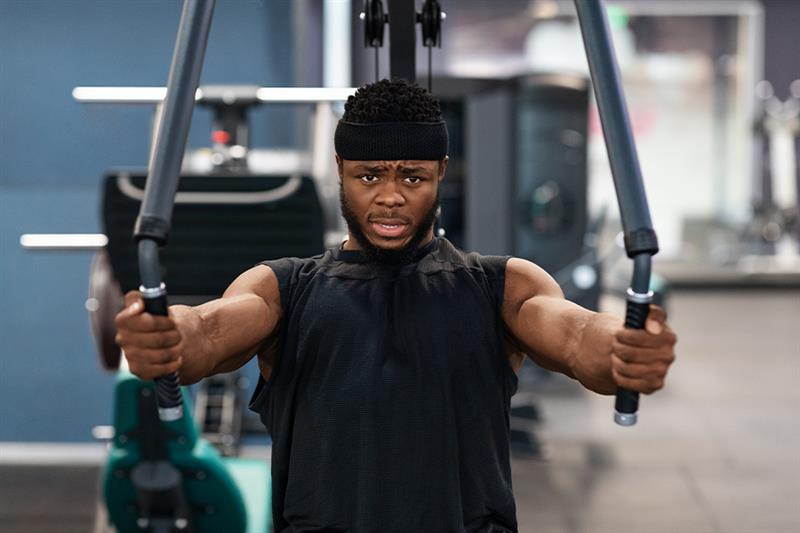
Exercise Description Main Target Muscles Chest Secondary Target Muscles Arms and Pectoralis Workout Type Strength Gym Gear Pec Deck Machine Fitness Level Advanced Compound/Isolated Compound Power Move Pull Targeted Muscle: Chest Pec Deck Workout Review Pec Deck, an exercise machine, specifically works the chest and its supporting muscles, strengthening not just the chest but the entire upper body. Pec deck engages arms and shoulders in order to activate and challenge the chest muscles. This results in an overall strengthening effect. How to Do It? Select the appropriate weight for the machine. Sit on the platform. Press your back firmly against the back of the platform with your feet flat on the floor. Grab the handles and place your forearms on each pad. Bend your arms at a 90° angle and keep your elbows at chest level. Gripping the pec deck handles, pull your arms toward your body while contracting your pectoral muscles. Bring the handles or arm pads in front of your chest, hold the position for a few seconds before slowly releasing back to the starting position. Repeat the desired number of reps. Pec Deck Workout Tips Exhale as you pull the handles toward your chest and inhale while you bring the handles back to starting position. If the workout is too intense, go with less weight to prevent injury. Your last rep should be difficult to complete, but not so much that you can't even maintain balance.
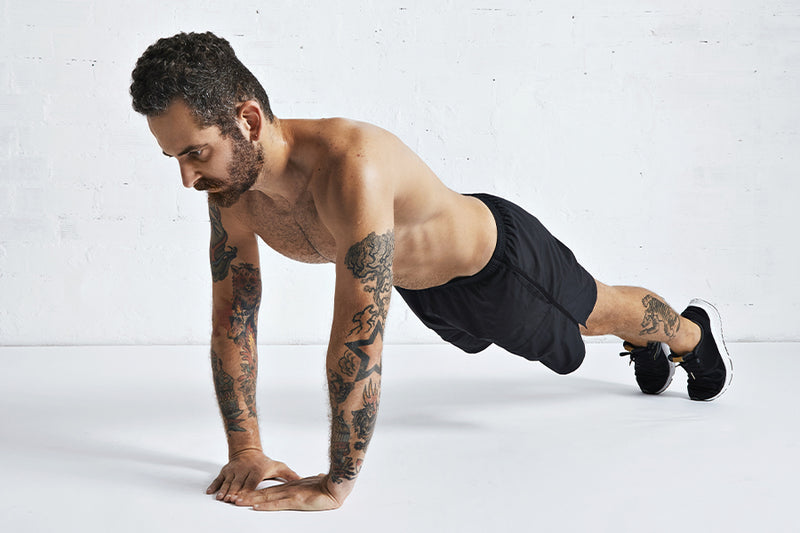
Exercise Description Main Target Muscles Triceps and Chest Secondary Target Muscles Biceps and Pectoralis Workout Type Strength Gym Gear Bodyweight Fitness Level Advanced Compound/Isolated Compound Power Move Push Target Muscles: Triceps and Chest Diamond Push Up Review The diamond push-up is a great way of targeting the triceps. All Push Ups engage the chest, shoulders and triceps anyway, but moving your hands a little closer than usual can do wonders for your triceps. In addition, the diamond push-up is a compound exercise that engages and activates muscles all over the body. Diamond push-ups are a considerable step up from the standard version in terms of difficulty. You would exhaust much sooner than when you do it with a wider angle. How to Do It Get on all fours with your hands placed close together under your chest. Place your index fingers and thumbs so they’re touching, forming a diamond shape, and extend your arms so that your body is elevated from the ground. It should form a straight line from your head to your feet. Lower your chest towards your hands Make sure you don’t flare out your elbows out to the sides and keep your back flat. Stop just before your chest touches the floor, then push back up to the starting position. This is one rep. Repeat the desired number of reps. Tips on Diamond Push-Ups Keeping your body straight is the key. Start small and gradually build stamina for more reps. It’s important to keep your hands under your chest; if they are placed outside of your shoulders, your joints will come under stress. Master the standard push-up before trying this version to avoid injury.
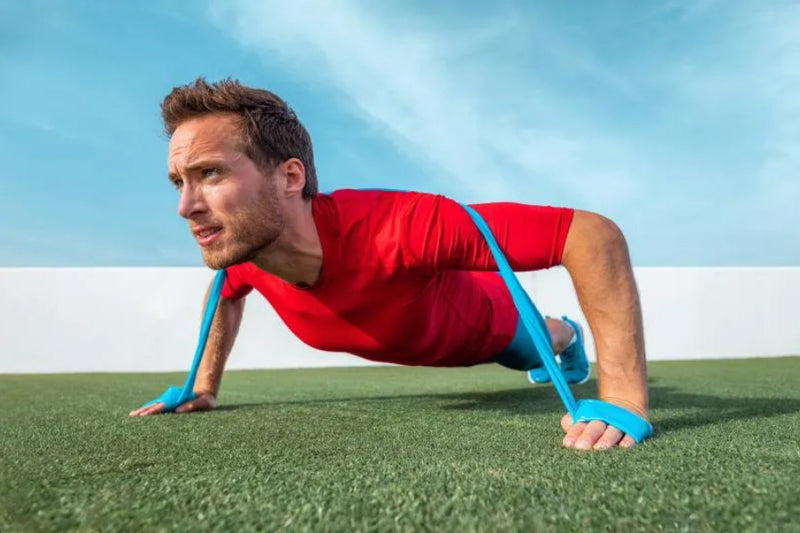
Exercise Description Main Target Muscles Chest Secondary Target Muscles Abs, Triceps, Shoulders Workout Type Strength Gym Gear Bands Fitness Level Beginner Compound/Isolated Compound Power Move Push Target Muscle: Chest Band Push Up Overview Most people are familiar with the traditional push-up, but the band push-up is a variation that offers a number of benefits. For one, it helps to maintain good form by keeping the elbows close to the body. This not only helps to prevent injuries, but also allows you to get the most out of the exercise. Additionally, the band push-up is a great way to build explosive power. The resistance provided by the bands challenges your muscles in a different way than bodyweight exercises, resulting in greater muscle growth. How to Do It Start in a standard push up position with your feet shoulder-width apart and your hands placed just outside of your chest. Place a band around your back and under your arms, making sure that it is tight but not too constrictive. Lower your body down to the ground, keeping your core engaged and your back straight. Press back up to the starting position, making sure to fully extend your arms at the top. Repeat for 8-12 reps. Push Up Tips Your arms should look like an arrow at the bottom, not a "T" Your spine should be straight throughout the exercise. Think of the pushup like a moving plank. To keep your ribcage neutral, squeeze your glutes and brace your abs before you descend. Keep your head down and keep your eyes on the floor. Think of your thumbs being pulled together as you complete the movement. This will increase the activation of your pecs. Do not allow your head to protrude forward. Your chest should touch your nose at the same moment as your nose. Try to push yourself as far off the ground as you can. Push through to the top of each repetition. Allow your shoulder blades and rib cage to move. Many people cut out repetition and don't reap the full benefits.
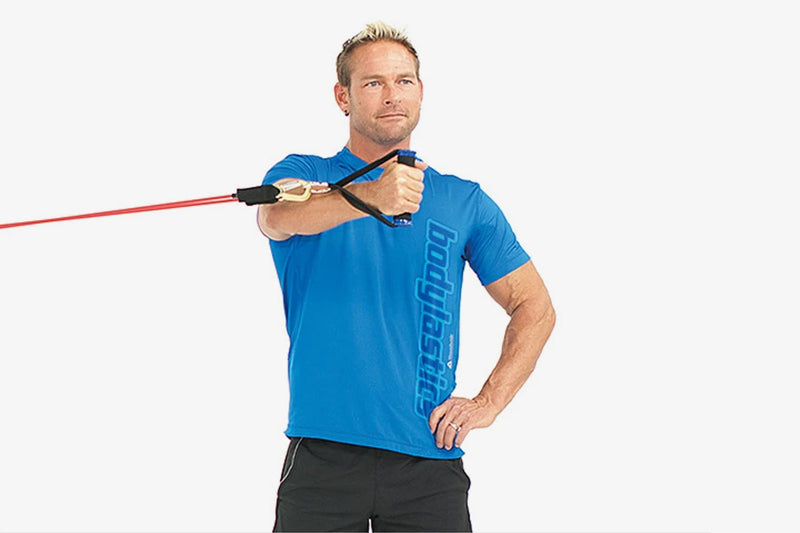
Exercise Description Main Target Muscles Chest Secondary Target Muscles Shoulders, Arms Workout Type Strength Gym Gear Band Fitness Level Beginner Compound/Isolated Compound Power Move Pull Target Muscle: Chest Single Arm Standing Fly Overview The single arm standing chest fly with resistance band is a great exercise for working the chest muscles. The resistance band provides resistance to the chest muscles as they contract, making the exercise more challenging. The single arm standing chest fly also helps to work the stabilizer muscles, which are important for posture and balance. In addition, this exercise can be performed with very little equipment, making it ideal for home workouts. How to Do Anchor a resistance band to a sturdy post or door at about chest height. Make sure the band is taut by giving it a good tug. Stand with your feet hip-width apart, and wrap the band around your left hand, holding it just above your wrist. Bend your elbow so that your arm is at a 90-degree angle and your palm is facing in. Keeping your elbow stationary, open your arm out to the side until your hand is in line with your shoulder. Reverse the motion, and bring your hand back to the starting position. Repeat for the desired number of reps. Exercise Tips To make this move more challenging, try doing it with one arm while holding a weight in the other hand. You can also increase the resistance by increasing the tension on the band.
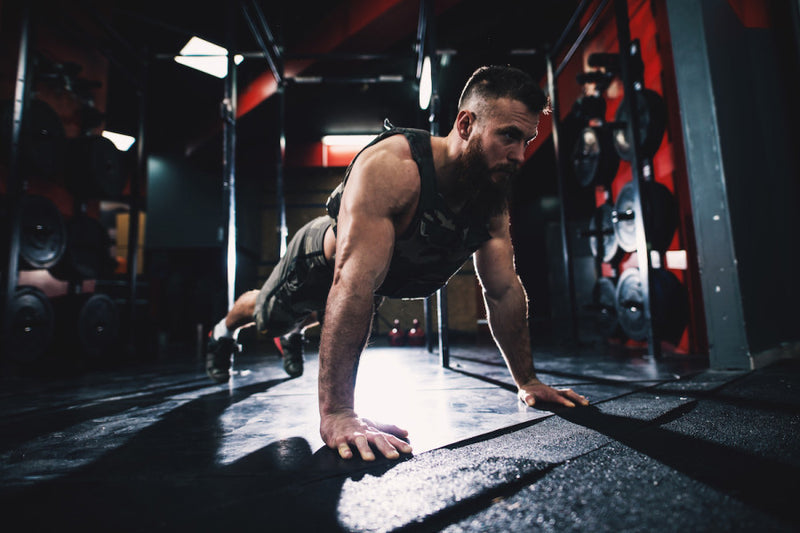
Exercise Description Main Target Muscles Chest Secondary Target Muscles Abs, Shoulders, Triceps Force Type Push Workout Type Strength Training Gym Gear Bodyweight, Weighted Vest Fitness Level Intermediate Compound/Isolated Compound Target Muscles: Chest, Abs, Shoulders, Triceps Paused Weighted Pushups Overview The paused weighted push up is a push up version and an exercise that targets the upper body's pressing muscles. The time under stress is increased by the isometric stop at the bottom of the halted push up. As a result, the stopped push up is a great next step after the push up. How to Do It? Place your hands below your shoulders with toes tucked and knees under hips in a quadruped pose on the ground. Stretch one leg at a time and push yourself up into a push-up situation with your legs straight, elbows open, and head in a stable position, staring at the ground. Retract your shoulder blades and free the elbows as you slowly descend towards the ground. Continue descending until your upper arms lie parallel to the ground or your chest reaches the floor, then hold for a defined length of time. Straighten your elbows and drive your hands into the floor to return to the beginning position. Repeat until you've completed the appropriate number of repeats. Paused Weighted Pushups Tips Using pauses increases the amount of time under pressure during the movement, making this an easy technique to improve a conventional pushup. In the lower position, your arms must form an arrow, not a "T." Consider the push up to be a moving plank. To maintain the ribcage straight, tighten your glutes and strengthen your abs before going down. Keep your chin low and avoid looking ahead. Squeeze your thumbs together while performing the exercise; this will boost pecs activation. Do not allow your head to thrust forward.
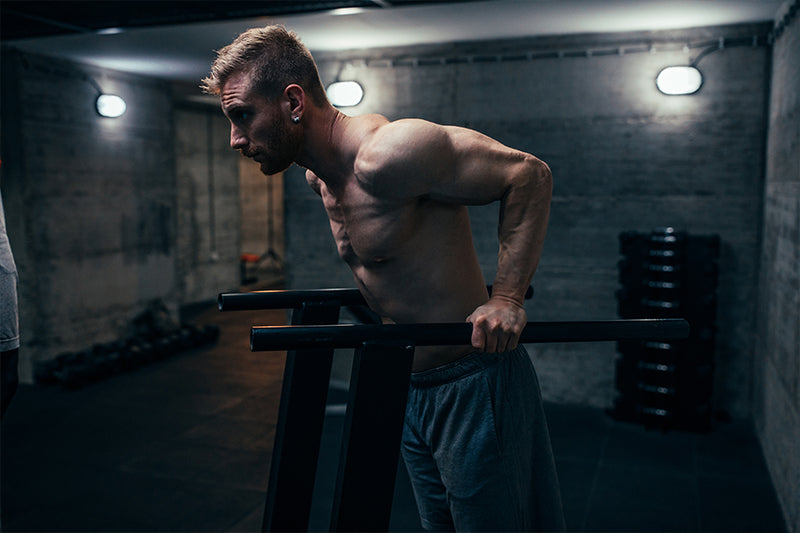
Exercise Description Main Target Muscles Chest Secondary Target Muscles Abs, Shoulders, Triceps Workout Type Strength Gym Gear Bodyweight Fitness Level Intermediate Compound/Isolated Compound Power Move Push Target Muscle: Chest Chest Dips Overview Chest dips are an excellent exercise that targets the triceps, shoulders and the chest muscles. This exercise is specifically effective for the lower region of the pecs. Whether you want to perform this exercise with bodyweight or free weights, this works spectacularly in both ways. This would be an excellent addition to chest exercises, push exercises, upper body exercises, and full-body workouts. How to Do It Position your hands in a neutral grip on the dip station. Unlock the elbows and lower the arms until they are parallel to the floor. Control the descent, then drive back to the initial position. Repeat for the desired number of reps. Chest Dips Tips You can perform these dips by staying upright or leaning forward. Brace the glutes and keep your legs straight, hanging down. You can position a box underneath handles if the station is not possible. If you don’t have a box either, you can jump in the position straight away. Keep your elbows just slightly away from being fully locked out. This would keep tension in your triceps.
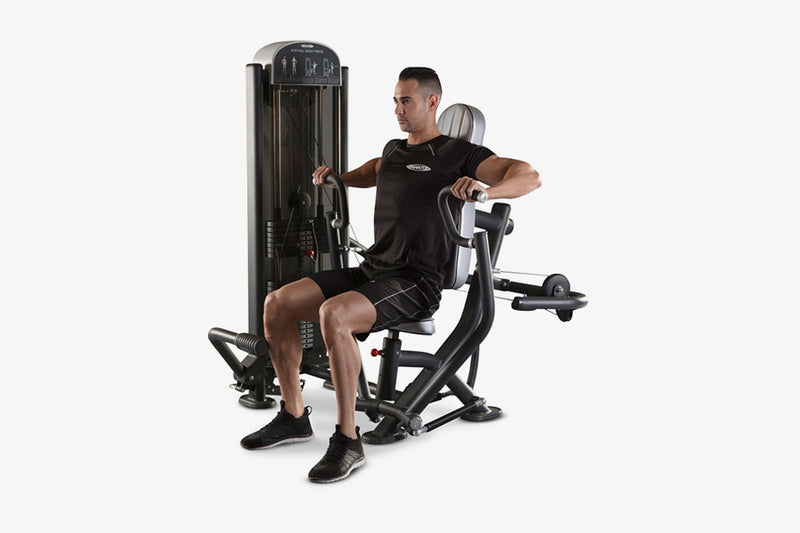
Exercise Description Main Target Muscles Chest Secondary Target Muscles Biceps Workout Type Strength Gym Gear Chest Press Machine Fitness Level Intermediate Compound/Isolated Compound Power Move Push Target Muscles: Pectoral Muscles Seated Chest Press Machine Overview The chest press machine works on your pectoral muscles. It also works on your biceps, deltoids, and latissimus dorsi. The seated chest press is a great exercise to include in your upper body workout routine. You also need better core stability to do the exercise. Since the pectoral muscles get weaker with age, it is necessary to work on them. In this exercise, you recruit the biceps and muscles of your shoulder and back. How to Do It Set the machine at the desired weight and adjust the seat to your height level. You should firmly press your feet to the floor and about shoulder-width apart. Grasp the handles with an overhand grip. Maintain a neutral wrist position. Push the bar outward until your arms are completely extended. Do not lock your elbows. Rest your head against the back support. Avoid moving your neck excessively. Pause here for a few seconds. Bend your elbows and return the bar to starting position. Seated Chest Press Machine Tips Make sure to breathe throughout the exercise. Start with a lighter load when you start with a chest press machine. Avoid stressing your shoulder joint too much. Control the arm extension and do not extend your arm too much. Avoid explosive movements and take them slowly.
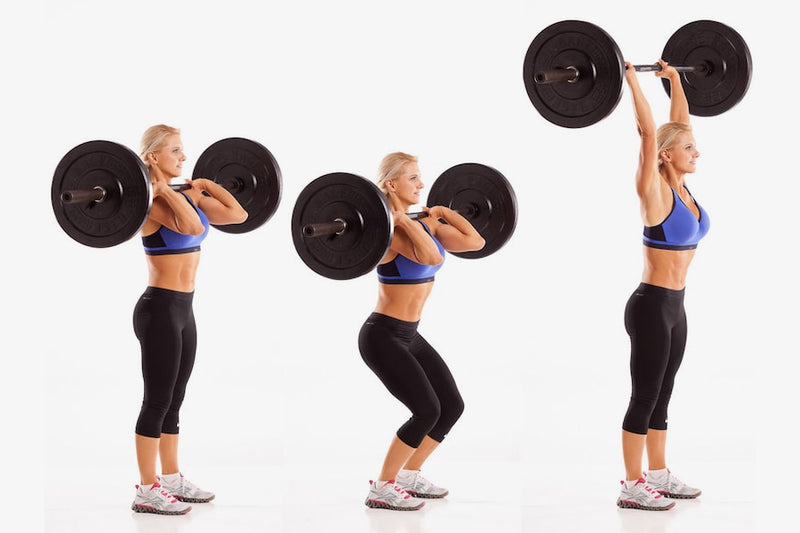
Exercise Description Main Target Muscles Chest, Triceps Secondary Target Muscles Glutes, Hamstrings, Core, Lower Back Workout Type Strength training Gym Gear Barbell, dumbbell Fitness Level Intermediate Compound/Isolated Compound Power Move Push Target Muscles: Pectoral Muscles, Triceps Push Press Overview Push press helps build your upper body strength. With this exercise, you can also get massive shoulders. It is a simpler version of the overhead press and plays a great role in conditioning your rotator cuff muscles which further helps you lift heavyweight. The exercise also helps activate many of your muscle groups. You will also see a great improvement in your other weightlifting exercises if you start practicing push press. The exercise also strengthens the muscles of your core. How to Do It Stand straight with your feet shoulder-width apart. Hold the bar with your fingers and point your elbows forward. Now rest the bar on the shoulders. Next, drop your lower body to a semi-squat position. You do not have to go to a complete squat. A slight bend in the knees would work too. Press up with your heels and drive the bar above your heads. Your arms should be straight and extended at this point. Pause here for a second and lower the bar to your chest. Do not arch your back and maintain a neutral spine. Push Press Tips Grip the bar strongly with the help of your fingers. Press it hard to activate the muscles. Make sure that you are not squatting too low. Only a slight bend in the knees will work. If you squat low, you might harm your knees. You can do push press with a pair of dumbbells too. With dumbbells, make sure that you stabilize the weight in each hand.
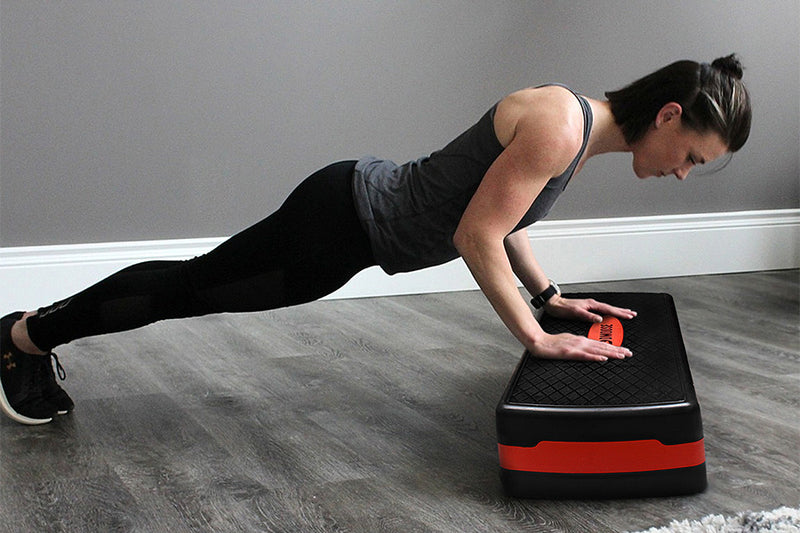
Exercise Description Main Target Muscles Chest Secondary Target Muscles Abs, Shoulders, Triceps Workout Type Strength Gym Gear Bodyweight Fitness Level Beginner Compound/Isolated Compound Power Move Push Target Muscle: Chest Incline Push-Ups Overview Incline push-ups are a variation of conventional push-ups that focuses primarily on the chest muscles. It also targets your abs, shoulders, and triceps as secondary muscle groups. This is a bodyweight exercise that requires the use of a bench press in order to incline the body. If you want to progress towards full bodyweight push-ups, this is an excellent exercise. It reduces stress on the shoulders, forearms, and wrists. It also improves your stability, form, and technique. How to Do It Place your hands on an elevated surface like a bench and walk your feet back until your body is at an incline. From there, lower your chest toward the surface and then press back up to the starting position. Keep your core engaged and be sure to not let your hips sag as you lower down. Repeat for the desired number of reps. Incline Push-Ups Tips Keep your spine as rigid as possible throughout the exercise. Brace your abs and squeeze your glutes as you perform the push-ups. Keep looking down and tuck in your chin. Put in your strength to pull yourself as far away from the floor as possible.

Exercise Description Main Target Muscles Chest Secondary Target Muscles Biceps, Lats, Lower Back, Shoulders Abs, Traps Workout Type Strength Gym Gear Dumbbell Fitness Level Beginner Compound/Isolated Isolated Power Move Push Target Muscle Group: Chest Dumbbell Fly Overview The dumbbell fly is a great exercise for targeting the chest muscles. This move can be done with a variety of weights, making it perfect for both beginners and experienced lifters alike. The dumbbell fly is often referred to as a classic movement because the purpose of the exercise is to isolate your chest for aesthetic reasons. Although the movement can be used to build a stronger bench press, it is not usually considered an increase in performance. This movement is best used for traditional chest exercises in bodybuilding style. How To Do It? Grab the dumbbells from the floor with a neutral grip. Place the dumbbells at your hip crease and then sit down on the bench. Once you are in position, lie back and hold the dumbbells near your chest. After you have gotten into position, take a deep inhale and press the dumbbells to lock out at the top. Retract your shoulders and unlock your elbows. The dumbbells will be slowly lowered laterally, while you keep the angle at the elbow. When the dumbbells reach chest height, you can reverse the movement by pressing your pecs together. Do not allow the dumbbells to touch the floor. Continue the exercise until you are satisfied. Dumbbell Fly Tips As you complete the exercise, imagine that you are trying to hug a tree. Do not squeeze the dumbbell handles too tightly as this can cause over-recruitment of the forearms, biceps, and reduce activation of your pecs. To maintain constant tension in the targeted muscle groups, avoid touching the dumbbells or banging them together at the top. Keep your elbows slightly bent and don't lower your weight so that you feel any pressure or pain at the front of your shoulder joint. If you feel pain in the shoulder joint, especially at the front, make sure your shoulder blades are slightly pulled back and keep your shoulder girdle "packed". Your feet should be flat on the ground. You can focus on activating your pecs and keeping your elbows bent. Keep your abdominal muscles tight and your lower back from arching too much.

Exercise Description Main Target Muscles Lats, chest Secondary Target Muscles Triceps Workout Type Strength Gym Gear Dumbbell Fitness Level Intermediate Compound/Isolated Isolated Power Move Push Target Muscles: Chest, Back Dumbbell Pullover Overview A dumbbell pullover plays a great role in building your chest muscles. It also helps target your lats and builds upper body strength. It is best to include this exercise in your upper body routine as it utilizes multiple muscle groups. When you are doing a dumbbell pullover, then it is ideal to select a weight that seems comfortable to you. Do not use excessive weight on the first go. Increase the weight gradually once you have established your resistance. How to Do It Sit on the end of the bench with your feet pressed in the ground. Hold a dumbbell in each hand and roll back so that you are lying on the floor. Press your head to the bench. Do not strain your neck. Extend your arms, over your chest, and towards the ceiling. Give a slight bend to your elbows, with your palms facing each other. Extend the weights back over your head and inhale. Keep your core engaged and back in contact with the bench. Fully extend your arms behind. But, weights should not be below your head. Exhale and return the weights to the starting position. Dumbbell Pullover Tips The dumbbell should not go below your head. Keep a controlled movement and do it slowly.
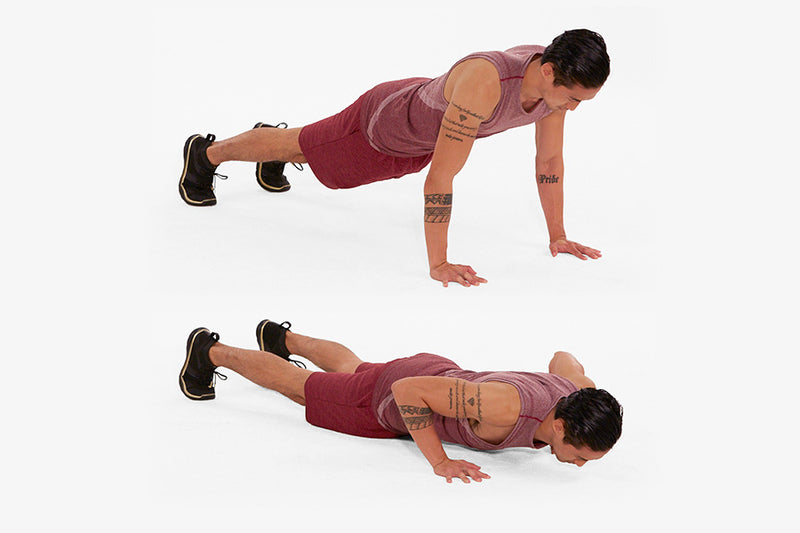
Exercise Description Main Target Muscles Chest Secondary Target Muscles Abs, Triceps, Shoulders Workout Type Strength Gym Gear Bodyweight Fitness Level Beginner Compound/Isolated Compound Power Move Push Target Muscle Group: Chest Push-Up Overview Push-ups are a great way to work your chest, shoulders, and triceps. They are also a good way to work your core muscles. Push-ups are a great exercise for beginners because they are relatively easy to do and they can be done almost anywhere. Push-ups can be included in your chest exercises, upper-body workouts, and full-body workouts. How to Do It Start in a plank position with your hands directly under your shoulders and your feet hip-width apart. Lower your body down toward the ground, keeping your elbows close to your sides. Once your chest touches the ground, press back up to the starting position. Repeat for the desired number of reps Push Up Tips First, be sure to keep your core engaged throughout the entire movement. This will help you maintain good form and prevent your lower back from sagging. Focus on keeping your elbows close to your sides as you lower down—this will help work your triceps more effectively. Be sure to exhale as you push back up to the starting position. This will help you keep your energy levels up and prevent you from holding your breath.
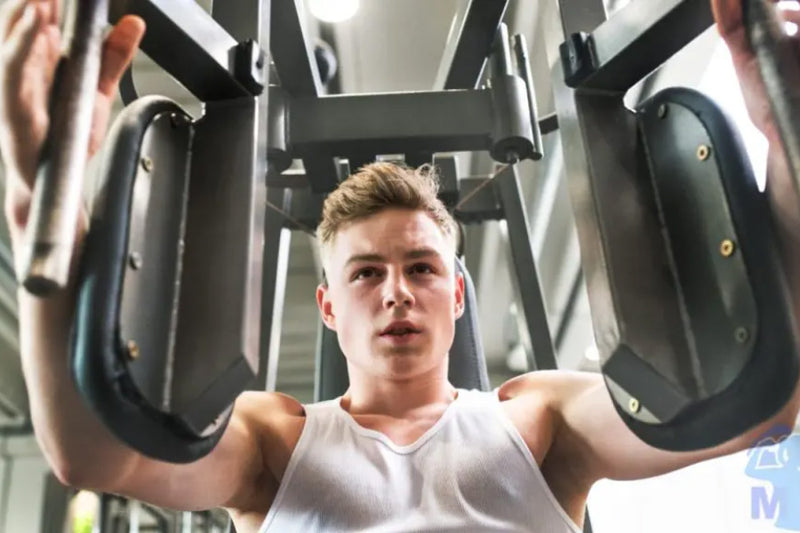
Exercise Description Main Target Muscles Chest Secondary Target Muscles Shoulders Workout Type Strength Gym Gear Chest Fly Machine Fitness Level Beginner Compound/Isolated Isolation Power Move Push Target Muscle: Chest Machine Chest Fly Overview The fly machine is ideal workout equipment to build chest strength and increase muscle mass. If your main objective to do this is to build your pecs, then you'd achieve the desired results efficiently with this workout. The best part about the machine chest fly is that you don’t have to worry about Maintaining Stability or balance throughout the exercise. For a beginner who has just begun working on his chest muscles would find the exercise to benefit him massively through the daily chores. How to Do It You will use the chest fly machine for this workout. Adjust the height of the seat in such a way that when you sit, your arm pads should be at the level of your chest. Select the weight from the rack. Sit on the machine, grab the handle, and take the weight off. Here’s your starting position for the exercise. Slowly bring your forearms together without letting them touch. Keep your body still. Count till 3 and squeeze the chest muscles, then return to the starting position. Repeat for the desired number of reps. Machine Chest Fly Tips Keep your body still throughout the exercise, and do not touch the handles in the center. Make sure not to extend your torso forward when squeezing the weight up. Squeeze the chest at the top of the exercise to increase the intensity. Keep your upper arms parallel to the floor. Related Article: Standing Chest Fly
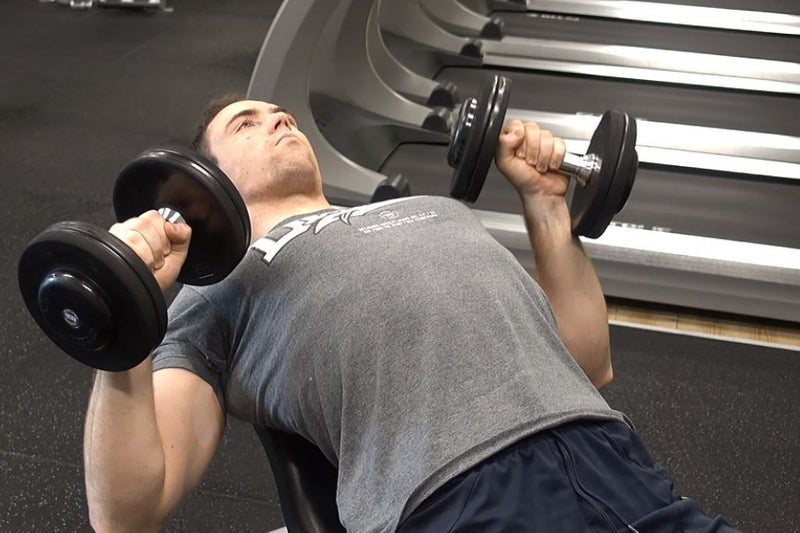
Exercise Description Main Target Muscles Chest Secondary Target Muscles Shoulders, Triceps Workout Type Strength Gym Gear Dumbbell Fitness Level Beginner Compound/Isolated Compound Power Move Push Target Muscle: Chest Dumbbell Bench Press Overview The dumbbell bench press is a phenomenal exercise performed to target the chest muscles. It is a variation of barbell bench presses. Dumbbell bench presses are always recommended after performing the barbell bench press. This is to allow the body to develop a specific level of strength that keeps it from suffering shoulder injuries. The weight you lift should be a very conscious decision in this case. Ensure to pick a weight that aligns with your physical capacity in order to maintain shoulder stability and avoid injuries. Variations of this exercise include: Inclined barbell bench press Inclined dumbbell bench press Close grip bench press How to Do It Pick the pair of dumbbells in your hands, keep a neutral grip and sit down on the bench. Lay down on your back on the bench and hold the dumbbells close to your chest. Now raise your arms and, almost locking your elbows, hold the dumbbells straight over your head. Slowly lower the dumbbells about the level of your chest. Contracting the chest muscles, push the dumbbells back to the starting position. Repeat for the desired number of reps. Dumbbell Bench Press Tips Throughout the exercise, keep your chest muscles tense and do not completely lock your elbows. Hold the weights at a tilted angle of 45 degrees in order to keep your elbows in a neutral position. Make sure your dumbbells don’t bounce or collide with each other as it can cause you to lose stability. Your shoulder blades should be contracted together. Keep your abs braced throughout. The lower body should not move throughout the movement.
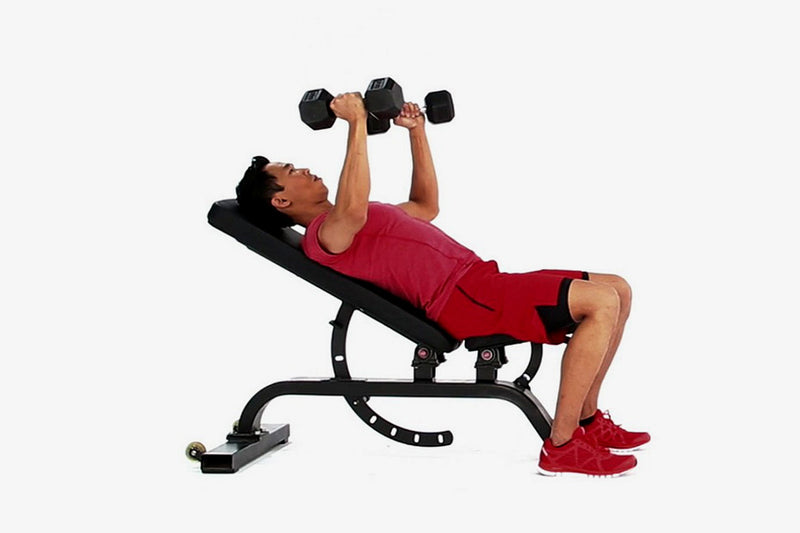
Exercise Description Main Target Muscles Chest Secondary Target Muscles Triceps Workout Type Strength Training Gym Gear Dumbbell Fitness Level Intermediate Compound/Isolated Compound Power Move Push Target Muscles: Chest Incline Dumbbell Press Overview The incline dumbbell press is a variation of the traditional bench press. It specifically targets your chest muscles and gives you a massive challenge. The incline in this variation adds more intensity which helps in targeting the chest muscles. Usually, lifters face hard working their chest muscles, but they can get better at targeting it with an incline dumbbell press. The use of dumbbells in this exercise helps develop strength among both sides of the chest and promotes balance. It also prevents developing different shoulder injuries. Select a weight that you feel comfortable with. Ensure to maintain your technique throughout the exercise. How to Do It Adjust the level of the bench to a level of 15 to 30 degrees. Sit on the bench and place two dumbbells by your side. Lie back and hold the dumbbells. This will be your starting position. Engage your core and press the dumbbells towards the ceiling. Your palms should be facing forward and rotating your shoulder outwards to engage your back muscles. Lower the dumbbell slowly until your upper arm is slightly below your back. Your elbows will be making an angle of 45 degrees to your torso. Pause here for a second. Your waist and back should be neutral. Incline Dumbbell Press Tips Keep your shoulder blades in one place and together to ensure a safe position. Maintain tension in pecs, and do not lock your elbows. Do not allow your back to arch and engage your abs throughout the exercise. Keep your feet on the ground and do not lift them. Do not allow the colliding of dumbbells at the top to ensure your safety.
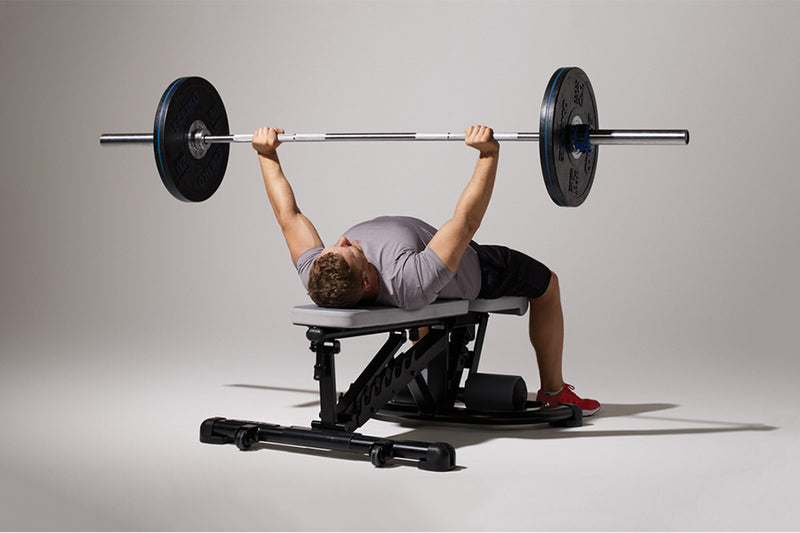
Exercise Description Main Target Muscles Chest Secondary Target Muscles Triceps, Shoulders Workout Type Strength Training Gym Gear Barbell/ Dumbbell Fitness Level Intermediate Compound/Isolated Compound Power Move Push Target Muscles: Chest muscles Bench Press Overview The bench press is one of the most common exercises that almost all weightlifters know. It is the best exercise to target the chest muscles, and hence it is part of all chest workouts. It targets many muscles of your upper body and develops strength. Majorly, the exercise works your chest muscles, but to move the equipment, your body uses other muscles such as the chest, triceps, and shoulders. Since it is a comparatively difficult exercise and many might find it hard to get a perfect grip on exercise, it is better to start with different variations. You can also use a pair of dumbbells instead of a barbell to do the bench press. How to Do It Lie flat on the bench with your feet pressed to the floor and hands outside the shoulder-width. Your shoulder blades must be in contact with the bench and pinched together. While breathing, lift the weight and maintain tightness in your upper back. At this point, make sure that your upper back is tight. Bring the bar towards your chest while inhaling and unlocking the elbows. Push it back and press yourself on the bench for the remaining reps. Bench Press Tips It is better to start slow with the bench press. Learn the technique first and then proceed with the exercises. Keep the bar straight in line with your wrists, ensure that it is straight while you lower it. Do not arch your lower back, or you might be at risk of developing injuries. Make sure that bar is touching your chest in every rep. The glutes and shoulder blades should be in contact with the bench throughout the exercise. Push your feet to the ground and avoid lifting them. Do not rush and aim for controlled movement. Maintain the tightness in your back throughout the movement. Practice with a dumbbell first and then move to the barbell.
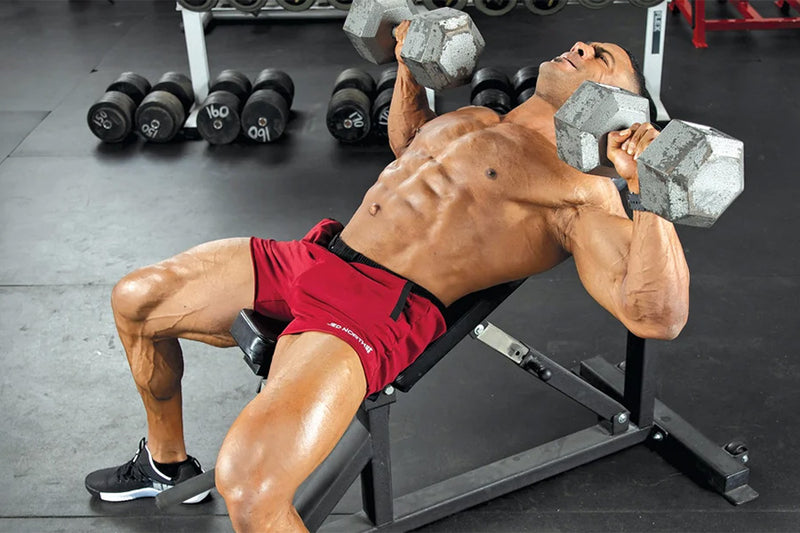
Exercise Description Main Target Muscles Pectoral (Chest) Muscles Secondary Target Muscles Deltoids and Triceps Workout Type Strength Gym Gear Dumbbell Fitness Level Intermediate Compound/Isolated Isolation Power Move Push Incline Dumbbell Bench Press Overview The incline dumbbell bench press is a variation of the incline bench press which primarily builds chest muscles. Shoulder and triceps muscles will also benefit from this exercise. Using an inclined position lets you target the upper part of the chest harder- a part that is usually ignored in most weightlifting exercises. Use of dumbbells means safety and muscular stability. How to Do It Sit down on the edge of an incline bench with dumbbells in your hand with a neutral grip. Lay back, keeping the weights close to your chest. Once you are ready, press the weight upwards stretching out your arms fully. Lower the dumbbells slowly, in a controlled fashion. Engage your chest muscles and push the weights back up to the starting position. Repeat as many times as you can. Tips on Incline Dumbbell Bench Press Try to keep your arms straight as you press the weights up. Do not let dumbbells collide at the top position because that can disrupt your balance. Engage your abs during the exercise. Maintain proper form and avoid pressuring your lower back.

Exercise Description Main Target Muscles Chest Secondary Target Muscles Shoulders, Triceps Workout Type Strength Gym Gear Barbell Fitness Level Intermediate Compound/Isolated Compound Power Move Bilateral Push Target muscles: Chest Incline Barbell Bench Press Overview The incline barbell bench press is a version of a regular bench press. The only difference in this version is the use of barbells. Adding a barbell here makes the exercise extremely challenging and involves the muscles of the chest, shoulders, and triceps. The inclined position and a barbell specifically target the upper portion of the chest muscles. Working on this part is particularly important as many lifters lag here. The exercise is great for the upper body, chest, or full-body workouts. How to Do It Simply lie on an incline bench with your back flat against the pad and your feet planted firmly on the floor. Then, grasp the barbell with an overhand grip and press them up above your chest. Lower the weight back down to your chest and repeat for reps. Incline Barbell Bench Press Tips It is better to start slow with the bench press. Learn the technique first and then proceed with the exercises. Keep the bar straight in line with your wrists, ensure that it is straight while you lower it. Do not arch your lower back, or you might be at risk of developing injuries. Make sure that the bar is touching your chest in every rep. The glutes and shoulder blades should be in contact with the bench throughout the exercise. Push your feet to the ground and avoid lifting them. Do not rush and aim for controlled movement. Maintain the tightness in your back throughout the movement.

Get ready to tone and strengthen your arms with these 15 dumbbell exercises. These moves will help you build definition and see real results. Perfect for beginners and gym enthusiasts looking to enhance their arm strength.

Exercise Description Main Target Muscles Forearm Secondary Target Muscles None Workout Type Strength Gym Gear Barbell Fitness Level Beginner Compound/Isolated Isolated Power Move Pull Target Muscle Group: Forearms Barbell Wrist Curl Over Bench Overview The seated barbell wrist curl is a wrist curl variant and a workout that targets the forearm muscles. Simply by strengthening your grip, having strong forearms, and exercising them in different methods can help you to lift heavier weights in many workouts. How to Do it Grab a barbell shoulder-width apart with an underhand grip (palms up) and then sit down in front of a flat bench. Place your hands on the benches and kneel. Keep your wrists straight and let the barbell fall as far as you can. This is the starting position. Slowly lift the bar as high as you can, squeezing your forearm muscles at their peak. Slowly lower the barbell to its original position. Repeat for desired reps. Exercise Tips A lightweight should be used with proper technique. This exercise is not difficult if you aren't using a heavyweight. For added intensity, slow down the rep timing and pause/squeeze your forearms for two counts at the top. Allow the weight to fall as low as possible at the bottom so you can use your full range of motion.

Exercise Description Main Target Muscles Forearms Secondary Target Muscles Abs, Hamstrings, Lower Back, Quads, Shoulders, Traps, Upper Back Force Type Pull Workout Type Strength Training Gym Gear Dumbbell Fitness Level Beginner Compound/Isolated Compound Targeted Muscles: Forearms Dumbbell Farmers Carry Overview The farmers carry is a full-body workout that develops forearm, trap, and core power. Its a fundamental movement pattern you should incorporate into your workouts if you want to develop your strength to its full potential. The forearms and traps must contract isometrically for the movement to take place. It also presents a core challenge as you attempt to keep a solid spine while walking the required distance. The farmers carry can be incorporated into almost any exercise program. How to Do It? Stand up straight and hold a dumbbell in each hand with a neutral grip. Hold the dumbbells by your side and walk for the allotted distance or time while keeping an active shoulder position. Dumbbell Farmer's Carry Tips Make sure to take a deep breath before starting the lift to posture your shoulders. You want to make sure that your shoulders are in a good position before lifting the weight since the weight will cause scapular depression in your shoulders. When doing a unilateral carry variation, be careful not to slant to one side while performing the exercise. Just a little shoulder shrug, Just enough to counteract the weight pulling your shoulders down, not enough to move you out of a neutral stance. To ensure a heel-toe pattern, walk slowly. Avoid letting the weight push you into overextension by stabilizing it. Don't rely on breathing to stabilize your spine; keep breathing throughout the activity.

Exercise Description Main Target Muscles Glutes Secondary Target Muscles Biceps, Triceps, Quads, Abs, Upper and Lower Back Workout Type Strength Gym Gear Dumbbell Fitness Level Beginner Compound/Isolated Compound Power Move Pull Target Muscles: Glutes Right Arm Dumbbell Snatch Overview This exercise targets the glutes and some other parts of the body that include the biceps, triceps, quads, abs, and upper and lower back. The equipment needed to perform this exercise is dumbbells. As this workout targets different muscles of your body, it has a beneficial effect on strengthening endurance in your upper and lower body. How to Do It? Start by standing with your feet shoulder-width apart and a dumbbell in your right hand. Keeping your elbow close to your side, raise the dumbbell up until your arm is fully extended overhead. From here, explosively extend your hips and knees as you pull the weight up in front of your body. As the dumbbell reaches chest level, flip your wrist so that your palm is facing forward and catch the weight at the top of the movement. Lower the weight back down to the starting position and repeat for 8-10 reps before switching sides. Right Arm Dumbbell Snatch Tips Push your hips back and bend your knees while holding the dumbbell. Keep your chest up, and look forward. Push your hips forward, with your shoulders and chest moving up and back. Keep the dumbbells close to your body. When you pull the dumbbell to your shoulder level, keep your legs straight with your glutes squeezed. Then, you can pull the dumbbell above your head and then lower it down to ground level.

Exercise Description Main Target Muscles Glutes Secondary Target Muscles Abs and Hamstrings Workout Type Strength Gym Gear Bodyweight Fitness Level Beginner Compound/Isolated Isolated Power Move Push (bilateral) Target muscle: Glutes Bodyweight Glute Bridge Overview The Bodyweight Glute Bridge is a great exercise for targeting the glutes (buttocks) and hamstrings. The move is simple to perform and can be done with no equipment, making it an ideal choice for at-home or gym workouts. Additionally, this exercise can be easily modified to make it more challenging as needed. For example, you can place your feet on an elevated surface such as a chair or couch to increase the range of motion and make the move more difficult. How to Do It? Lie flat on your back with your knees bent and feet flat on the ground about hip-width apart. Place your hands on the ground beside you. Lift your hips off the ground, contracting your glutes and hamstrings. Hold for a few seconds, then slowly lower your hips back to the starting position. Start with 3 sets of 10-12 repetitions and increase as needed. Bodyweight Glute Bridge Tips Make sure to keep your core engaged throughout the exercise to protect your lower back. Focus on contracting your glutes and hamstrings as you lift your hips off the ground. Don't let your knees cave in as you perform the move. Keep them in line with your ankles and hips. To make the exercise more challenging, try placing your feet on an elevated surface such as a chair or couch. You can also add weight by holding a dumbbell or kettlebell on your pelvis.

Exercise Description Main Target Muscles Glutes Secondary Target Muscles Abs, Hamstrings Workout Type Strength Gym Gear Bands Fitness Level Beginner Compound/Isolated Isolation Power Move Push Target Muscle: Glutes Banded Lateral Walk Overview This is an excellent glute-strengthening exercise that builds strength in your hip muscles, improves stability, and minimized hip and back pain. It sculpts your legs and engages many of the deep muscles that help enhance stability in your pelvis. This exercise must be a staple part of your regular routine if you struggle with hip stiffness. Whether you’re performing it as a warm-up exercise or part of your regular routine, you must follow the right form in order to make the most of it. How to Do It Assume an athletic position. You can do this by bending your knees, eyes facing forward, and hips flexed. Wrap a resistance band just above your knees. Keep your fit at the width of your shoulders and step laterally. Repeat for the desired number of reps. Banded Lateral Walk Tips As you step laterally, ensure your feet do not get closer than shoulder-width. You have to keep them wide and take small steps forward. Your hips should not tilt towards your face as push your knees away from each other. Your glute medium should feel the contraction. Keep your upper body slightly tilted forward. Do not use momentum to control the range of motion, use the musculature. If one of your glutes feels relatively less contracted, place twice as much volume on that side.

Exercise Description Target Muscle Group Glutes Secondary Muscles Hamstrings Exercise Type Strength Equipment Required Cable Pulley Experience Level Intermediate Compound/Isolated Compound Force Type Pull Target Muscles: Glutes and Hamstrings Cable 45-Degree Kickback Overview The glutes and hamstrings are two of the body's most important muscles in terms of movement. The glutes control hip and knee motions when walking, squatting, bending your legs, and tilting your pelvis, as well as kneeling down, lowering yourself to the ground with one leg at a time. These muscles assist us in moving more efficiently and help prevent injuries. The muscles that the cable 45-degree kickback works are the hamstrings, glutes, and calves. This exercise is a great way to target these muscles and help tone them. To do the cable 45-degree kickback, you will need to find a cable machine with a pulley attached at a 45-degree angle. You will also need to attach an ankle cuff to the pulley. How To Do It In this exercise, you’ll be working your glutes and hamstrings Stand up straight facing a cable pulley machine. Attach your ankle strap to the machine on the lowest setting. Start by keeping both your feet together. Pull back the strapped leg at a 45-degree angle, while keeping your knee straight and feeling your upper glutes stretch. Lower your leg slowly and return to your original position, Repeat the exercise on your other leg for 12-15 reps. Cable 45-Degree Kickbacks Tips When doing the cable 45-degree kickback, be sure to keep your back straight and maintain proper form. You should also avoid arching your lower back. If you feel any pain in your lower back, stop doing the exercise and consult a doctor. Be sure to use a weight that is comfortable for you and that allows you to complete the desired number of repetitions. If the weight is too heavy, you will not be able to complete the exercise correctly and could cause an injury. If you are a beginner, start with no weight or very lightweight and work your way up as you become stronger. Make sure that the ankle cuff is secured tightly around your ankle to avoid it slipping off during the exercise.

Exercise Description Main Target Muscles Glutes Secondary Target Muscles Abs, Hamstrings, Upper Back, Lower Back Workout Type Strength Gym Gear Band Fitness Level Intermediate Compound/Isolated Compound Power Move Hinge Target Muscle: Glutes Band Good Mornings Overview This is a banded variation of good morning that targets your glutes. With the accurate resistance provided by the band, your target muscles are adequately contracted which brings quick and effective results. This is a great exercise if you want a twist to your exercise regime. How to Do Keep your feet equidistant and stand on the band. Wrap the other end of the band around your neck. Grab the band at shoulder length and pull it up slightly to release the tension. Now, unlock your knees and hinge back your hips. Return to the starting position by driving through your entire foot. Repeat for the desired number of reps. Exercise Tips Make sure to keep a neutral spine and neutral neck throughout the movement. Keep your weight equally distributed in your entire foot when you move up. Don't drive through your heels.

Exercise Description Target Muscle Group Glutes Secondary Muscles Quads Exercise Type Strength Equipment Required Cable pulley machine Experience Level Beginner Compound/Isolated Compound Force Type Pull Target Muscles: Glutes and Quads Cable Straight Leg Hip Flexions Overview The hip muscles are important for a variety of different movements, including walking, running, and jumping. Strong hip muscles can help to prevent injuries, and also improve your overall performance in these activities. Additionally, strong hip muscles can help to alleviate lower back pain. Therefore, it is beneficial to exercise the hip muscles for both injury prevention and performance enhancement. The cable straight leg hip flexion exercise targets the iliopsoas muscle group, which includes the psoas major and iliacus muscles. These muscles are responsible for flexing the hip joint, as well as stabilizing the pelvis and lower back. This exercise can be performed with a variety of different cable machines, or with a resistance band attached to a sturdy object. How To Do It? This exercise will help you work up your glutes, quads and hip flexors. Attach the cable to your ankle strap Stand straight, with your back facing the cable pulley machine Start pulling your leg forward, up to a 45-degree angle Make sure you are keeping your knee straight while pulling Repeat the exercise on the other leg for12-15 reps per side Tips For Cable Straight Leg Hip Flexion As with any exercise, it is important to warm up before performing the cable straight leg hip flexion. A light jog or dynamic stretching routine will help to prepare your muscles for the workout ahead. When using a resistance band, be sure to secure it firmly to avoid it snapping back and causing injury. If you are using a cable machine, be mindful of the weight you are lifting and do not exceed your personal lifting limit. Always use a spotter when performing this exercise with heavyweights. Lastly, be sure to cool down and stretch after your workout to avoid any muscle soreness.

Exercise Description Target Muscle Group Glutes Secondary Muscles Abdominals, Hamstrings Exercise Type Strength Equipment Required Core Slider Experience Level Beginner Compound/Isolated Compound Force Type Pull Target Muscle: Glutes Core Slider Glute Bridge with Hamstring Curl Overview The core slider glute bridge with a hamstring curl is a great way to work your glutes and hamstrings. It's a fantastic way to work your glutes and keep pain and strain at bay. It's also a wonderful way to strengthen them so you can lift more and run faster. How to Do Start by lying on your back with your feet flat on the ground and your knees bent. Place a core slider under each foot. Hoist your hips off the ground, until you are resting on your upper back all the while pressing down into the sliders While maintaining this elevated posture bend your knees to bring the core sliders towards you, feeling the tension in your hamstrings Inhale and extend your feet before lowering down to the starting position Repeat for the specified reps or time Exercise Tips Make sure to keep your core engaged throughout the entire movement. Keep your hips level, and do not allow them to sag or rotate during the exercise. Use a slow and controlled motion, and focus on squeezing your glutes and hamstrings throughout the range of motion.

Exercise Description Main Target Muscles Glutes Secondary Target Muscles Abs, Hamstring Force Type Push Workout Type Strength training Gym Gear Bodyweight, Barbell Fitness Level Intermediate Compound/Isolated Isolated Target Muscles: Glutes, Abs, Hamstring Barbell Glute Bridge Overview The barbell glute bridge is a strengthening exercise for glute muscles. Many lifters assume that workouts like the squats and deadlifts are all you require to develop a complete and strong pair of glutes. However, this isn't entirely accurate. For aesthetics, usefulness, and strength, using more isolation-focused glute workouts like the barbell glute bridge is a good option. How to Do It? Stand straight and secure a handle at chest level to a cable stack. Grip the handle to your chest, having feet wide open (shoulder-width apart) in an athletic base position. Squeeze the handle horizontally to extend as you exhale. Go back to the initial position for fulfilling desired reps. Barbell Glute Bridge Tips Stand straight and secure a handle at chest level to a cable stack. Grip the handle to your chest, having feet wide open (shoulder-width apart) in an athletic base position. Squeeze the handle horizontally to extend as you exhale. Go back to the initial position for fulfilling desired reps.

Exercise Description Main Target Muscles Glutes Secondary Target Muscles Abs, Hamstrings Workout Type Strength Gym Gear Bodyweight Fitness Level Beginner Compound/Isolated Isolation Power Move Push Target Muscle: Glutes Hip Dips Overview Hip dips are a common problem faced by several women trying to get rid of that. These are the inward curves on the side of the hips just below the hip bone. This unique body structure is completely normal but exercise can be very helpful in getting rid of the dips. These exercises focus on the stability and strength of the hips. It also promotes fluidity in your daily routine and recedes the risk of injury. This overall improves the appearance of the hip dips. How to Do It Lie down on your back and place your hands on your sides. Assume a stance just a bit wider than your hips and brace your core. Slowly lift your hips off the ground. Now inhale and lower your hips back on the ground. Repeat for the desired number of reps. Hip Dips Tips Ensure to keep your core braced throughout the exercise. Do not forget to exhale and inhale through the exercise. Hike your hips and lower back off the ground but not your mid back.

Exercise Description Main Target Muscles Glutes Secondary Target Muscles Abductors, Hamstrings, Hip Flexors, Quads Workout Type Warm up Gym Gear - Fitness Level Beginner Compound/Isolated Compound Power Move Dynamic Stretching Target Muscles: Glutes Curtsy Lunge Overview The main muscles worked with a curtsy lunge are the glutes (buttocks), quads (thighs), and hamstrings (back of the legs). However, because you’re also squatting down low and balancing on one leg, your core muscles (abs and lower back) have to work hard to stabilize your body too. How to Do It Stand with your feet shoulder-width apart while your arms in front of your chest. Shift your weight onto your right foot and step back with your left foot. Bend the left leg at the knee and lower it close to the floor without touching it. Ensure that your chest stays straight and proud as you lower your knee behind the front leg, keeping your hands in curtsying fashion. Start to straighten up with your right leg, returning your left foot to the starting position. Repeat the desired number of reps. Tips on Curtsy Lunges Keeping your torso straight is the right tip here. Foot placement will determine your stability. Agility is not the goal: try to main a stable posture.

Exercise Description Main Target Muscles Legs, Thighs and Hips Secondary Target Muscles Shoulders and arms Workout Type Cardio Gym Gear Bodyweight Fitness Level Beginner Compound/Isolated Compound Power Move Static High Knees Overview High knees might seem like a simple exercise to perform, but doing just a few sets of this high-energy move will get your heart pumping, and activate your lower body and core muscles. What’s more, high knees can serve as a warmup, cardio between resistance training exercises, or part of a high-intensity interval training workout. How to Do it Stand tall with your feet almost hip-to-shoulder-width apart and your arms at your sides. Looking straight ahead, open your chest, and engage your core muscles. Begin by bringing your right knee toward your chest, slightly above waist level. Simultaneously, move your left hand up in a pumping motion. Quickly lower your right leg and left hand. Repeat with your left leg and right hand. Alternate your right and left leg for the desired time. Tips on High Knees Take 30-60 seconds off after a set. If you can't handle high speed, you can do it slowly

Exercise Description Main Target Muscles Back Extensor Muscles, Glutes Secondary Target Muscles Core Workout Type Aerobic activity Gym Gear None Fitness Level Beginner Compound/Isolated Compound Power Move Explosive Target Muscle: Glutes, Back Extensor Muscles, Core Swimmers Overview Swimmers might seem like a fun exercise in which all you have to do is lie on the floor and act as if you are swimming. But, in reality, it is a lot more than that. It can be quite challenging as it engages the muscles of your entire body to do the movement. The exercise targets your glutes, lower back, and core. It would be best to use your hamstrings to lift your legs off the mat. It also targets the back extensor muscles, which are important in aligning your spine and reducing the tension in your neck. How to Do It Lie on your stomach on the mat with your legs straight, and arms extended forward overhead. Your shoulders should be away from your ears and shoulder blades in the back. Engage your abs and contract them to pull your belly button away from the mat. Your arms and legs should be extended and not on the floor. Your head should not be on the ground either. Lift your right arm and left leg up and do some pulses. Then lift your left arm and right leg for pulses. Continue to do so for a minute, at least. Swimmers Tips While doing the exercise, imagine yourself swimming in the pool. Do not forget to breathe during the exercise. Do not strain your neck and keep it in a neutral position.

Exercise Description Main Target Muscles Glutes Secondary Target Muscles Core Workout Type Bodyweight exercise Gym Gear Resistance bands Fitness Level Beginner Compound/Isolated Isolation Power Move Hip abduction Target Muscles: Gluteus Maximus Fire Hydrants Overview The fire hydrants specifically target your glutes and sides. If you want to give a perfect definition to your glutes, practicing fire hydrants is the best. This easy exercise can be performed anytime and anywhere, but It's critical to master the technique before attempting this exercise. This is a bodyweight exercise, but you can practice with resistance bands if you want to add any resistance to it. The exercise will strengthen your glutes, improve your hip mobility, strengthen your lower back and reduce the risk of injuries. How to Do It Start with a tabletop position. Keep your hands directly below the shoulders and knees directly below the hips. You should not lock your elbows here. Engage your core and glutes, and while breathing, lift one leg and move your knee sideways and away from your body until it forms an angle of 45 degrees. Keeping your knees bent the entire time, slowly lower your leg and return to starting position. Repeat for the desired number of reps and then switch to the other leg. If you are using a resistance band, place it on your thighs and do the same. Fire Hydrants Tips Engage your core throughout the exercise. Avoid using resistance bands if you are new to exercise.

Exercise Description Main Target Muscles Glute Secondary Target Muscles Hamstring, Lower back Workout Type Strength Gym Gear Bodyweight Fitness Level Intermediate Compound/Isolated Isolation Power Move Hinge Target Muscles: Glutes Hyperextension Overview The hyperextension movement targets the muscles in the back of the body, including the erector spinae, which runs along the spine, and the gluteus maximus, which is the largest muscle in the buttocks. Hamstrings are also worked during hyperextension exercises. Hyperextensions can be performed with or without weight, and are often included in lower-body workouts. How to Do It Start by lying face down on the bench with your hips and thighs supported. Bend your knees and place your feet flat on the footpads. Place your hands behind your head or crossed over your chest. Brace your abs and squeeze your glutes. Slowly raise your torso up until your back is in line with your hips. Hold for a count of two, then lower back down under control. Repeat for the desired number of reps. Tips on Hypertension Keep your head and neck comfortable and neutral. When you pull yourself up, the whole body should be in a straight line.

Exercise Description Main Target Muscles Hamstrings Secondary Target Muscles Calves, Glutes, Quads Workout Type Strength Gym Gear Machine Fitness Level Intermediate Compound/Isolated Compound Power Move Push Target Muscle: Glutes Reverse Hack Squat Overview The reverse hack squat is a variation of the regular squats performed on a hack machine. It requires you to push up the weights with your shoulders and chest while engaging your core and targeting the hamstrings and glutes. Since this is an intermediate fitness level workout, you must have prior experience and strength to do weighted squats. Moreover, when exercising, the individual must be aware of machines, setting different weights according to stamina, and stopping when needed. How to Do It Adjust the hack machine according to your height and fix the bar on lighter weights, to begin with. Stand on the machine and place your shoulders below on the weight pads and assume the squat position Once you’re in position, push the weights upwards with the help of your shoulders, using the push from your feet Slowly lower down the weights until your hamstrings and calves are almost perpendicular to each other This will complete your single rep Tips for Reverse Hack Squat Make sure you start with light weights to avoid any injuries Do not lock your knees when you’re lifting weights with your shoulders Take your time to build the stamina and switch to heavier weights Make sure to always warm-up and cool down after this workout

Exercise Description Main Target Muscles Glutes Secondary Target Muscles Abs and Hamstrings Workout Type Strength Gym Gear Bodyweight and bench Fitness Level Beginner Compound/Isolated Isolation Power Move Push Single Leg Bodyweight Hip Thrust Overview Single leg bodyweight hip thrust is an advanced form of the conventional bodyweight hip thrust. Since this is a beginner to intermediate level workout, you are not required to use any weights. But to challenge your strength, you can add in a barbell with a squat pad and place it under your belly button and up high on your thighs. This workout helps you target your glutes, quads, and hamstrings to make sure you are exercising various muscles simultaneously. How to Do It Sit with your back against a bench and keep your knees bent and thighs parallel to the floor To start the exercise, lift up your left leg, making a 90-degree angle between your left hip and knee Lift your leg high enough to align the hip with your spine Keep your hands behind your head, and rest your elbows and upper arm on the bench Slowly return to the leg down but do not touch the floor until all your reps are completed. Tips on Bodyweight Hip Thrusts Start with fewer sets and reps: build your stamina first. Do not think you can let go of hip thrusts if you are doing glute bridges: the two are not interchangeable. Rest against the bench just below your shoulder blade to give your body solid support.

Exercise Description Main Target Muscles Glutes Secondary Target Muscles Shoulder, Back Workout Type Strength Gym Gear Resistance Bands Fitness Level Beginner Compound/Isolated Compound Power Move Bent-Knee flexion Target Muscles: Glutes, Core, Shoulders, Back Donkey Kicks Overview Donkey kicks target your glutes and make them strong. They also play a great role in giving a perfect shape to your butt and correcting your form, while improving your balance and coordination and enhancing your posture. It is better to learn the technique first to do the exercise. While it may seem simple, the majority are doing it wrong. How to Do It Start on all fours with your hands directly below your shoulders. The back of the neck should be flat. Engage your core and glutes, and lift your right leg towards the ceiling with a bend in the knees. Make sure that your hips and lower back are in the same position throughout the exercise. Lower the right leg to starting position and lift the other leg. Donkey Kicks Tips Avoid rushing, and keep it controlled. Make sure to breathe throughout the exercise. Avoid arching your back.

Exercise Description Main Target Muscles Glutes Secondary Target Muscles Abs, Hamstrings, Upper Back, Lower Back Workout Type Strength Gym Gear Barbell Fitness Level Intermediate Compound/Isolated Compound Power Move Hinge Target Muscle: Glutes This exercise is a variation of hip-hinge which targets your glutes primarily. Some people use this exercise to build strength in their backs but in order to utilize its maximum benefits, it’s better to perform it to focus on glutes. The exercise improves functional strength, recedes the risk of a hamstring injury, improves hip mobility, and produces greater gains. If properly done, it can prove to be one of the most effective exercises for the posterior chain. How to Do It Set the bar on the rack at the height of your shoulders and safeties to hip height. Position the bar on your traps or slightly below. Hinge back your hips and keep your spine neutral. Now extend the hip back to get to the original position. Make sure to drive through the whole foot. Repeat for the desired number of reps. Good Morning Tips Make sure to maintain a neutral spine, it has a huge role to play in your range of motion. Try holding the bar with a false grip i.e., a thumbless grip as it helps alleviate wrist issues. Experiment with your neck position to check which one suits you better. Ensure to drive through your entire foot and not just on the heels. Just keep three points of contact with the ground: big toe, little toe, and heel.

Exercise Description Main Target Muscles Glutes Secondary Target Muscles Hamstrings Workout Type Strength Gym Gear Bodyweight Fitness Level Beginner Compound/Isolated Isolation Power Move Push Target Muscle: Glutes Glute Kickback Overview Glute kickback is also commonly known as quadricep hip extension. It is an excellent way to warm up the glutes and work on them. Some people also know this exercise as donkey kicks. It is an ideal way to build muscle, improve balance, and build strength. Glutes actually hold the ability to support your entire body and render stability to your lower back to enable it to lift heavier loads. For this reason, it should be a staple exercise in your normal regimen. How to Do It Get on your fours, keep your hands under your shoulders, and knees under your hips. Keep a neutral spine, bend your knee at a 90-degree angle and kick the heel of your foot towards the ceiling. Return to the starting position. Then repeat with the other side. Repeat for the desired number of reps. Glute Kickback Tips Make sure that your lumbar spine doesn’t move at all. While performing the reps keep your head down. You don’t have to look straight or ahead in this exercise. Ensure that your elbows are completely locked out.

Exercise Description Main Target Muscles Glutes Secondary Target Muscles Calves, Glutes, Lower Back, Hamstrings Workout Type Strength Gym Gear Smith Machine Fitness Level Beginner Compound/Isolated Intermediate Power Move Push Target Muscle: Glutes Smith Machine Sumo Squats Overview Sumo squats are a fantastic lower-body movement that targets the glutes and calves, as well as the hamstrings, lower back, and secondary muscles such as your quadriceps. It is one of the best compound exercises that focuses on your glutes and inner thighs to make them firmer. The exercise is performed with a smith machine but you can also add more gear to it such as a lifting belt or hip circle. How to Do It Start by positioning yourself under the barbell with your feet shoulder-width apart and your toes pointing outwards. Once you have assumed this position, brace your core and slowly lower your hips towards the floor. Now, lower your body, make sure that you keep your back straight and maintain an excellent squatting technique by keeping your knees from moving too far forward. Once your thighs are parallel with the floor, drive through your heels, extend your hips and knees, and return to the starting position. Smith Machine Sumo Squats Tips It is critically important for you to keep your back straight throughout the workout. To ensure that keep facing forward. Keep your core braced throughout the exercise to keep your back still. Push yourself through the heels of your feet not through the balls as it would stress your joints. Squat deep down till your thighs are parallel to the floor.

Exercise Description Main Target Muscles Glutes Secondary Target Muscles Hamstrings Workout Type Strength Gym Gear Machine Fitness Level Beginner Compound/Isolated Isolation Power Move Explosive Bodyweight Exercise Target Muscle: Glutes Glute Cable Kickback Overview This strengthening exercise is a variation of glute kickbacks. It focuses on glutes as primary muscles and hamstrings as secondary. Beginners who are trying to build strength in their glutes and lower body as a whole would find this exercise super effective. The exercise doesn’t just shape these groups of muscles but also tones them. Since your leg moves in a kicking motion behind your body in this exercise, you would experience an enhancement in balance and stability as well. How to Do It Attach your ankle cuff to a lower cable pulley. Stand about 2 feet away in front of a cable pulley machine, so your right ankle aligns with the pulley. Attach the ankle cuff to your right ankle. Set the weight on the pulley machine according to your fitness level Hold the frame for support and hinge at the hips to keep your chest upright. Engage your core, and bend the knees slightly while squeezing your glutes to pull your right leg backward. Keep your left leg firmly planted to provide balance. Slowly return your right leg to the front, bending at the knee. Repeat for desired repetitions, and then repeat on your left leg. Glute Cable Kickback Tips Make sure you are squeezing your glutes properly. For that, try to keep the pace of your exercise slow and controlled. When choosing a weight, pick one that doesn’t make your body jerk. Your body must be as still as possible. To increase the intensity level, pause for a few seconds and squeeze your glutes when your leg is fully extended.

Exercise Description Main Target Muscles Glutes Secondary Target Muscles Abs, Hamstrings Workout Type Strength Gym Gear Barbell Fitness Level Intermediate Compound/Isolated Isolated Power Move Push Target Muscle: Glutes Barbell Hip Thrust Overview Barbell Hip Thrust is a variation of bodyweight hip thrust. It is an exercise especially formulated to focus on the glute muscles. It also targets hamstrings, quads, and calves as secondary muscles. This exercise works to help you get a bigger butt and build stronger glutes. Whether you are looking for leg workouts or full-body workouts, this exercise has some amazing advantages to help you attain your fitness goals. How to Do It Sit upon the ground with your legs bent and your feet no more than hip distance apart. Tilt your toes out just a little bit. Place your upper back against the center of the weight bench, resting it on edge. Put the barbell across your hips. To keep it in place, grab the bar with both hands. Do not use your arms to lift it. Squeeze the glutes and keep the bar straight ahead until your hips align with your shoulders and knees. The bench should support the mid-scapula region. With your focus on down your body (about a few inches above the bar), maintain a minimal chin tuck and keep your core tight. Slowly lower the bar down until the hips are just a few inches off the floor. Squeeze the glutes and lift the bar back up. Barbell Hip Thrust Tips Make sure that you don’t arch your lower back when you extend your hips. Your body should be in a straight line from your shoulders to your knees. When you bridge your hips, you should keep them from dropping down. Do not make any movement in your lower back as you proceed with the exercise.

Exercise Description Main Target Muscles Glutes Secondary Target Muscles Hamstrings, Abs Workout Type Strength Gym Gear Bench Fitness Level Beginner Compound/Isolated Isolation Power Move Push Target Muscles: Glutes Bodyweight Hip Thrusts Overview The main muscles targeted by the bodyweight hip thrust are the glutes (buttocks) and hamstrings (back of the thigh). This exercise also works the core, and lower back. When performed with proper form, the bodyweight hip thrust can be an effective way to build strength and muscle in the lower body. How to Do It Sit with your back against a bench. Your knees should be bent and your feet should be flat on the ground. The bench should hit you just below the shoulder blades. Keep feet shoulder-width apart: rest the elbows on the bench. Push with your heels until your thighs are parallel to the floor Squeeze your glutes and then return to start. Tips on Bodyweight Hip Thrusts Start with fewer sets and reps: build your stamina first. Do not think you can let go of hip thrusts if you are doing glute bridges: the two are not interchangeable. Rest against the bench just below your shoulder blade to give your body solid support.
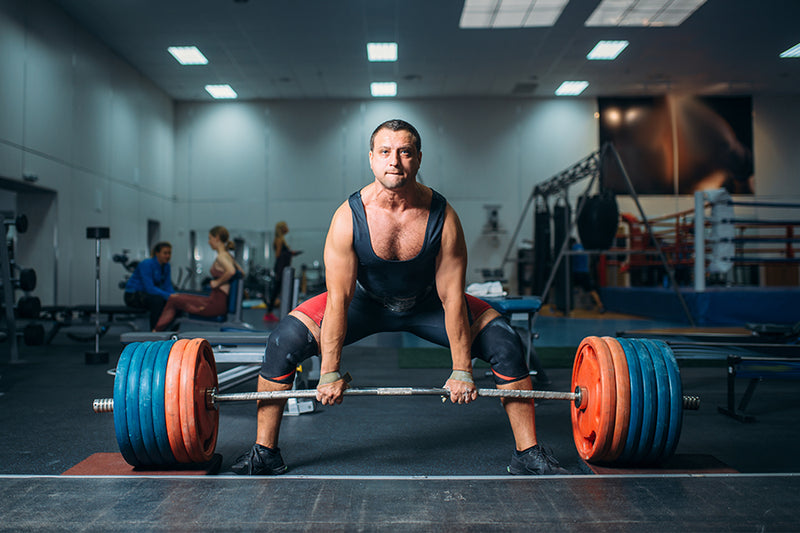
Exercise Description Main Target Muscles Hamstrings Secondary Target Muscles Glutes, Lower Back Workout Type Strength Gym Gear Barbell Fitness Level Beginner Compound/Isolated Compound Power Move Pull Target Muscles: Hamstrings Barbell Stiff Leg Deadlift Overview The hamstrings are the primary target of this strengthening workout. The exercise improves muscle mass and engages the muscle fibres of the hamstrings and glutes. It demands a mind-muscle connection because it is a hamstring isolation workout. After completing this practice, the connection would immediately improve. The activity improves your hip strength, endurance, and form, which improves your athletic performance. The engagement maximizes the strength and size of the hamstrings, calves, and glutes since it concentrates on total leg development. This supports your overarching fitness training objectives. How to Do It? Begin the exercise by choosing a correct barbell and lift by your sides. Stand by bending your knees. Your feet must be placed at shoulder distance apart. Now, you are at your starting position. Bend over to lower the barbell over your feet. Ensure that your back isn’t rounded, it must be as straight as possible. Keep your feet stationary. Continue lowering the barbell till your hamstrings allow you to. You would feel a stretch in your hamstrings at this point, but lower them till the point of your comfort. Squeeze the hamstrings and glutes and stand back straight. Repeat for the desired number of reps. Barbell Stiff Leg Deadlift Tips You are going to end up with a rounded back as soon as you look down. It’s just as simple as that. Keep looking forward. Keep your barbell as close to your body as possible, or else you will put unnecessary strain on your back. Keep your lower back, legs, and abdominal as tight as you can. Keep the weight of your body towards the heels and not to your toes. If you shift your weight at your toes, you’ll be risking your back terribly. Keep the rep timing slow in order to ensure your focus and control over the movement.
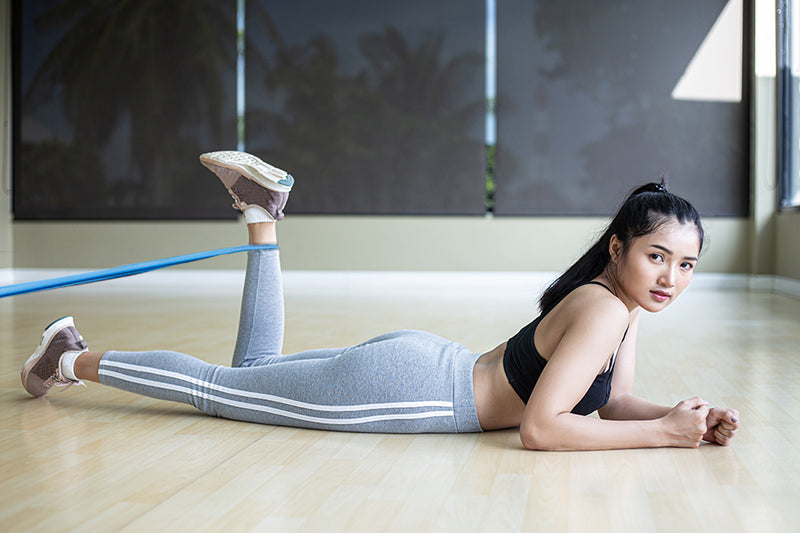
Exercise Description Main Target Muscles Hamstrings Secondary Target Muscles None Workout Type Strength Gym Gear Resistance Band Fitness Level Beginner Compound/Isolated Isolated Power Move Pull Target Muscle: Hamstrings Banded Lying Leg Curl Overview The lying leg curl with resistance band is a great exercise for those looking to work their hamstrings. The hamstrings are the muscles that run along the back of the thigh, and they are responsible for knee flexion. The lying leg curl with resistance band challenges these muscles by providing resistance as you curl your legs up. This exercise can be performed with or without weights, making it a versatile option for all fitness levels. In addition, the lying leg curl with resistance band is a great way to target the inner and outer thighs. By varying your foot placement on the band, you can focus on different areas of the thigh, making this an ideal exercise for sculpting and toning the legs. How to Do It Start by looping one end of the resistance band around a sturdy object and the other end around your ankles. Lay down on your stomach and slowly pull your feet towards your glutes. Be sure to squeeze your hamstrings at the top of the movement. Hold the position for a second, then gradually revert to the initial position. Repeat for the desired number of reps. Banded Lying Leg Curl Tips Make sure your knees stay on the ground throughout the exercise. You should feel a stretch in your hamstrings when you reach the peak of the movement. Keep your movement slow and controlled.
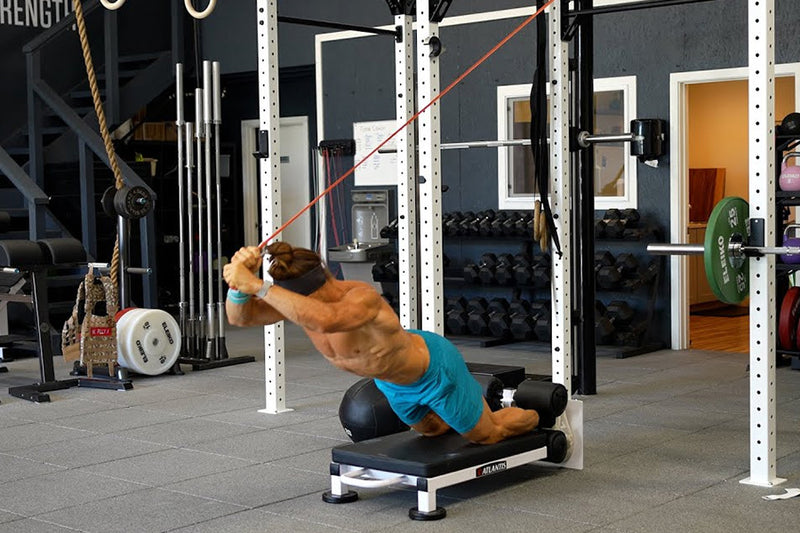
Exercise Description Main Target Muscles Hamstrings Secondary Target Muscles Abs, Calves, Glutes Workout Type Strength Gym Gear Bands Fitness Level Intermediate Compound/Isolated Compound Power Move Pull Target Muscle: Hamstrings Band Nordic Curl Overview The Nordic hamstring curl is a great exercise for people who want to improve their hamstring strength and prevent injuries. You can perform this exercise with or without a resistance band, but using a band provides some additional benefits. First, the band helps keep your knees stable, which reduces the stress on your hamstrings. Second, the resistance provided by the band helps build leg muscles more quickly. Finally, the band provides an extra challenge that can help you stay motivated as you work to improve your strength and flexibility. Whether you're a beginner or a seasoned athlete, the Nordic hamstring curl is a great way to reduce your risk of injury and improve your overall fitness. How to Do Wrap the band around the upper part of the lat pulldown machine. Place your knees on the knee pad and grab the band from behind your head using both your hands. Slowly lower yourself till your body is parallel to the floor. Pull yourself to the starting position by flexing your hamstrings. Repeat for the desired number of reps. Exercise Tips If you prefer a hands-free version, you can wrap the band around your chest as well. Keep your hips extended throughout the movement. If you need more assistance in stretching the band, grab it from a higher point. Be sure you don't feel any contractions in your lower back.
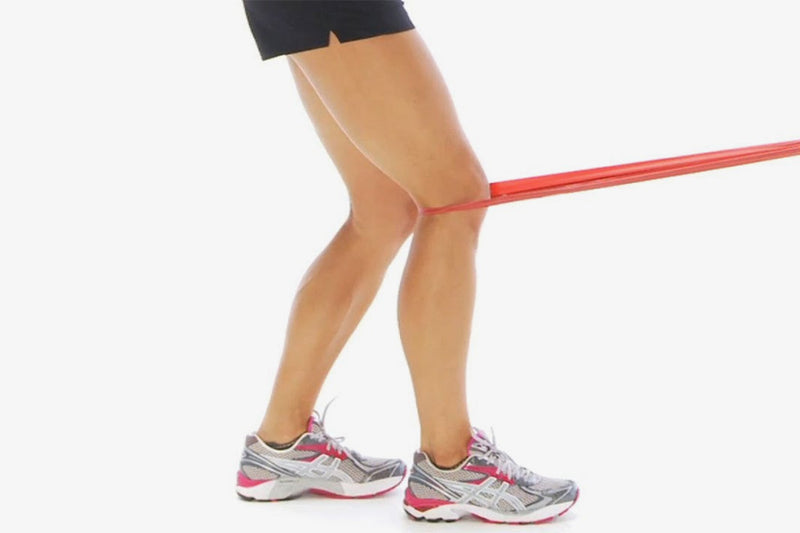
Exercise Description Main Target Muscles Hamstrings Secondary Target Muscles Calves Workout Type Strength Gym Gear Bands Fitness Level Beginner Compound/Isolated Compound Power Move Pull Target Muscle: Hamstrings Terminal Knee Extension Overview Terminal knee extension with a resistance band is one of the most effective exercises for improving knee function. The exercise works by strengthening the quadriceps, which are the muscles that support the knee. In addition, terminal knee extension helps stretch the hamstrings and improve the range of motion in the joint. As a result, exercise can help prevent injuries and improve overall knee health. How to Do Start in a standing position with your feet hip-width apart and the resistance band wrapped around your lower thighs. Hinge forward at your hips and bend your knees to lower into a quarter squat. Drive through your heels to stand back up, extending your legs as you go. As you reach the top of the movement, press the resistance band away from your body to add resistance. Return to the starting position and repeat. Exercise Tips Keep your back straight throughout the exercise. Keep the movements slow and controlled.
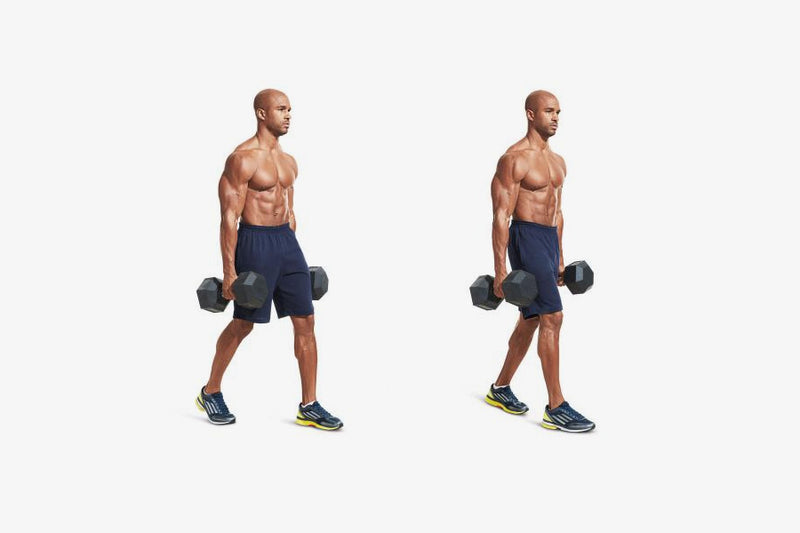
Exercise Description Main Target Muscles Quadriceps, Hamstring, Calves, Glutes Secondary Target Muscles Shoulder, Core Workout Type Strength Gym Gear Dumbbell, Kettlebell Fitness Level Advanced Compound/Isolated Compound Power Move Pull Target Muscles: Quadriceps, Glutes, Calves, Hamstrings, Core, Upper Back, Shoulders, Biceps, and Triceps Farmer’s Walk Overview Farmer’s carry is yet another easy workout. Lift two dumbbells in each hand with weights that are heavy enough for you. Once you’ve gripped the weights correctly, stand up straight, start walking 20 steps in the forwarding direction, and then slowly put the weights back on the ground. How to Do It Stand straight with your feet shoulder-width apart. Arms should be resting at your sides. Place dumbbells on the floor. Squat down a little and grab the dumbbell in each hand. Pull your shoulder blades down and back, engage your core and return to the upright position. Step forward and start walking. Keep your head up and straight, shoulder back and core completely engaged. Walk for 20 steps at least. Farmer’s Walk Tips Make sure to walk in one straight line. Increase the distance and time gradually to get the most out of the exercise. For beginners, it is best to walk for a small distance. Increase your weight gradually to make it more challenging.
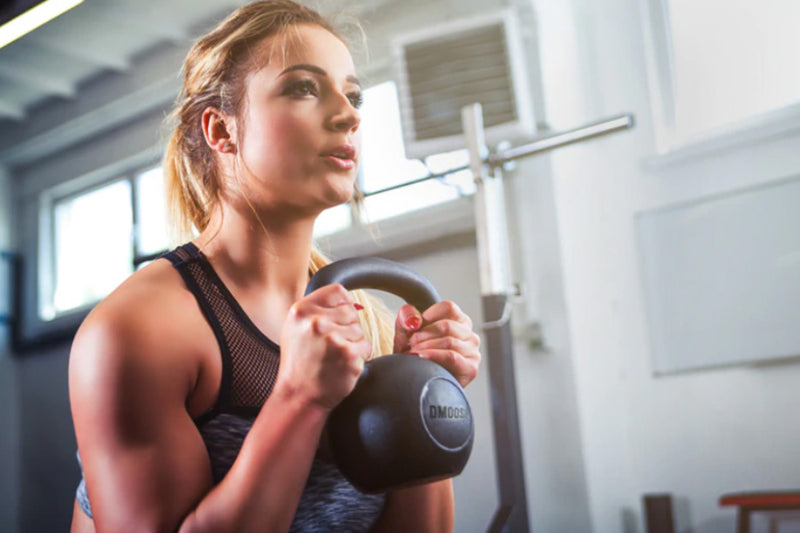
Exercise Description Main Target Muscles Hamstrings Secondary Target Muscles Abs, Adductors, Calves, Forearms, Glutes, Lats, Lower Back, Quads, Traps, Upper Back Workout Type Strength Gym Gear Kettle Bells Fitness Level Intermediate Compound/Isolated Beginner Power Move Hinge Target Muscle: Hamstrings Kettlebell Swings Overview The kettlebell swing is a full-body workout that mainly targets the muscles of the posterior chain with a primary focus on the hamstrings. People who are new to learning the hip hinge position would find this an excellent workout. It will help them massively with several other exercises that involve the hinge, especially deadlifts. It strengthens your weak muscles, builds functional strength, and helps improve your posture. Regardless of the workout program that you are following, kettlebell swings can be healthy incorporation in all. How to Do It Take up a hinged position with your knees slightly bent and hold the kettlebell handle in both your hands. Make sure to keep your chin tucked and weight equally distributed around your foot. Keep your spine neutral and hike the kettlebell between your legs. Then pull the kettlebell back to the starting position by extending your hips and keeping your arms straight. Repeat for the desired number of reps. Kettlebell Swings Tips The swing should generate hip extension as swiftly as possible. Due to the weight, you will experience your toes rising but you shouldn’t allow that. Shift your weight to your heels. Keep your chin tucked in, touching your chest at all times. Ensure you are not keeping a false grip, keep your thumbs around the handle.
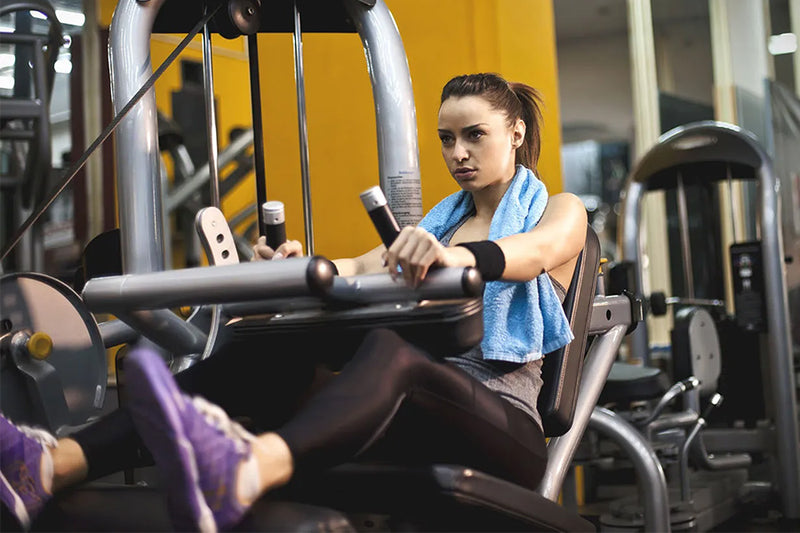
Exercise Description Main Target Muscles Hamstrings Secondary Target Muscles Glutes Workout Type Strength Gym Gear Machine Fitness Level Beginner Compound/Isolated Isolated Power Move Pull Target Muscle: Hamstrings Seated Leg Curl Overview Seated leg curl is an excellent way to work your hamstrings and calves. If your objective is to build muscle mass in your thighs, then this exercise is an ideal way to build more power. It improves strength and flexibility in the legs and prevents your lower back from injuries. Adding in pauses and the timing of the movement completely depends on your individual fitness goals. Whether you are having a leg day or a full-body workout day, this exercise is a must. Other variations include: Lying leg curl Seated leg curl How to Do It Select a weight and rest it comfortably at the back of your heels. Tense your hamstrings and take off the weight from the rack. Make sure to keep your low back flat against the pad. Take your weight up as far as possible until your hamstrings are squeezed. Then return to the starting position. Repeat for the desired number of reps. Seated Leg Curl Tips Make sure to keep the tension in your hamstrings intact throughout the movement. Keep your hips fixed against the seat and do not let your back round up. Your head should not protrude forward. Keep your movement controlled.
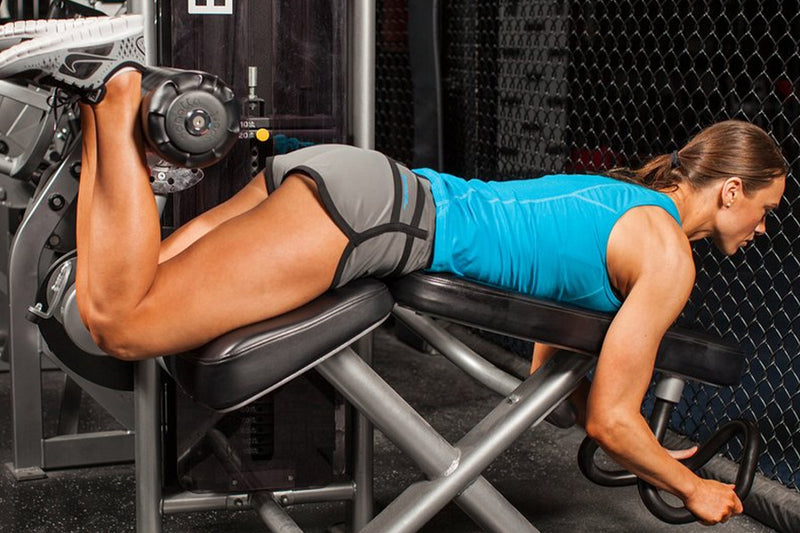
Exercise Description Main Target Muscles Hamstrings Secondary Target Muscles None Workout Type Strength Gym Gear Machine Fitness Level Beginner Compound/Isolated Isolated Power Move Pull Target Muscle: Hamstrings Lying Leg Curl Overview Lying leg curl directly focuses on your hamstrings building power and flexibility in your legs. If performed with the correct form and technique, leg curls hold the ability to enhance the overall strength of your leg. It mitigates the risk of a knee injury, improves mobility, and promotes muscle growth. You can perform this exercise in an isolated manner on the machine or increase the intensity by adding dumbbells to it. How to Do It Lie down on the machine on your belly and place your legs under the cushioned pads. Make sure to lock your ankles under the roller. Now curl your legs towards your hips. Contract your hamstrings and your hips throughout the motion. Slowly lower it back to the starting position. Repeat for the desired number of reps. Lying Leg Curl Tips The roller should be placed above the ankles but below the calves. Make sure your hamstrings are fully contracted to utilize the full range of motion. Keep the rep timing slow and controlled.
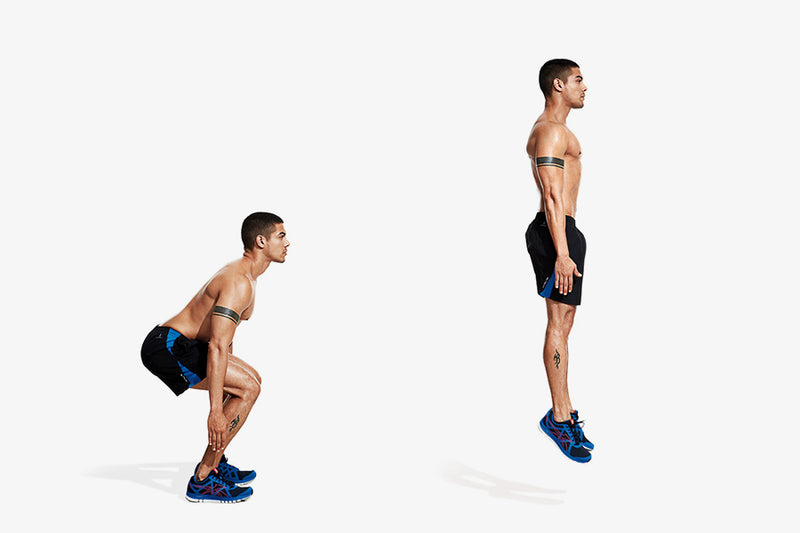
Exercise Description Main Target Muscles Quads Secondary Target Muscles Glutes, Hamstrings Workout Type Plyometrics Gym Gear Bodyweight Fitness Level Beginner Compound/Isolated Compound Power Move Push Target Muscle Group: Quads Jump Squat Overview Jump squats target legs, hips, and thighs. They are the perfect lower muscle builders, easy to do, and absolutely no equipment required. You can do them anywhere: no need to miss out on your muscle-building routine if you follow convenient exercises like this one. If you are an athlete and you want to improve your jumping ability and agility, jump squats will serve as training buddies. They help train your body for high jumps. How to Do It Stand with feet shoulder-width apart and knees bent slightly. Bend your knees some more and lower yourself to a full squat position (like you are sitting in a chair) Engaging the quads, glutes, and hamstrings pull the body up and off the floor, in a jumping manner. With the legs fully extended, the feet will go a few inches (or more) off the floor. Descend and control your landing, and descend further into the squat position again for another rep. When you land, immediately go for another jump Repeat as many times as you can. Tips on Jump Squats Do not go exploding into a squat. Warm up, get your body in the right form and then do the exercise. Do not choose an extra-hard surface for the exercise: choose a flat surface, but not a concrete hard one. Do not overdo it however you may like it. You will not benefit from adding any weights to this exercise: take it easy and do it modestly.
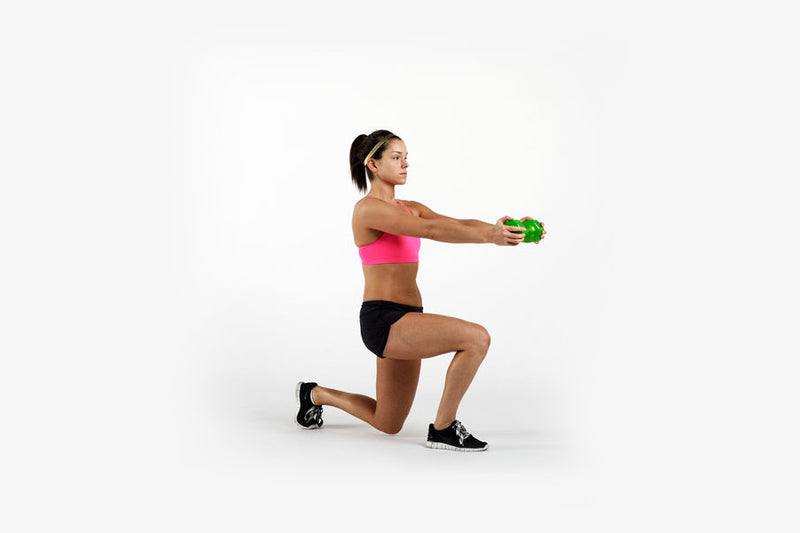
Exercise Description Main Target Muscles Hamstrings, Glutes, and Hip Flexors. Secondary Target Muscles Core, Legs and Obliques Workout Type Strength Gym Gear Dumbbell Fitness Level Beginner Compound/Isolated Compound Power Move Push Target Muscle: Hamstrings, Glutes, and Hip Flexors Alternating Lunge with a Twist Overview Alternating lunge twists can sound to be a scary workout, but it is not that difficult. This is a variation of the basic lunge workout, where instead of getting back up instantly, you twist to your side and then get back up. When performed consistently, this workout can help you strengthen your glutes, hamstrings, and calf muscles effectively. This workout can be easily intensified from a beginner to an intermediate level by adding in heavier dumbbells and increasing the reps of your lunges. You can also try and lunge with smaller steps and wider steps to increase the variation. How to Do It Stand up straight with feet shoulder-width apart Hold a single dumbbell by its sides from both hands, pointed straight ahead. Engaging your core, take a large step forward with your right leg Maintain this lunge position, ensuring the knees of either leg are not touching the floor Twist to your right side and then return your hands in front of you, keeping your hands fully extended. Bring back your right leg to the starting position Now take the left foot ahead and twist to your left side Alternate your legs between the workouts to complete the exercise. Tips for Alternating Lunges with a Twist Always keep your feet straight and not turned either way Keep your hands extended in front of you at all times Keep your back straight and do not lean forward or backward Make sure your knees don’t cross your toes when lunging Keep your heels slightly lifted at all times so you can bounce back from the lunge easily.
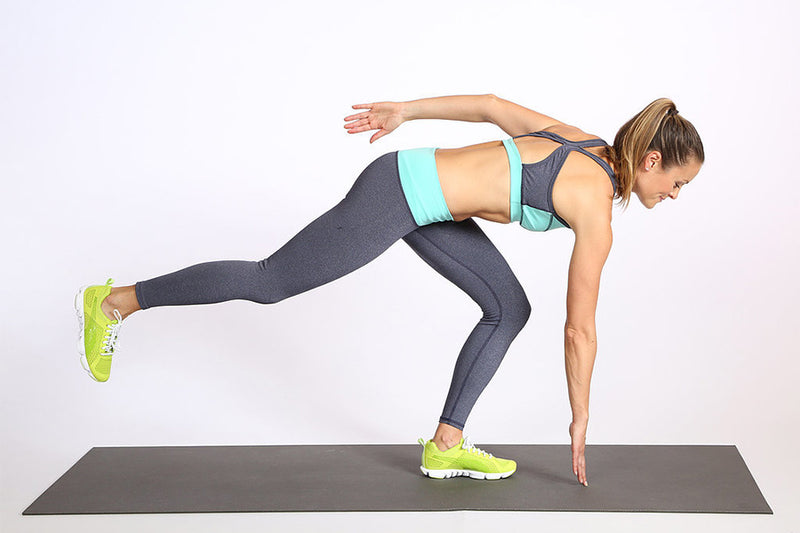
Exercise Description Main Target Muscles Glute Max, Quads, Hamstrings. Secondary Target Muscles Front Shoulders, Lats (back), Lower Back, Neck Flexors Workout Type Strength Gym Gear Dumbbell (Optional) Fitness Level Intermediate Compound/Isolated Compound Power Move Balancing Target Muscle Group: Glute Max, Quads, Hamstrings Single Leg Touchdown Overview Single leg touchdown is a beginner to intermediate level exercise that targets your glutes, quads, and hamstrings. Apart from the core and lower body, a single-leg touchdown is a great workout that helps you improve your body balance, as it requires you to stand on one foot. Even though it is a simple workout, adding heavier dumbbells will allow you to challenge your strength and balance. How to Do It Start by standing with your feet slightly open. Lift your left leg a little and slightly bend the right leg Engaging your core, lean forward, and touch your right leg toes with your fingers Maintain your left leg, spine, and neck in a straight line Slowly return to your position, and repeat the workout Perform all your reps on one leg before moving on the other Tips for Single-Leg Touchdowns Keep your body aligned and well balanced when leaning forward Perform the exercise with controlled movements Intensify the workout by adding in dumbbells and increasing the reps Always make sure to keep your feet tightly grounded to avoid tripping Do not try to do more reps quickly. A slow and focused workout goes a long way than a quick and unfocused workout.

Exercise Description Main Target Muscles Hamstrings Secondary Target Muscles Glutes, Obliques, Abs, Spine, Legs Workout Type Strength Gym Gear Dumbbell Fitness Level Intermediate Compound/Isolated Compound Power Move Pull Target Muscle Group: Glutes and Hamstrings Single Leg Deadlift Overview Single leg deadlift is an intermediate to advanced level workout done using a dumbbell or a barbell, depending on the individual’s fitness level. This workout is a variation of the conventional deadlift. Here the weights are lifted in both hands while the body is balanced upon one leg at a time. This exercise helps you target your glutes and hamstrings simultaneously and help you build a firmer lower body. Furthermore, the individual can target various other muscles such as the core and spinal muscles in this workout and enhance body stability. How to Do It Stand up straight with feet opened hip-width apart and hands placed in front of you. Grab the dumbbells with an overhand grip, i.e., palms facing inwards Balance your body on the left leg and bend your torso forward Once you’re bent forward, the weights should not be touching the ground, while your right leg should be raised and aligned with your back. Slowly lower down your leg to complete one rep Perform all reps on one leg before moving on to the other leg Single Leg Deadlift Tips Perform the workout in a controlled movement and don’t let the hands hang loose Keep your feet grounded on the floor firmly to avoid tripping. Stop immediately if you feel too much pain in your spine. Start with lighter weights and gradually move to heavier weights. Focus on the workout and make a mind-muscle connection to control the movements better and engage your muscles.
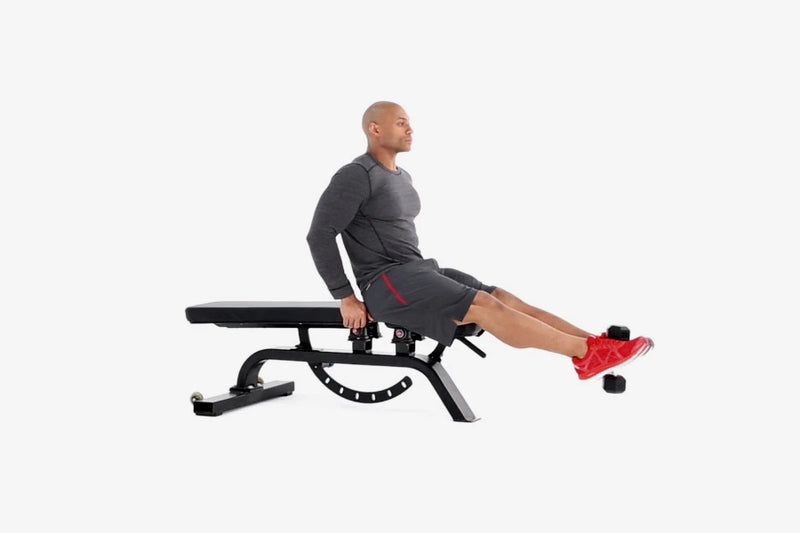
Exercise Description Main Target Muscles Quads Secondary Target Muscles None Workout Type Strength Gym Gear Dumbbell Fitness Level Beginner Compound/Isolated Isolated Power Move Push Target Muscle: Quads Leg Extensions Overview A leg extension is an isolated form of exercise that focuses on the quads primarily. It’s important to note that leg extensions can be pretty hard on the knees so if you already suffer from a knee issue, it would be best to practice other exercises to target quads. It strengthens your quadriceps which are the front of your upper legs. This strength training exercise can be done on a leg extension machine or with a dumbbell at home. How to Do It Choose the required weight of the dumbbell. Adjust the seat, sit down, and position the dumbbell on both your feet equally. Extend your legs and flex your quadriceps. After your legs have locked out, reverse to complete the rep. Lower back to the starting position. Leg Extension Tips The dumbbell should be in line with your knees completely. Make sure you do not put excessive weight on your legs due to the lack of hamstrings contraction which can put your knee at the risk of injury. Keep your toes pointed.
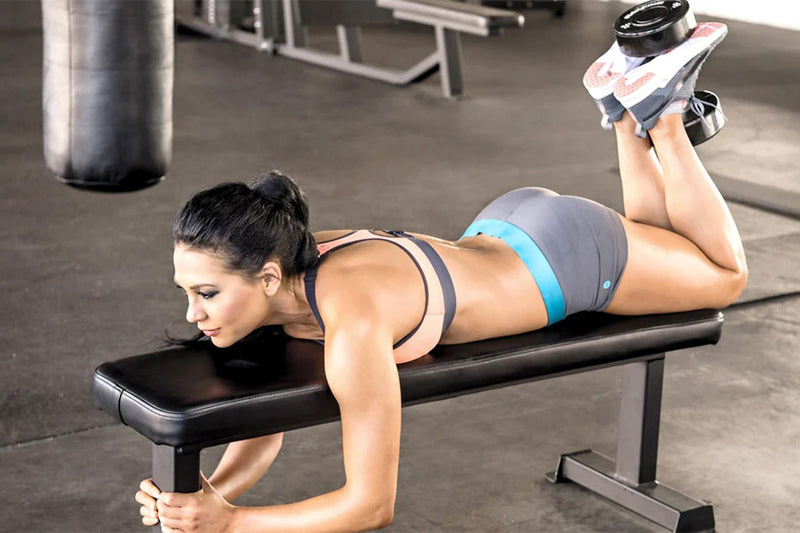
Exercise Description Main Target Muscles Hamstrings Secondary Target Muscles None Workout Type Strength Gym Gear Dumbbell Fitness Level Intermediate Compound/Isolated Isolated Power Move Pull Target Muscle Group: Hamstrings Dumbbell Hamstring Curl Overview Dumbbell hamstring curl directly focuses on your hamstrings, building power and flexibility in your legs. If performed with the correct form and technique, leg curls hold the ability to enhance the overall strength of your leg. It mitigates the risk of a knee injury, improves mobility, and promotes muscle growth. You can perform this exercise in an isolated manner on the machine or increase the intensity by adding dumbbells to it. How to do it To prepare for dumbbell hamstring curls, elevate a flat bench on a step or block to prepare for dumbbell hamstring curls. A flat, grounded bench can be used. However, elevating the bench allows for more motion and better recruitment of the hamstrings. Next, choose the correct dumbbell and place it on the ground at the lower end. Place your face down on the bench, and place your knees at the edge. Grab the dumbbell and place it on the ground with your feet. Secure it between your arches. For stability, your legs should be extended fully and you should wrap your arms around the bench. This is the starting position. Slowly lift the dumbbell towards your buttocks by bending at the knees. The dumbbell should be raised as high as possible, but not beyond 90 degrees. Take a moment to pause, then slowly lower the dumbbell back to its starting position. Repeat for desired reps. Exercise Tips Begin the exercise with a lightweight. Throughout the exercise, you will need to keep your upper body and legs still. A too heavy dumbbell may cause injury by causing your body to swing or jerk. If you have trouble lifting the dumbbell from the ground, a partner can place it between your feet. Before you begin the movement, make sure the dumbbell is secure between your feet. You should focus on lifting the weight using your hamstrings and using a full-range motion.
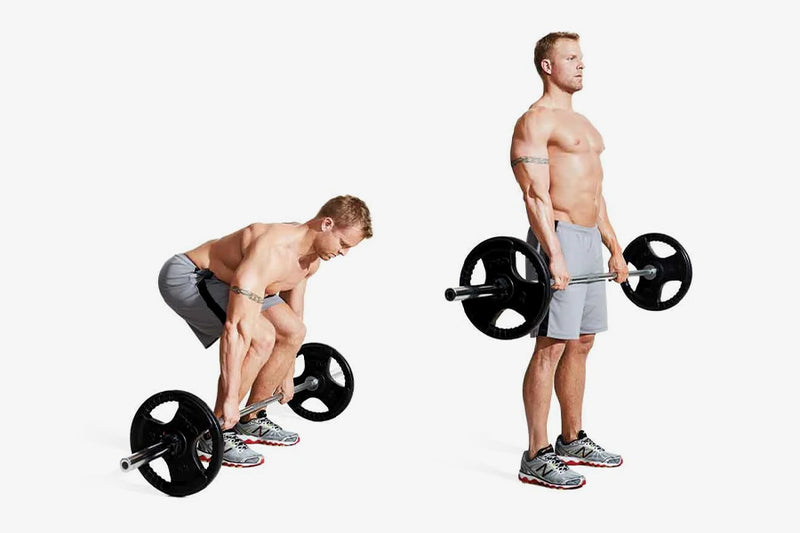
Exercise Description Main Target Muscles Hamstrings Secondary Target Muscles Abs, Forearms, Glutes, Lats, Lower Back, Traps, Upper Back Workout Type Strength Gym Gear Barbell Fitness Level Beginner Compound/Isolated Compound Power Move Hinge Target Muscle: Glutes Romanian Deadlift Overview The Romanian deadlift is just as powerful of an exercise as the name sounds. It is a variation of the conventional deadlift which primarily targets the glutes and hamstrings. The exercise ensures to increase the movement of all the muscles involved in this movement. It enhances movement patterns, minimizes the risk of injury, and improves strength and coordination. This is a highly beneficial exercise regardless of the training purpose. In order to increase your training frequency, try performing the Romanian deadlift on the leg day and another variation of deadlift on your pull days. Since the hip hinge is a critical movement, find a variation that aligns with your comfort level. How to Do It Stand at a hip-width distance and hold the bar over your shoelaces. Place a double overhand grip, slightly wider than your hip-width, and deadlift the bar to the position such that your hips and knees are locked out. Begin the Romanian deadlift by pushing the hips back and extending forward so that the bar is rightly below knee length. Make sure to drive through the whole leg through the movement. Return and repeat for the desired number of reps. Romanian Deadlift Tips The range of motion throughout the exercise is completely dependent upon the mobility and ability of the individual to the spine neutral. If you are picking up an excessively heavy weight, try to do it with the help of hook grips as you might encounter a slipping grip issue. Make sure to keep your neck neutral. Experiment with the neck positions to choose the best option. Make sure the bar doesn’t drift away from the body, It should stay as close to your legs as possible. Do not keep a false grip on the bar and hold it as tight as possible. Shift your weight to your heels and not to the ball of your feet. It should ideally remain equally distributed throughout your foot. Keep your elbows locked out. Make sure your elbow doesn’t break the neutral position as it can pose risk to your bicep.
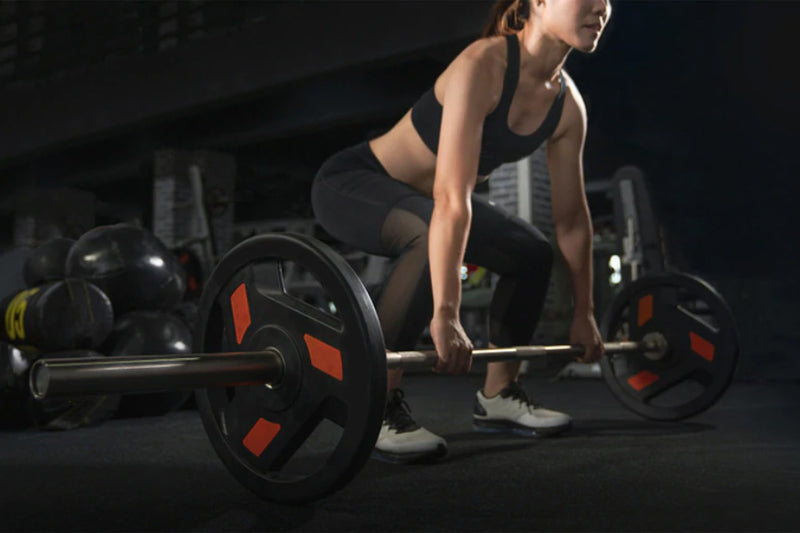
Exercise Description Main Target Muscles Hamstrings Secondary Target Muscles Abs, Adductors, Calves, Forearms, Glutes, Hamstrings, Lats, Lower Back, Middle Back, Quads, Traps, Upper Back Workout Type Strength Gym Gear Barbell Fitness Level Intermediate Compound/Isolated Compound Power Move Hinge Target Muscle: Hamstrings Conventional Deadlift Overview This is a highly popular exercise that is known to build overall body strength. You pick up dead weight off of the ground and lift it up till your hip level. It promotes muscle growth in the entire posterior chain which are the muscles on the back of your body. It is one of the three powerlifting exercises; squats, bench presses, and deadlifts. The exercise primarily works on your hamstrings and indirectly targets abs adductors, calves, glutes, lats, forearms, lower back, middle back, upper back, quads, and traps. The exercise requires you to be adequately skilled in order to pull this off with utmost ease. It should be a staple exercise to be included in every workout program, irrespective of the fitness goals. Some of its popular variations include: Stiff leg deadlift Romanian deadlift Dumbbell deadlift Smith machine deadlift How to Do It Assume a hip-width stance and place the bar above your shoelaces. Hinge forward and push your hips back so that your torso gets parallel to the floor. Pick up the bar with a double overhand grip and pull it slightly. Make sure your armpits are positioned above the bar and are squeezed. As you drop your hips, pull up the bar. Ensure that you’ve pulled the bar up in a straight line as you pick the bar up. Make sure to keep your weight divided in the whole foot equally. Once your hips are locked out, reverse your movement to go back to the starting position. Repeat for the desired number of reps. Deadlift Tips You have to make sure that the crease of your armpit lies over the bar and midfoot. It is important to note that a deadlift is not a squat, it is a hinge. Lowering yourself in a squat position will be severely disadvantageous for you. Squeeze your lats to prevent the bar from drifting away from your body. Experiment with your neck to check if you find it better in a neutral position or while looking straight ahead. Pick one that renders comfort. Angle your toes at your convenience. Experiment with different positions to check which suits you better. Drive through your whole foot when pulling the weight up. Do not flex your triceps and keep your elbows locked out. If you want to perform multiple repetitions of the exercise, pick a weight that is under your control and doesn’t overly fatigue you. Keep your knees positioned over your feet.
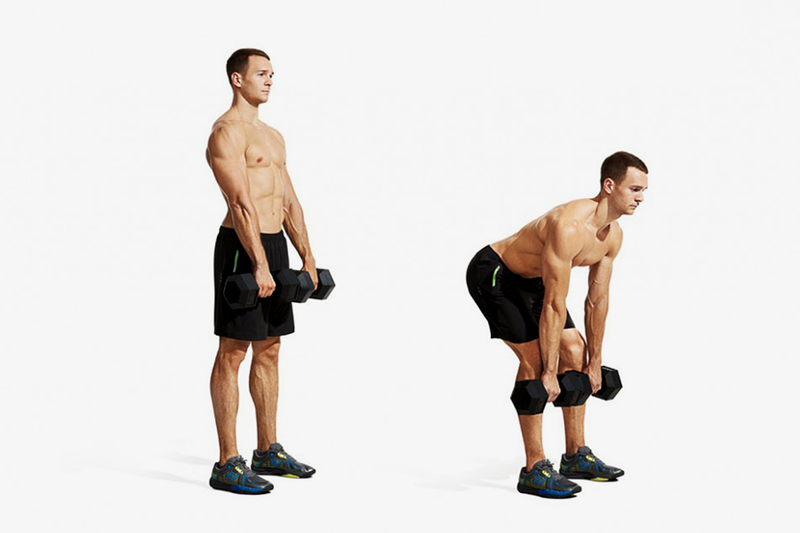
Exercise Description Main Target Muscles Hamstrings Secondary Target Muscles Glutes, Lower Back Workout Type Strength Gym Gear Dumbbell Fitness Level Beginner Compound/Isolated Compound Power Move Pull Target Muscle: Hamstrings Dumbbell Stiff Leg Deadlift Overview This strengthening exercise focuses on the hamstrings individually. The exercise activates the muscle fibers in the glutes and hamstrings and increases the muscle mass. Since it is an isolation exercise for your hamstrings, it requires a mind-muscle connection. You would experience instant enhancement in the connection after performing this exercise. The exercise improves your hip strength, endurance, and form, which enhances your athletic performance. Since it focuses on complete leg development, the engagement maximizes the power and size of hamstrings, calves, and glutes. This complements your overall fitness training aims. How to Do It Begin the exercise by choosing a pair of dumbbells and lift them by your sides. Stand up straight and bend your knees. Your feet should be placed at shoulder width. Now, you are at your starting position. Bend over to lower the dumbbells over your feet. Make sure that your back isn’t rounded, it should be as straight as possible. Keep your feet stationary. Continue lowering the dumbbells till your hamstrings allow you to. You would feel a stretch in your hamstrings at this point, but lower them till the point of your comfort. Squeeze the hamstrings and glutes and stand back straight. Repeat for the desired number of steps. Dumbbell Stiff Leg Deadlift Tips You are going to end up with a rounded back as soon as you look down. It’s just as simple as that. Keep looking forward. Keep your dumbbells as close to your body as possible, or else you will put unnecessary strain on your back. Keep your back, legs, and abdominal as tight as you can throughout the movement. Do not stop or rest at the bottom of the movement. Keep the weight of your body towards the heels and not to your toes. If you shift your weight at your toes, you’ll be risking your back terribly. Keep the rep timing slow in order to ensure your focus and control over the movement. Ensure to push your hips back when you bend over. You need the weight to focus on your hamstrings and not the lower back as it would increase your risk of injury. If you are a beginner, start with a mirror on your side or under the observation of a trainer to keep your technique and form on point.

Exercise Description Main Target Muscles Lats Secondary Target Muscles Abs, Biceps, Shoulders, Upper Back Workout Type Strength Gym Gear Bodyweight Fitness Level Beginner Compound/Isolated Compound Power Move Pull Target Muscle: Lats Chin-Ups Overview The chin-up is a great exercise for toning your arms, shoulders, and back muscles and improving your grip strength. In addition, chin-ups help improve your posture by correcting imbalances in your upper body muscles. As a result, you may find that you stand taller and have less pain in your back and neck. Furthermore, chin-ups are a great way to boost your mood and energy levels. The act of pulling your body up against gravity gives you a sense of accomplishment and provides a great upper body workout. As an added bonus, you can do chin-ups almost anywhere with a little bit of creativity. How to Do Start by standing up tall and grasp the bar. Next, tilt your head back and look at the ceiling. Make sure you feel a stretch in your neck. Take a deep breath, squeeze your glutes and abs hard, and brace your core. While contracting the lats, drive the elbows straight down to the floor. Pull your chin towards the bar until the lats are totally contracted, then slowly lower yourself back to the start position and do as many repetitions as directed. Chin Ups Tips Keep your core engaged, and avoid swinging your body as you pull yourself up. Use slow, controlled movements and focus on contracting your neck and chin area muscles. Drive through the elbows. Be sure your shoulders are back and down and not rounded. If the bar is high, keep your legs straightened out in front of your body. Do not hyperflex your lumbar spine by bracing your glutes and abs.

Exercise Description Target Muscle Group Lats Secondary Muscles Abs, Biceps, Shoulders, Upper Back Exercise Type Strength Equipment Required Bodyweight Experience Level Beginner Compound/Isolated Compound Force Type Pull Target Muscles: Lats Reverse Grip Chin-Up Overview The muscles targeted in a Reverse Grip Chin-Up are the lats (latissimus dorsi), which are the large, triangular muscles that run down the sides of your back. Additionally, this exercise also works the biceps and forearms. The latissimus dorsi are responsible for several key functions in the upper body, including shoulder extension, adduction, and internal rotation. Strong lats help to stabilize the shoulder joint and can prevent injuries such as rotator cuff tears. Additionally, they contribute to a well-rounded physique and can give you that coveted "V-shaped" torso. How to Do It? Here's a step-by-step guide on how to perform Reverse Grip Chin-Ups: Start by gripping the bar with your hands shoulder-width apart, using an overhand (palms facing away from you) grip. Hang from the bar with your arms extended and your feet off the ground. Use your back muscles to pull yourself up towards the bar, keeping your elbows close to your sides. Once your chin is over the bar, slowly lower yourself back to the starting position. Repeat for 8-12 reps. Reverse Grip Chin Ups Tips Use a smooth, controlled motion throughout the entire range of motion. Keep your elbows close to your sides and focus on using your back muscles to lift your body up. Don't swing your body up, as this can put unnecessary stress on your shoulders. If you find the exercise too difficult, try performing it with a band for assistance. If you want to increase the challenge, try adding weight by holding a dumbbell or plate between your feet.

Exercise Description Main Target Muscles Lats Secondary Target Muscles Abs, Biceps, Shoulders, Upper Back Workout Type Strength Gym Gear Band Fitness Level Beginner Compound/Isolated Compound Power Move Pull Target Muscle: Lats Overview of Lat Pulldown The lat pulldown is a great exercise for targeting the muscles in your back, specifically the latissimus dorsi. This muscle is responsible for pulling your arms down and back, which is why the lat pulldown is such an effective movement for developing strength and size in this area. In addition to targeting the lats, the lat pulldown also works the muscles in your shoulders and upper arms. By using a resistance band instead of a weight machine, you can also increase the range of motion and work your muscles through a greater range of motion. This not only helps to build muscle, but it can also improve your mobility and flexibility. How to Do It Attach the band to the cable machine and set the height so that the band is at about chest level. Step forward so that the band is taut and your arms are extended in front of you, perpendicular to your body. Bend your knees and place your shins on a towel or pad for comfort. Keeping your back straight, pull the band down to your sides, bringing your elbows back and squeezing your shoulder blades together. Return to the starting position and repeat for desired repetitions. Lat Pulldown Tips You should tone your abdominal muscles as you pull the bar towards your body. This will ensure that your spine doesn't arch too much. You must control the weights during each rep. As you pull, don't let your head jut forward. Similar to the previous step, ensure that the shoulder blade remains in contact with the rib cage. You don't need to lock the shoulder blade. Just move through the joint. Allow the shoulder to rotate internally and shrug slightly at its top. The movement will be reversed and the shoulder blade will be depressed before you pull the arm.

Exercise Description Main Target Muscles Lats Secondary Target Muscles Abs, Biceps, Shoulders, Upper Back Workout Type Strength Gym Gear Cable Fitness Level Beginner Compound/Isolated Compound Power Move Pull Target Muscle Group: Lats Overview of Lat Pull Down The lat pulldown is an exercise to strengthen the back muscles. Although the exercise focuses on the lats, it will also activate the middle and biceps. It is important to experiment with your back muscle group. Try different hand positions and angles to increase your back muscle growth. The lat pull-down can be done during your back exercises or upper body exercises, pull workouts, or full-body exercises. How To Do It? Attach a wide grip handle and a lat pulldown to your machine, and sit down. Start by grasping the handle in a pronated grip (double-overhand). Next, depress the shoulder blade while extending the shoulder. Move the handle towards your body so that your elbows meet your torso. Then, slowly lower it back to its original position. Repeat the process until you have reached the desired number of reps. Lat Pull Down Tips You should tone your abdominal muscles as you pull the bar towards your body. This will ensure that your spine doesn't arch too much. You must control the weights during each rep. As you pull, don't let your head protrude forward. Similar to the previous step, ensure that the shoulder blade remains in contact with the rib cage. You don't need to lock the shoulder blade. Just move through the joint. Allow the shoulder to rotate internally and shrug slightly at its top. The movement will be reversed and the shoulder blade will be depressed before you pull the arm.

Exercise Description Main Target Muscles Back, Lats, Deltoids Secondary Target Muscles Shoulder, Biceps Workout Type Strength Gym Gear Barbell Fitness Level Beginner Compound/Isolated Compound Power Move Pull Target Muscles: Lats, deltoid, shoulders, back Bent-over Barbell Row Overview The bent-over barbell row is your staple exercise if you want a wide, strong, and muscular back. It targets the entire upper back area and is relatively simple to perform. Whether you are powerlifting or just muscle building, a barbell row is necessary for you. It increases strength and muscle mass simultaneously. How to Do It? Start by standing and holding the bar with a double overhand grip. Bend forward until your upper body is parallel to the floor. Now start the movement by pushing the elbows behind the body, retracting the shoulder blades. Pull the bar towards your lower abdomen, and then slowly lower it to the starting position. Repeat for the desired number of reps. Tips on Bent-Over Barbell Row Do not try to complete it quickly: this exercise is all about control. Do not jerk your head excessively as you lift: this can be injurious. Do not arch too much as you pull the bar towards your abdomen.

Exercise Description Main Target Muscles Lats, Trapezius, Shoulder Secondary Target Muscles Abs Workout Type Strength Gym Gear Dumbbell Fitness Level Beginner Compound/Isolated Compound Power Move Pull Target Muscles: Lats, Trapezius, Deltoid, Rhomboids Dumbbell Row Overview The dumbbell row is great for building upper body strength. It develops strength in the upper and middle back muscles, and hence, your posture gets much better. Your torso does not slouch, and your shoulders are on the back. You need to bend forward by hinging your hips just like you do in a deadlift. The exercise is great to add to your upper body workouts or full-body workouts. How to Do it? Stand close to a bench with dumbbells right by your side. Hinge at your hip level and give a slight bend to your knees. Extend your arms and lift the weight. Bend your elbow and lift the weight until it reaches your chest. Your arms should be on the side rather than in the center. Return to the starting position. You can pull weight in each hand at the same time. You can also pull weight with one hand. Dumbbell Row Tips Your head and neck should be in one position. Your back should be straight throughout the exercise. Engage your core and glutes. Avoid locking your shoulder blades.

Exercise Description Main Target Muscles Lats, Biceps Secondary Target Muscles Deltoids, Core Workout Type Strength Training Gym Gear Pull-Up Bar Fitness Level Intermediate Compound/Isolated Compound Power Move Pull Target Muscles: Triceps, Lats, Deltoids, Core Pull-Ups Overview Pull-ups are hands down the best exercise for training your back and upper body muscles. The exercise effectively tones your arms and gives them a defined look. With the help of a pull-up bar, you can even do the exercise in the comfort of your home. While doing pull-ups, you can get an idea about your upper body strength. Pull-ups are a bodyweight exercise that uses your weight to add resistance. It works multiple muscle groups to pull the body, and so it is included in the list of compound exercises. Pull-ups can be a real challenge for beginners, so starting slow with the exercise is best. How to Do It Stand under a pull-up bar and hold with a strong overhand grip. Your hands should be a little further from shoulder-width apart. Hang with the bar with your arms completely extended. Fold your legs if they still touch the ground. Hold the movement for at least ten seconds. Now bend your elbows, keep your core engaged and shoulders back, and pull your body upwards. Move slowly until your chin is above the bar. Gradually lower yourself and keep breathing. Pull-Ups Tips Invest in a quality pull-up bar to avoid any harm. Ensure that it does not move with your weight. Start slow and increase the reps gradually. Your body should not be in a straight line at the top of the movement. Give a slight arch to your back and keep your shoulders at the back to target your back.

Exercise Description Main Target Muscles Core Secondary Target Muscles Lower Back Workout Type Strength Gym Gear Bodyweight Fitness Level Beginner Compound/Isolated Isolated Power Move Static Target Muscle: Core Simple Plank Overview Planks are one of the most well-known exercises in any fitness routine. It's a fantastic method to improve your posture, balance, body alignment, and core strength while also improving your general health. There are several variations to the exercise that you can try to increase the intensity and add more challenge to your workout such as: Side planks High Plank to push up Reverse Plank Plank with side dips How to Do It Get down on your all fours and extend your legs backward. Kick your body up on your toes. Now your body weight is shifted on your forearms and toes. Make sure your elbows are placed directly under your shoulders. You can interlace your fingers or keep your palms facing down on the ground. Keep facing forward and hold the position for 30 seconds to 1 minute. Repeat for the desired number of reps. Simple Plank Tips Make sure your elbows are under your shoulders. Do not sag your hips or hike them in the air. Ensure your body is in a straight line from your head to your toes. Keep your core embraced throughout the exercise. Do not let your back round up.

Exercise Description Main Target Muscles Middle Back Secondary Target Muscles Biceps, Forearms, Glutes, Hamstrings, Quads, Shoulders Workout Type Strength Gym Gear Cable Machine, V Bar Fitness Level Intermediate Compound/Isolated Compound Power Move Pull Target Muscles: Middle Back Cable Squat to Underhand Row Overview It's an exercise machine that targets the middle back, while to some extent, it focuses on the biceps, forearms, glutes, hamstrings, quads and shoulders. To perform this workout, you will need a cable machine and v bar. This workout is for those with an intermediate level of fitness and gym experience. You can learn how to do it through some instructions and tips. How to Do It? Firstly, hook a v-bar handle up to the cable machine and place the handle at a notch above waist height. Hold the handle with both hands and pull it out so that the cable is taught. Bend at the knees with your arms extended and squat down till your knees make 90-degree angles. As you stand back up, pull the v-bar handle to your chest. Pinch your shoulder blades together. Squat back down and extend your arms back out as you do. This completes one rep. Now repeat as necessary. Cable Squat to Underhand Row Tips While you perform the workout, make sure your back is straight. Hold the cable handle tightly. Before you return the handles to starting position, tighten your back muscles.

Exercise Description Main Target Muscles Upper Back Secondary Target Muscles Biceps, Lats, Shoulders Workout Type Strength Gym Gear Band Fitness Level Beginner Compound/Isolated Compound Power Move Pull Target Muscle: Upper Back Seated Neutral Grip Band Rows Overview Seated rows are a great way to work the muscles in your back, and they can be done with or without weights. However, many people don't realize that resistance bands can also be used for seated rows. Using a resistance band offers a number of benefits over traditional weights. First, resistance bands are low-impact, so they're easy on your joints. Second, they're portable, so you can do them anywhere. And third, they provide a constant level of resistance, which helps to build muscle more effectively. If you're looking for a new way to work your back muscles, try doing seated rows with a resistance band. You may be surprised at how effective they are. How to Do It To set up for the exercise, start by sitting on the floor with your legs extended straight in front of you. Wrap the resistance band around your feet and hold the ends in each hand. Sit up tall, keeping your shoulders down and back and your core engaged. From this position, exhale as you row the band back, keeping your elbows close to your sides. You should feel your back muscles working as you do this. Inhale as you return to the starting position. Seated Neutral Grip Band Rows Tips You can also try this exercise with one arm at a time to focus on each side of your back evenly Be sure to keep your torso stable throughout the exercise and avoid rounding your back.

Exercise Description Main Target Muscles Upper Back Secondary Target Muscles Biceps, Lats Workout Type Strength Training Gym Gear Machine Fitness Level Beginner Compound/Isolated Compound Power Move Pull Target Muscle: Upper Back Machine Row Overview This is a simple yet challenging workout that can provide a number of benefits for both the mind and body. Machine row is an excellent way to build strength and muscle mass. In addition, it can help to improve posture and flexibility. Additionally, machine row is a low-impact exercise that is easy on the joints, making it ideal for those with joint problems or injuries. And because machine row can be done at your own pace, it’s perfect for beginners or those looking for a more relaxed workout. How to Do Sit in a rowing machine with your feet shoulder-width apart, and your knees bent at 90 degrees. Grip the handles of the rowing machine with your hands and pull them towards your chest, keeping your elbows close to your body. Slowly pull the handles as far back as you can Squeeze the shoulder blades to return to the starting position and repeat. Exercise Tips Use a lightweight at first so that you can get used to the motion. As you get stronger, you can increase your weight. Keep your back straight and avoid rounding your shoulders. Squeeze your shoulder blades tight at the top of the exercise. Exhale as you pull the handles back and inhale as you return to the starting position.

Exercise Description Main Target Muscles Upper Back Secondary Target Muscles Biceps, Lats Workout Type Strength training Gym Gear Bodyweight Fitness Level Beginner Compound/Isolated Isolated Power Move Push Targeted Muscles: Upper Back, Biceps, Lats Inverted Row Overview The inverted row is also known as a horizontal pull-up. It is a multi-joint upper-body exercise with a closed kinetic chain that can strengthen an athlete's shoulder girdle. It offers spine stability and generates high forces during pulling activities such as rope climbing, rock climbing, gymnastics, rowing, and swimming. The inverted row is a fantastic back workout for people of all fitness levels. It's very beneficial for beginners who can't do pull-ups. There are more accessible alternatives that will meet your fitness level, even if you're a beginner without the strength to complete the traditional inverted row technique. How to Do The inverted row is a wonderful exercise for increasing upper back depth. Place a level bench in front of the smith machine and place it lengthwise. Set the smith machine bar's position to roughly 4 feet off the ground. Align yourself on the seat with your heels on it and your hands somewhat wider than shoulder width. Upright your spine. This is where you'll begin. Pull in your upper body to the bar level while keeping your body straight. Return to the starting position after a brief pause. Rep until you've reached your desired number of reps. Inverted Row Tips Position yourself so that the bar reaches your centre chest when you pull up. The bar should not be raised or lowered any further. Maintain a straight posture and avoid sagging in the middle of your body. Add some weight plates to your body to make it more challenging!

Exercise Description Main Target Muscles Upper Back Secondary Target Muscles Lower Back, Biceps, Abs, Lats,Shoulders Force Type Pull Workout Type Strength training Gym Gear Landmine Fitness Level Beginner Compound/Isolated Compound Targeted Muscles: Upper back, Lower back, Abs, Biceps, Shoulders, Lats Meadows Row Overview The meadows row is a unilateral landmine workout that focuses on the back muscles. The grassy row also tests one's grip while indirectly targeting the bicep muscles. Meadows Row is named after John Meadows, the movement's popularizer. It's a great way to isolate each side of your back and develop a symmetrical physique and quality strength. How to Do It? Stand straight and secure a handle at chest level to a cable stack. Grip the handle to your chest, having feet wide open (shoulder-width apart) in an athletic base position. Squeeze the handle horizontally to extend as you exhale. Go back to the initial position for fulfilling desired reps. Meadows Row Tips Stand straight and secure a handle at chest level to a cable stack. Grip the handle to your chest, having feet wide open (shoulder-width apart) in an athletic base position. Squeeze the handle horizontally to extend as you exhale. Go back to the initial position for fulfilling desired reps.

Exercise Description Main Target Muscles Trapezius Secondary Target Muscles Neck Workout Type Strength Gym Gear Barbell Fitness Level Advanced Compound/Isolated Isolation Power Move Pull Target Muscle: Trapezius Barbell Shrugs Overview Barbell shrugs are a great exercise for training your upper body. The exercise also works to develop your upper body strength. Including the exercise in your upper body routine or a full-body workout is great. It is necessary to learn the technique properly before starting with the exercise. How to Do It Set the bar on the rack above knee height. Grip the bar with an overhand grip. Your hands should be slightly wider than shoulder-width. Your back should be straight and chest up, stand straight and move your hips forward. Your feet should be slightly wider than shoulder-width, and you should point your toes forward. Hinge at your hips level and do not pinch your shoulder blades. Keep them in a neutral position. Bend your hips and knees slightly, do not overdo them. Lift the weight and shrug your shoulders up. Squeeze your traps at this point. Lower the bar slowly and in a controlled manner. Lower it until you feel a stretch in your traps. Barbell Shrugs Tips Start with a weight that feels comfortable to you. Shrug as high as you can to maximize the contraction. Avoid rolling your shoulders forward or backward.

Exercise Description Main Target Muscles Upper Back Secondary Target Muscles Abs, Biceps, Lats, Shoulders Workout Type Strength Gym Gear Dumbbell Fitness Level Beginner Compound/Isolated Compound Power Move Pull Target Muscle: Upper back One Arm Dumbbell Row Overview This is a variation of dumbbell row that is an exceptional way to build your strength and muscles. In order to build maximum strength in your back, try to experiment with different angles and positions for a fair amount of variation. A well-executed exercise wouldn’t only build a stronger back, but would also work on your arms, shoulders, and core. This exercise would help you experience less discomfort in your day-to-day activities and inculcate more fluidity in your routine. Other variations of the exercise include: Barbell row Bent over dumbbell row Bent over barbell row How to Do It Stand, holding the dumbbell in one hand. Slightly hinge forward so that your torso is parallel to the floor. Now pull the dumbbell towards your body so that the elbow goes behind the body. Now lower the dumbbell back to the initial position. Repeat for the desired number of reps on each hand. One Arm Dumbbell Tips You can either look forward or have a packed neck position when performing this exercise. Experiment with the positions to see which one works best for you. Make sure you don’t arch excessively through your spine. For that try to keep your abdominals braced. Ensure to keep your dumbbells controlled through the entirety of the rep. Your shoulder blades should move on your rib cage. Don’t block your shoulder blade down completely.

Exercise Description Main Target Muscles Deltoids Secondary Target Muscles Shoulders Workout Type Strength Gym Gear Dumbbells Fitness Level Intermediate Compound/Isolated Isolation Power Move Pull Target Muscle: Deltoid Rear Lateral Raise Overview Rear lateral raise also known as bent-over lateral raise is an isolated exercise that targets the often forgotten, rear shoulder muscles alongside building as well as strengthening the muscles in your arms. It's a great way to build more muscles and increase muscle size in your arms and shoulders. It fixes your posture and increases functional strength. How to Do It Stand with your feet at hip-distance while bending your knees a little. Holding a dumbbell in each hand, stretch forward your spine, engage your core and bend forward at your hips. Position your body so that your torso is parallel to the ground. Your arms will be hanging down with a dumbbell in each. Activate your shoulder blades while raising the weights to your sides. Stop when your elbows reach shoulder height. Slowly and steadily, lower the dumbbells back to the starting position. Tips on Rear Lateral Raise Keep a slight bend in your arms throughout the movement. Use weights that let you perform the exercise with proper form and posture. Focus on doing more reps for rear deltoids than lifting heavy weights. Bend your knees: it helps maintain good posture and prevents hyperextension and injury.

Exercise Description Main Target Muscles Upperback Secondary Target Muscles Abs, Biceps, Lats, Lower Back, Shoulders, Traps Workout Type Strength Gym Gear Barbell Fitness Level Beginner Compound/Isolated Compound Power Move Pull Target Muscle: Upper Back T-Bar Rows Overview T-Bar rows is the exercise that gives you a chunky, muscled up, thick back. It doesn't work to broaden it, but surely helps to make it stronger by adding more muscle and beefing up the existing ones. With a T-bar, you can lift with a neutral grip which is the strongest grip ever. The neutral grip makes the T-bar win over all of its variations, but you will definitely need a gym that has a T-bar to perform this exercise. How to Do It If your gym doesn’t have a landmine unit, follow the instructions below. Place the end of an empty barbell into the corner of a room. Put a heavy dumbbell or some weight plates on it to secure it. Load the opposite end of the bar with plates and straddle it. Bend over at the hips until your torso is making a 45-degree angle to the floor with arms extended. Hook a V-grip handle (the kind you see at a cable station) under the bar and hold with both hands. Keeping your lower back in its natural arch, squeeze your shoulder blades together and pull the bar until the plates touch your chest. Lower to the original position slowly and repeat. Tips on T-Bar Rows Keeping the back straight will do the trick. Do not think too much about pulling the weight- just guide your elbows upwards to take the pressure of pulling off your brain.

Exercise Description Main Target Muscles Upper Back Secondary Target Muscles Biceps, Lats, Lower Back, Shoulders Abs, Traps Workout Type Strength Gym Gear Dumbbell Fitness Level Beginner Compound/Isolated Compound Power Move Pull Target Muscle Group: Upper Back Overview of Bent-Over Dumbbell Row The dumbbell row, a variation on the barbell bent-over row which is an exercise that builds muscle and strength. You can vary the position of your back muscles. To maximize the growth of your back muscles, try different angles and hand positions. You can perform the dumbbell row during your back exercises, upper-body workouts, pull workouts, and full-body workouts. How To Do It? Stand while maintaining a neutral grip on the dumbbells in your hands. Keep your head up until your torso is parallel to the floor or slightly higher. Let the dumbbells hang at arm's length, keeping your shoulder blades squeezed together and your core engaged. From here, bend your elbows and row the dumbbells up to your sides, leading with your elbows. Squeeze your shoulder blades together at the top of the movement, then lower the dumbbells back down to the starting position. Continue repeating until you reach the desired number. Exercise Tips Try different head positions to find the one that works best for you. To avoid arching your spine, keep your abdominals toned as you pull the dumbbells in your body. Do not allow momentum to dictate your movements. Instead, control dumbbells for the entire rep. A false grip is a technique that allows you to hold the dumbbell in your hand while you are bending your back. Do not wrap your thumb around the dumbbell. Do not allow your head to protrude forward when you pull. Also, make sure the shoulder blade is free to move on the rib cage. Do not lock your shoulder blade. Instead, move it through the glenohumeral joint.

Exercise Description Main Target Muscles Upper Back Secondary Target Muscles Biceps, Lats, Shoulders Workout Type Strength Gym Gear Cable Fitness Level Beginner Compound/Isolated Compound Power Move Pull Target Muscle: Upper Back Seated Cable Row Overview This strengthening exercise focuses on the upper back as the primary target muscle. Other than building glutes, it also indirectly targets biceps, lats, and shoulders. The exercise activates multiple muscles in your upper body building exemplary strength. It eliminates stress on your lower back so that you are working on the upper body in isolation. It helps you achieve a better posture, build better back definition, and increase core stability. This is a safe and effective exercise to try and to be included in your everyday routine. How to Do It Sit down on the bench with your knees bent and grab the cable attachment. With your knees bent and torso straight, extend your hands to grab the handle. Your lower back should not be curled over as you reach forward. Keep your core engaged and pull the handle and weight back toward your lower abdomen while avoiding using too much momentum. Target the middle to upper back by keeping your back straight and squeezing your shoulder blades together as you row your chest out. Return the handle forward under tension to full stretch while keeping the back straight and flexed at the hips. Do the desired number of repetitions. Barbell Hip Thrust Tips Your back must remain straight through the entirety of your workout. Keep your torso as still as possible. Make sure your shoulders do not hunch over your extended arms. Do not lean forward to swing the weight, use your upper body muscles instead.

Exercise Description Target Muscle Group Sternocleidomastoid (SCM) Secondary Muscles Scalene Muscles Exercise Type Strength Equipment Required Neck Harness With Weight Plates Experience Level Beginner Compound/Isolated Isolated Force Type Pull Target Muscles: Sternocleidomastoid Neck Flexion Overview Our neck muscles play an important role in supporting our heads and helping us maintain good posture. When these muscles are weak, we are more likely to slump forward, which can lead to back pain and other health problems. Exercising our neck muscles regularly can help to keep them strong and healthy. The muscles which work for neck flexion are the sternocleidomastoid, the scalenes, and the pectoralis minor. All of these muscles attach to the base of the skull and originate along the front of the ribcage. They work together to pull your head backward and forward. How to Do It Stand and straighten your spine. Bend your head downwards. Now, try to touch your chin on your chest without opening your mouth. Return to the starting position. Neck Flexion Tips When doing any type of neck flexion exercise, be sure to take precautions to avoid injuring your neck. Make sure that you are using a stable surface to support your head and do not strain too hard or you could cause yourself an injury. If you experience any pain or discomfort while doing these exercises, stop immediately and consult a doctor.

Exercise Description Target Muscle Group Sternocleidomastoid (SCM) Secondary Muscles Scalene Muscles Exercise Type Strength Equipment Required Neck Harness With Weight Plates Experience Level Beginner Compound/Isolated Isolated Force Type Pull Target Muscles: Sternocleidomastoid Neck Lateral Flexion: Overview The muscles that do neck lateral flexion work are the sternocleidomastoid and the scalenes. These muscles help to flex the neck to the side. They also help to rotate the head to the opposite side. These muscles are important for everyday activities such as looking over your shoulder while driving or turning your head to check on a baby in a crib. Strengthening these muscles can help to prevent neck pain and improve overall function. How to Do It? Stand up tall and straight Tilt your head sideways Try and touch the ears to the shoulder Make sure you keep your shoulders straight throughout Return to the original position and repeat on the other side. Tips for Neck Lateral Flexion First, make sure that you are using the proper form. Be sure to keep your back straight and tuck your chin in so that you are looking down at your chest. Do not allow your head to tilt backwards or forwards. Second, start with a lightweight. Heavier weights can put unnecessary stress on the muscles and joints. Third, always listen to your body. If you feel any pain or discomfort, stop the exercise and consult a physician. Fourth, be sure to warm up before performing any neck exercises. This will help to loosen the muscles and reduce the risk of injury. Fifth, avoid performing neck exercises if you have a recent neck injury. Sixth, be patient. It may take some time to see results.

Exercise Description Main Target Muscles Obliques Secondary Target Muscles Core, Shoulder, Back Workout Type Strength Gym Gear Kettlebell, Dumbbell Fitness Level Beginner Compound/Isolated Compound Power Move Rotational Target Muscles: Obliques and Core Kettlebell Russian Twists Overview The Russian twist is a common exercise that takes a strong place in ab workouts. It targets the oblique and gives your abs a defined shape. If you are looking for any workout move to get the perfect curves, you know what to rely on. The exercise also plays a key role in working on your core. It develops your abdominals' muscles, strengthens your core muscles, and improves your posture. You can add more challenges to exercise with the help of a kettlebell or a dumbbell. How to Do It Start by sitting on the floor, bending your knees and feet flat on the ground. Lean back so that your upper torso is at an angle of 45-degree with the floor. Keep your back straight. Position your hands in front of your chest and engage your core. If you use a dumbbell or kettlebell, hold it at the center. Lift your feet off the ground. Rotate your arms to one side. Go all out and move as far as you can. Do the same on the opposite side. Kettlebell Russian Twists Tips Lift your feet off the ground to make exercise more challenging. Hold the kettlebell to work on your oblique. Make sure that you do not drop the weight at any point. Your back and shoulders should be in one place throughout the exercise.

Exercise Description Target Muscle Group Obliques Secondary Muscles Abs, Glutes, Lower Back and Shoulders Exercise Type Strength Equipment Required Bodyweight Experience Level Beginner Compound/Isolated Compound Force Type Static Target Muscles: Obliques 3-Way Plank Over View The 3-way plank is an advanced exercise that primarily targets obliques along with arms, shoulders, chest, core, and legs. It is a demanding exercise that requires not only strength but also stability and balance. The oblique muscles are the muscles that run along the sides of the abdomen and are responsible for trunk rotation. These muscles are important for stabilizing the spine, and they also play a role in many daily activities such as sitting up from lying down, bending to one side, and reaching overhead. Because the obliques are used in so many everyday movements, it is important to train them in order to prevent imbalances and injuries. Additionally, strong oblique muscles can help to improve posture and give the body a more toned appearance. How to do It? Begin in a push-up position, resting on your forearms with your feet close to one another. Your hips should be off the ground and your hands planted beneath your chin, forming a straight line from your shoulders to your feet. This is where you'll begin. As you reach one arm up to the ceiling and stack one foot on top of another in a side plank. Slowly rotate your toes, knees, and hips to one side. Slowly return to your beginning plank position before repeating on the other side. Tips for Performing 3-Way Plank When performing the 3-way plank, be sure to keep your core engaged throughout the entire exercise. It is also important to maintain good form by keeping your hips level and avoiding any arching in the lower back. If you feel any pain in your lower back, stop the exercise and consult a healthcare professional. Additionally, those with wrist problems or other injuries should avoid this exercise. If you are new to exercise, it may be best to start with a simpler plank variation before progressing to the 3-way plank.

Exercise Description Main Target Muscles Obliques Secondary Target Muscles Core Workout Type Strength Gym Gear Dumbbell Fitness Level Intermediate Compound/Isolated Compound Power Move Pull Target Muscles: Obliques Wood Chop Overview The wood chop is a type of exercise that helps to keep your core strong and stable, while also improving the flexibility in one's spine. This can lead not only ensure good posture but healthier overall health because it strengthens both upper body muscles as well lower half - resulting in improved balance! How to Do It Stand straight with your feet shoulder-width apart holding a dumbbell with both hands. Rotate your torso to the right and raise the dumbbell until it’s over the right shoulder (diagonally) Squat while rotating your torso to the left and bring the dumbbell diagonally across the body until it’s close to your left hip. Repeat and switch sides. Tips on Wood Chop Engage your core during the exercise. Your feet and knees should be pointing in the same direction. Keep your arms straight, and breathe out as you twist your upper body (torso).

Exercise Description Main Target Muscles Core Secondary Target Muscles Obliques Workout Type Cardio Gym Gear None Fitness Level Beginner Compound/Isolated Compound Power Move Jumping Target Muscles: Shoulder, Calves, Hamstring, Hip Flexors, Glutes, Quadriceps, Upper Back, Core Bunny Hops Overview Bunny hops are the best move to burn stubborn fat and target multiple muscle groups in the body. It improves the balance and stability of the muscles. You need to focus on the exercise completely, which helps develop a strong mind-muscle connection. Bunny hops are also a great exercise to include in your warm-up session. It is a bodyweight exercise that doesn’t need any specific equipment to target any muscle. The exercise improves your functional capacity and increases your mobility. It burns more calories and develops core strength and functional strength. How to Do It Come to a high plank position. Keeping your core engaged and body in one straight line, jump your legs towards your right. Bring them back to the starting position, i.e., the centre. Now jump to the left side. Increase the speed and alternate sides. Bunny Hops Tips Remember to engage your core throughout the exercise and focus on your breathing. Practice it while controlling the speed; increase the speed once you are familiar with the movement.

Exercise Description Main Target Muscles Obliques Secondary Target Muscles Core, shoulder, back Workout Type Strength Gym Gear Kettlebell, dumbbell Fitness Level Beginner Compound/Isolated Compound Power Move Rotational Target Muscles: Obliques and Core Russian Twists Overview The Russian twist is a common exercise that takes a strong place in ab workouts. It targets the oblique and gives your abs a defined shape. If you are looking for any workout move to get the perfect curves, you know what to rely on. The exercise also plays a key role in working your core. It develops your abdominals' muscles, strengthens your core muscles, and improves your posture. You can add more challenges to exercise with the help of a kettlebell or a dumbbell. How to Do It Start by sitting on the floor, bending your knees and feet flat on the ground. Lean back so that your upper torso is at an angle of 45-degree with the floor. Keep your back straight. Position your hands in front of your chest and engage your core. If you are using a dumbbell or kettlebell, hold it at the center. Lift your feet off the ground. Rotate your arms to one side. Go all out and move as far as you can. Do the same on the opposite side. Russian Twists Tips Lift your feet off the ground to make exercise more challenging. You can hold the weight to work on your oblique. Make sure that you do not drop the weight at any point. Your back and shoulders should be in one place throughout the exercise.

Exercise Description Main Target Muscles Obliques Secondary Target Muscles Abs Workout Type Strength Gym Gear Bodyweight Fitness Level Beginner Compound/Isolated Isolation Power Move Pull (bilateral) Target Muscles: Obliques Side Crunch Overview Side crunches, also known as oblique crunches, are your perfect moves for increasing core strength. They activate the abdominal muscles and obliques (the sides of your body). No equipment is required to do an abs workout — you can do it at home and at the gym. How to Do It Lie on your back, your knees bent, and your feet on the floor (like you're doing a sit-up). Keep your upper body straight while lowering your knees to one side. Your knees should be stacked on top of one another while your legs are still bent. Squeeze your sides, lift your shoulders while keeping your lower back on the floor. Switch sides to repeat. Tips on Side Crunch Maintain the proper posture for reaping the maximum benefit of exercise. Do not overdo this exercise: slow and steady wins the race when it comes to side crunches.

Exercise Description Main Target Muscles Core Secondary Target Muscles Quads and obliques Workout Type Strength Gym Gear Bodyweight Fitness Level Beginner Compound/Isolated Compound Power Move Pull Target Muscle: Core Bicycle Crunch Overview The bicycle crunch is a bodyweight exercise that engages the core muscles. With proper posture, bicycle crunches can increase core strength while adding a cardio element to your ab exercise routine. For a challenging variation, hold a medicine ball or a pair of dumbbells above your body during this core workout. How to Do It Lie flat on the ground with your face up, legs straight, with your feet on the floor. Your head and shoulders should be slightly raised off the ground. Place both of your hands behind your head but do not interlock your fingers. Engage your core with a neutral spine and pelvis The chin should remain tucked throughout the movement. Raise the knees upward: shins should be parallel to the floor. Engage your abs and curl the right side of your upper body off the floor to move your right elbow towards your left knee. Pause for a second at the end of the movement, squeezing your abs and sides. The left side of your upper body should remain stagnant with your right leg straight. Rotate the left side of your upper body to move your left elbow toward your right knee while simultaneously bringing the right side of your upper body and left leg back toward the floor. Repeat the desired number of reps. Tips on Bicycle Crunch Warm-up before exercising. Maintaining proper posture holds the key in this exercise.

Exercise Description Main Target Muscles Core Secondary Target Muscles None Workout Type Strength Gym Gear Decline Bench Fitness Level Beginner Compound/Isolated Isolated Power Move Pull Target Muscle Group: Core Twisting Bench Crunch Overview The decline twisting sit-up is an abdominal and oblique exercise that strengthens your core and builds muscle. It’s a great exercise for intermediate to advanced lifters with its moderate level challenge but high efficiency for the purpose. It is primarily a bodyweight exercise but you can increase the challenge with added free weights. It’s imperative to strengthen abs and obliques for your functional fitness. But no need to get too complex since the core does receive a lot of stimulation even during lower body compound movements. These twisting bench crunches are perfect for toning and building ideal abs. How To Do It Sit at the highest point on the decline bench and place your legs through the supportive padding/foam to hold yourself in place. Then lie down flat on the bench so that your head is lower than your legs. Place your hands lightly behind your head or cross your arms on your chest. Keep your head straight and core tight. Perform the sit-up and twist your torso to one side at the same time while exhaling. Hold for a couple of seconds to let the muscles feel the stretch. Slowly lower your body back down while inhaling. Repeat the exercise but twist to the other side this time. Repeat for the desired number of reps. Tips on Twisting Bench Crunch You can hold a plate near your chest for more resistance/challenge. Keep your head and neck straight at all times during the move. Place your hands anywhere as long as you can comfortably go through the exercise. But hands behind your head or crossed on your chest are the most common places for hand placement. This is a great core strengthening exercise which is important for balance and stabilisation

Build stronger, more sculpted legs with these 13 dumbbell workouts designed for every fitness level. This guide helps you target key lower-body muscles with effective, equipment-light exercises. Get ready to improve strength, balance, and endurance all from home or the gym.

Exercise Description Main Target Muscles Quads Secondary Target Muscles Glutes and Hamstrings Workout Type Strength Gym Gear Medicine Ball, Bench Fitness Level Beginner Compound/Isolated Compound Power Move Push Target Muscles: Quadriceps and Glutes Bench Step Up Overview This exercise targets the thighs and butts. It isolates the glutes and quads and can be an amazing addition to any type of workout routine. The equipment needed to perform this exercise is a medicine ball and a bench. The quads are the muscles present in front of the thighs, while the glutes serve as a connecting point between the back muscle and joints. The purpose of this exercise is to tone and strengthen your glutes and butts. How to Do It? Begin the exercise by placing a bench press in front of you. Stand in a position with your feet and shoulder width apart, holding a medicine ball in your hand. Now step up on the bench and stand straight by stretching your quads at the height of the exercise. Step back down and repeat as needed. Bench Step Ups Tips Place the bench on a plain surface so it doesn't lose balance. Step up carefully on the bench and stand straight with the distance between your legs.

Exercise Description Main Target Muscles Quads Secondary Target Muscles Calves, Glutes, Hamstrings, Groin, Hip Flexors, Outer Thighs Workout Type Strength Gym Gear None Fitness Level Intermediate Compound/Isolated Compound Power Move Push Target Muscles: Quads Frog Hops Overview This workout targets the quads and, to a lesser extent, the calves, glutes, hamstrings, groin, hip flexors and outer thighs. It's known as calisthenics and plyometrics exercise. Learning frog hop is easy and is designed for people with intermediate levels of fitness and exercise experience. You can learn this workout with the help of an instructor. How to Do It? Start by standing with your feet together and your arms at your sides. Then, squat down low and jump up into the air, bringing your knees up to your chest as you go. Try to land softly on your feet. Repeat the jump as many times as you can. Frog Hop Tips Make sure to be in an upright position before doing the squat. Bend, put a little pressure on your knees and land your feet slightly while you jump.

Exercise Description Main Target Muscles Quads Secondary Target Muscles Glutes, Hamstrings, Calves Workout Type Strength Gym Gear Box, Sturdy Bench, or Chair Fitness Level Beginner Compound/Isolated Compound Power Move Push Target Muscles: Quads, Glutes, Hamstrings, Calves Box Jumps Overview This move is best for those who are open to challenging workouts. The box jump is a plyometric move in which you must jump on a box from the floor. It targets your quads, glutes, hamstrings, and calves. These moves are for increasing the strength in your body. They help to increase your power and explosiveness. By doing box jumps, you'll gain more hops. In addition, this workout will help you burn more calories as well. How to Do It? Keep a box of short steps in front of you and stand with your shoulders and feet width apart. Slightly bend your knees, drop down and move your arms behind you. Now jump on the box with bent knees, allowing the arms to come before you. Jump back slightly onto the floor with knees bent. Repeat the procedure. Box Jump Tips Make sure the box you place in front of you is not too high in length. Bend your knees properly with arms out behind you. Jump carefully from floor to box and land your feet slightly on it. Avoid poor feet or knee alignment on landing.

Exercise Description Main Target Muscles Quads Secondary Target Muscles Glutes, Calves, Hamstring Workout Type Strength Gym Gear Kettlebell Fitness Level Beginner Compound/Isolated Compound Power Move Push Targeted Muscles: Quads, Glutes, Calves, Hamstring High Knees With Kettlebell Overview High knees are a fantastic aerobic exercise that you can do anywhere with a kettlebell. It is a fantastic exercise for enhancing the coordination and power of the lower body. It also puts a strain on your core stability because the movement requires you to use your abs to maintain your balance. Additionally, it's a fantastic method to raise your heart rate and get your legs going! How to Do It? Start with a standing position with your feet hip-width apart and a kettlebell in hand. Raise your right knee to hip height as you exhale while maintaining a strong core. Take a deep breath as you lower your right leg back to its starting position. Continue by using your left leg. Once you've reached the desired amount of repetitions, keep alternating legs. Tips Maintain a tall posture during the motion. As you raise your knees, try not to let them cave in. Make sure your arms move forward and backward in unison with your legs. You can keep your balance and increase movement effectiveness by doing this.

Exercise Description Main Target Muscles Quads Secondary Target Muscles Calves Workout Type Strength Gym Gear Dumbbells Fitness Level Intermediate/Advanced Compound/Isolated Isolation Power Move Push Targeted Muscles: Quads, Calves Walking Dumbbell Lunges Overview Walking lunges are part of our usual daily activities: most people may relate to the feeling. It resembles the wide steps you take when you walk. Walking dumbbell lunges are a variation of regular walking lunges and work every muscle in your lower body and bolster your core. They assist you in becoming more flexible while enhancing your balance and functional strength. Walking dumbbell lunges are under the category of strength workouts that feel effortless and natural while significantly assisting in muscular growth. How to Do It? Place your feet hip-width apart as you stand while holding dumbbells. Keep your shoulders pulled back, your chip straight up, your torso tall and engaged, and your core engaged. Look forward. Take a full stride forward and maintain it about two feet in front. You'll walk with a wide stride that comes naturally to you. You can support yourself by keeping your hands on your hips. Hold a straight, engaged posture. Jointly bend your knees, stopping just before the back knee reaches the floor. As you lower your body, breathe in. Put pressure on your back, knee, and foot to stand up. With each lunge, take a step forward while switching sides. If you notice that your equilibrium is off, stop and take a break. Get your bearings and carry on. Walking Dumbbell Lunges Tips Your balance and stability will suffer if you keep your feet too close together; instead, keep them hip-width apart. Longer strides are walking lunges, but if you go beyond, it won't be necessary, and you'll end up in an uncomfortable scenario. You won't need to rush to start gaining muscles because this will build them gradually.

Exercise Description Main Target Muscles Quadriceps Secondary Target Muscles Calves, Abs, Adductors, Glutes, Hamstrings, Shoulders, Traps, Upper Back Workout Type Strength Gym Gear Barbell Fitness Level Intermediate Compound/Isolated Compound Power Move Push Target Muscles: Quadriceps Barbell Reverse Lunge Overview Lunges with a barbell are a relatively underutilized lower body exercise. Although a barbell also works well, most athletes prefer to lunge with a pair of dumbbells or kettlebells. The goal is to support a bar on your back, much like when performing a squat. However, you must lunge forward and press yourself back to the starting position with your front leg rather than squatting back and forth. Using a barbell, you can train with additional weight and significantly increase the mechanical tension in your legs. Lunging is also advantageous and essential since it enhances balance and trains one leg at a time, lowering the possibility of muscular imbalances. You become more functional and athletic, improving your ability to handle daily duties and maintain safety when participating in sports. How to Do It? The barbell should be placed over a squat stand at collarbone height. Reach forward and spread your hands evenly across the bar as you stand in front. Your trapezius muscle should be pressed against the bar when you tuck your head under it. Choose whichever seems more secure and natural when holding your hands: close or wide. Put your feet in a straight line, tension your entire body, squeeze your abs, and inhale. Extend your knees to unrack the barbell to make room for lunges, and then take a few cautious steps back. Take another breath and place your feet at hip-width apart. Step your foot down on the ground as you lunge forward. Quickly lower yourself into a controlled lunge while maintaining a steady upper body and the posture of the barbell. Drop until your rear knee is only a few inches above the ground. In that position, your front knee should be at a 90-degree angle. Once you've reached the bottom position, hold it for a moment before pressing yourself up to the starting position by using your front quadricep. Near the peak, let out a breath. Re-align your feet, take a breath, and lunge forward while extending the opposite leg. Continually switch between left and right until the set is complete. Barbell Reverse Lunge Tips Always choose a load that enables you to train over your whole range of motion. As you lunge forward, lower yourself until your rear knee is virtually parallel to the floor and your front thigh is nearly there.

Exercise Description Main Target Muscles Quads Secondary Target Muscles Abs, Adductors, Calves, Glutes, Hamstrings, Shoulders, Traps, Upper Back Workout Type Strength Gym Gear Band Fitness Level Intermediate Compound/Isolated Compound Power Move Push Target Muscle: Quads Banded Bulgarian Split Squat Overview The Bulgarian split squat is a great exercise for building lower body strength. Unlike traditional squats, which work the large muscles of the legs, the Bulgarian split squat targets the smaller muscles of the hips and glutes. This makes it an ideal exercise for those who are looking to improve their leg definition. In addition, performing it with a resistance band adds extra resistance and challenges the muscles even further. By adding a resistance band, you can not only improve your strength but also your coordination and balance. As a result, the Bulgarian split squat is a great exercise for those who are looking to improve their overall fitness level. How to Do It? To do this exercise, you will need a resistance band and a sturdy chair or bench. First, position the band around your ankles. You can also place one end of the band under your front foot and hold the other end extended right above your head, in your palms. Next, place your left foot behind you on the chair or bench. Once you are in position, bend your knees and lower your body until your front thigh is parallel to the ground. Be sure to keep your chest up and your back straight throughout the movement. Finally, press through your front heel to return to the starting position. Complete 8-12 repetitions on each leg. Bulgarian Split Squat Tips The key to performing this exercise correctly is to keep your trunk upright and your core engaged. When lowering your body in a squat, bend both knees to lower your body until your rear knee nearly touches the ground. You can make the exercise more challenging by increasing the resistance of the band or by holding a weight in each hand.

Leg extensions are one of the best exercises to strengthen your quads and build muscular legs. Learn proper form and achieve powerful lower-body strength.

Exercise Description Main Target Muscles Quads Secondary Target Muscles Calves, Abs, Adductors, Glutes, Hamstrings, Lower Back Workout Type Strength Gym Gear Dumbbells Fitness Level Beginner Compound/Isolated Isolation Power Move Push Target Muscle Group: Quads Plie Squat Overview The dumbbell plie squat is a version of the goblet squat that is designed to improve the leg muscles. The plie squat will mainly engage the quadriceps, but it will also indirectly train the other leg muscles. Before advancing to larger and more technically challenging squat movements, this exercise may be utilised as a starting exercise to help you master the squat movement pattern. How to Do It? Choose a dumbbell and place it on the floor vertically. Allow your arms to hang straight down to the floor and have a wider than shoulder-width posture. Squat down and take both hands on the dumbbell's edges. As you stand tall, brace your abs and force your feet into the floor. Return to the starting position slowly and repeat for the appropriate amount of reps. Plie Squat Tips Experiment with different toe angles to determine what feels best for you. Drive through the whole foot, aiming for three points of contact: the big toe, the small toe, and the heel. Some forward translation of the knees over the toes is acceptable as long as the knees do not deviate inward or outward significantly. If they wish to stay upright, those with longer femurs will have to allow their knees to come forward more. Neck posture is also extremely personal; some people like a neutral neck position (keeping the chin tucked throughout the lift), while others prefer to stare straight ahead. Experiment with each to find which one suits your body the best. Don't overextend the knees, but make sure they're approximately over or slightly outside the 2nd toe.

Exercise Description Main Target Muscles Quads Secondary Target Muscles Abs, Abductors, Glutes, Calves, Hamstring, Lower Back Workout Type Strength Gym Gear Bodyweight Fitness Level Beginner Compound/Isolated Compound Power Move Push Target Muscle: Quads Prisoner Squat Overview Prisoner squat is a variation of squats designed to be practiced in places as confined as cells. It is an excellent way to increase muscle mass in your legs and improve your cardiovascular and bone health. How to Do Place your feet shoulder-width apart and raise your hands behind your head, keeping them clasped together. This will be your starting position. Lower your body down into a squat position by pushing your hips backward, bending your knees, and moving your feet closer together. Keep your chest up and spine straight throughout the entire movement. Once you reach the bottom of the squat, drive through your heels to return to the starting position. Prisoner Squat Tips Keep your head up and chest proudly throughout the entire movement. Remember to breathe throughout the squat. Inhale as you lower down, and exhale as you return to the starting position. If you have any trouble balancing, place your hands out in front of you for assistance. Make sure to drive through the whole foot. Ensure that your knees do not deviate excessively inwards or outwards.

Exercise Description Main Target Muscles Quads Secondary Target Muscles Glutes, Calves, Hamstring Workout Type Strength Gym Gear Bodyweight Fitness Level Beginner Compound/Isolated Compound Power Move Push Target Muscle: Quads High Knees Overview High knees is a great cardio exercise that can be performed anywhere and doesn't require any equipment. It is a great exercise for improving lower body power and coordination. It also challenges your core stability, as you must engage your abs to keep your balance while performing the movement. Plus, it's a great way to get your heart rate up and get those legs moving! You can perform this exercise anywhere, whether you are at home, at vacation or in a park. Make sure to keep your feet light for this one. How to Do Start in a standing position with your feet hip-width apart. Keeping your core engaged, bring your right knee up to hip height as you exhale. Inhale as you lower your right leg back to the starting position. Repeat with your left leg. Continue alternating legs for the desired number of repetitions. Exercise Tips Keep your posture tall throughout the movement. Do not let your knees collapse inward as you raise them. Make sure to swing your arms forward and back in sync with your legs. This will help you maintain balance and improve the efficiency of the movement.

Exercise Description Main Target Muscles Quads Secondary Target Muscles Upper Back Workout Type Strength Gym Gear Barbell Fitness Level Intermediate Compound/Isolated Isolated Power Move Multi-Joint Target Muscles: Quads Front Squat Overview The front squat is one of the best moves that help grow the muscle and build strength. You can see a great difference in the muscular size of your lower body while practicing this move. You have to hold the bar in front of your shoulder rather than the back of your neck. The exercise engages your core as you have to maintain an upright posture throughout. It also works on your quads as it moves more of the load. How to Do It Start by standing with your feet shoulder-width apart and your toes pointed slightly outward. Place a barbell across your shoulders, making sure that the bar is resting evenly across them. Squat down slowly, keeping your back straight and your knees from going too far forward. Once you reach the bottom of the squat, drive back up to the starting position. Repeat for the desired number of repetitions. Front Squat Tips Make sure to warm up your wrists and fingers before doing the front squat. It will improve the flexibility of your wrists. Make sure your knees don’t cross your toes when you’re bent in a squat position Keep your core engaged throughout the exercise for better stability

Exercise Description Target Muscle Group Vastus Lateralis (Outer Thigh) Secondary Muscles Outer Thigh Muscles/ Quads/ Vastus Lateralis Exercise Type Strength Equipment Required Cable pully Experience Level Intermediate Compound/Isolated Compound Force Type Pull Target Muscles: Outer thigh muscles/ quads/ vastus lateralis Cable Hip Abductions Overview Cable hip abductions are a great exercise for those who want to target their hips and thighs. This move can be done with a variety of different apparatus, such as a cable machine, resistance band, or TRX system. The muscles worked during cable hip abductions include the gluteus medius, gluteus minimus, and tensor fasciae latae. These muscles are responsible for stabilizing the hip and keeping the leg from collapsing inward. The vastus lateralis is one of the four quadriceps muscles. It is located on the side of the thigh and attaches to the femur (thigh bone). The vastus lateralis is responsible for extending the knee, which means it helps straighten the leg. The quadriceps are important for activities such as walking, running, and climbing stairs. Strong quadriceps can help prevent knee injuries. How to Do It In this exercise, you will be working your hips and lateral quads muscles. Stand straight against a cable pulley machine. Keep the pulley machine set to the lowest, and attach it to your ankle strap on the leg away from the machine. Hold on to the cable machine with one hand to stabilize yourself. Pointing your toe up, extend your leg out at a 45-degree angle Bring back your foot and extend it over the supporting leg. Make sure you are only moving your leg and not your entire body Do not touch your foot on the floor until you complete all your reps. Repeat the exercise on the other leg and perform 20-25 reps per side Cable Hip Abduction Tips When performing any hip abduction exercise, it is important to keep the spine in a neutral position. This means that the back should be straight and the pelvis should not be tilted. It is also important to use proper form and technique. The knees should be kept in line with the hips, and the feet should point straight ahead. There should be no twisting or turning of the body during the exercise. It is also important to use light weights and to start with lower repetitions. As you get stronger, you can increase the weight and number of repetitions. If you feel any pain during the exercise, stop immediately and consult a doctor or physical therapist.

Exercise Description Main Target Muscles Quads Secondary Target Muscles Abs, Adductors, Biceps, Calves, Forearms, Glutes, Hamstrings, Shoulders, Traps, Triceps, Upper Back Workout Type Olympic Weightlifting Gym Gear Kettlebell Fitness Level Beginner Compound/Isolated Compound Target Muscle Group: Quads KB Kettlebell Clean Overview The 1 KB kettlebell clean is an extension of the Barbell Clean exercise. It is a full-body exercise that is often performed in Olympic weight lifting or athletic training facilities. The 1 KB kettlebell clean is a very explosive move that engages almost every muscle in your body. These can be particularly beneficial to those who want to increase their explosiveness in sports or to create thicker traps using explosive exercises. How to Do It Place the kettlebell between your feet. Place your feet shoulder width apart and your hands slightly wider than your shoulders. Grab the bell's handle and swing it between your legs, keeping your spine neutral. Keep your hips extended and swing the bell forward. The bell will then flip around to the front rack. If you wish, flip the bell over your wrist and swing it between your legs. 1 KB Kettlebell Cleaning Tips Olympic lifting is not about brute strength, but efficiency. First, master the hip hinge to learn how to use kettlebells efficiently. Next, move on to kettlebell swings. To generate momentum, use your hips. It's all about using your lower body to move and control the kettlebell effectively. With your wrist neutral, place the bell in the front rack position. Toe angle can be very individual. You should experiment to find what feels right for you. You should drive the entire foot. There are three points of contact you need: the big toe and the little toe.

Exercise Description Main Target Muscles Quads Secondary Target Muscles Calves, Hamstring, Glutes Workout Type Strength Gym Gear Bodyweight Fitness Level Beginner Compound/Isolated Compound Power Move Push Target Muscles: Glutes and Quads Lateral Jumps Overview Lateral jumps are a great way to improve your coordination and balance. When you jump sideways, you have to control your body in mid-air and land on your target leg. This helps to develop the muscles in your legs and core, which can improve your overall strength and stability. In addition, lateral jumps can help to improve your cardiovascular fitness by getting your heart rate up. They are also a great way to burn calories and fat. If you are looking for a challenging and fun workout, try adding some lateral jumps to your routine. You may be surprised at how quickly you see results. How to Do Start by standing with your feet hip-width apart. Lower into a quarter squat, then explosively jump to the side. joints. Land softly on your feet and immediately jump back to the other side. Repeat for the desired number of repetitions. Exercise Tips Keep your chest up and shoulders back throughout the entire movement. Make sure to land softly on your feet in order to minimize the impact on your joints. Use your arms to generate power and help you jump higher.

Exercise Description Main Target Muscles Quads Secondary Target Muscles Abs, Adductors, Biceps, Calves, Forearms, Glutes, Hamstrings, Shoulders, Traps, Triceps, Upper Back Workout Type Olympic Weightlifting Gym Gear Kettlebell/Barbell Fitness Level Intermediate Compound/Isolated Compound Target Muscle Group: Quads Kettlebell Clean and Jerk Overview Clean and Jerk is a complete body exercise that is usually performed in Olympic-style weightlifting facilities. This is a combination exercise that combines the clean and the jerk. The clean movement is a pulling pattern, while the jerk moves in a pushing pattern. This combination affects nearly every muscle in the body. Olympic lifts such as the clean and jerk are technically difficult and require lots of practice before you can perform with any weight. How to Do It Place the kettlebell between your feet. Place your feet shoulder-width apart, with your toes slightly out, your hands slightly wider than your shoulders. Keep your hips down and look forward. Keep the bar near your body and push the floor away. Then, shift your knees forward. When the bar passes your knees shift your knees forward so that your torso is upright. Jump up explosively and shake the bar vigorously. Rotate your elbows so that the bar is facing you as it passes your shoulders. Place your hands on the bars and drop down to a squat. Elevate your hips by lifting your knees and extending your legs. If you wish, reposition your hands to prepare for the jerk. Then drop the elbows to approximately 45 degrees. You can then dip slightly to your knees, and then you will explode straight up when the bar is pressed overhead. Drop underneath while it is still moving overhead and then split the legs before you catch the bar with your arms locked out. Take a step forward with your front foot, then move to the back foot. Then bring the feet together. In a controlled manner, lower the bar from above. Continue repeating until you reach the desired number. Kettlebell Clean and Jerk Tips Olympic lifting is not about brute strength but efficiency. Most jerks will be dropped from above as it is much easier to lower them to the ground. This could pose a risk of injury to an already complex lift. Due to the differences in hand position, your hips will likely begin a bit lower in the clean than in the snatch. Shorter athletes might need to hold their elbows up during the dip before the jerk because the bar could slide forward from their shoulders due to the smaller muscle mass. You want to see the movement in a vertical direction. Do not think of pushing your hips forward. Think up. Before moving into the clean, do some front squats or RDLs first. This will help ensure your strength in hinge and front rack positions. Start with the hang (middle thigh) when learning the clean. Toe angle can be very individual. You should experiment to find what feels right for you. You should drive the entire foot. You need two points of contact: the big toe and the little toe.

Exercise Description Main Target Muscles Quads Secondary Target Muscles Calves Workout Type Power Gym Gear Bodyweight/Dumbbells Fitness Level Intermediate/Advanced Compound/Isolated Isolation Power Move Push Target Muscle: Hamstrings, Glutes, and Hip Flexors Alternating Plyo Lunges Overview These high-intensity bodyweight workouts, known as plyometric lunges or jumping lunges, improve lower-body strength and elevate your heart rate. Muscles are stretched and contracted quickly in plyometric activities. Plyo lunges use a jump lunge to increase heart rate while also strengthening glutes, hamstrings, hip flexors, and quadriceps. You may want to start with walking lunges or reverse lunges if you're new to the workout. How to Do It? Begin with 2–4 sets of 10–20 repetitions for plyo lunges. Sets and repetitions should be chosen depending on your ability to maintain proper technique during each set. Stand with your feet shoulder-width apart and your knees slightly bent. Your shoulders should be exactly above your hips, and your head and neck should be in a neutral posture. Throughout the action, keep your chin tucked, as if you were cradling an egg beneath your chin. To achieve a sturdy stance, evenly distribute your weight and grab the floor with your feet. With a small bend in your elbows, keep your arms long at your sides. Take a step forward into a lunge stance while keeping a neutral spine and an erect chest position. Bend your hips, knees, and ankles while keeping a firm foot stance to drop your hips toward the floor until your back knee is an inch or two off the ground. Your front foot should be neutral, and your front knee should cross your big toe directly. You should be on the ball of your back foot with your heel off the ground, and your back hip should be above your back knee. Your chest should be a fraction of an inch ahead of your hips. This is the starting position for all repetitions. To begin your leap, stomp your front foot into the ground while simultaneously swinging your arms forward. Quickly alter your leg position by moving your rear leg forward and your front leg back at the highest point of your leap in mid-air. Land at the bottom position of a lunge after your leap. The landing stance should be identical to the leaping position. Your weight should be equally distributed and your front foot should be neutral. Your chest should be a fraction of an inch ahead of your hips. Prepare to leap again by stabilising your body. Continue jumping for the required amount of repetitions, switching sides. Tips for Alternating Plyo Lunges Always choose a weight that permits you to maintain complete body control throughout the exercise. Pay great attention to your body while doing any activity, and stop immediately if you feel any pain or discomfort. Incorporate correct warm-ups, rest, and nutrition into your training regimen to see continuous growth and increase body strength. Your capacity to fully recuperate from your exercises will ultimately determine your outcomes. Allow for adequate recovery by resting for 24 to 48 hours before exercising the same muscle groups.

Exercise Description Main Target Muscles Glutes, Hamstrings, Quads Secondary Target Muscles Hip Adductors Workout Type Strength Gym Gear None Fitness Level Advanced Compound/Isolated Compound Power Move Functional Movement Target Muscle: Glutes, Hamstrings, Quads, Hip Adductors Pistol Squat Overview Pistol Squat wins the game when it comes to talking about the king of squats. They are undoubtedly one of the best yet most challenging exercises that you can do to work on your lower body. You need to do other exercises to build strength before advancing to this form. Apart from that, it is also essential to practice the proper technique with some trainer to do this exercise, or you might stress your knees. How to Do It Stand with your feet shoulder-width apart, and raise your arms till they are in front of you at the level of your shoulder. Now pull your shoulder back while engaging your core. Lift one leg and try to hold it in front of you in a raised position. Lower into a squat by bending your supporting knee, and keep your upper body and back as straight as possible. Make sure that your butt is close to your supporting heel, engage your glutes and use that heel to lift yourself. Return to your starting position. Repeat on the other leg. Pistol Squat Tips Make sure to start slow and practice with a trainer. Once you have mastered the technique, add weight to make your exercise more challenging.

Exercise Description Main Target Muscles Quads, Glutes Secondary Target Muscles Lower Back Workout Type Strength Gym Gear Barbell Fitness Level Advanced Compound/Isolated Compound Power Move Push Target Muscles: Lower Back, Glutes, Hamstrings Back Squat Overview Back squat targets the posterior side of your body. It is a compound exercise, and it involves all muscles in your body. It is a great move as it also strengthens your joints, ligaments and muscles around your hips. It is an advanced move, and so you need to ensure that you practice some other basic squat forms first. It is important to have ankle and core stability for this exercise as they are largely involved throughout the movement. How to Do It Standing up straight with feet shoulder-width apart, align your toes with the barbell. Lift the barbell over your head and place it on your shoulder blades without stressing the spine Place your hands near the shoulders for a firm grip and avoid stressing the spine. Bend down in a squat position, and stand back up, squeezing your glutes to perform the back squat. Back Squat Tips Make sure that your entire focus is on the movement. Keep your chin tucked in and your head straight. Your heels should be in line with your toes and heels flat on the floor.

Exercise Description Main Target Muscles Quads Secondary Target Muscles Calves, Abs, Adductors, Glutes, Hamstrings, Shoulders, Traps, Upper Back Workout Type Strength Gym Gear Dumbbells/ Barbell/Bodyweight Fitness Level Intermediate Compound/Isolated Compound Power Move Push Target Muscle Group Reverse Lunge Overview The reverse lunge is a leg strengthening exercise that focuses on the quadriceps. It's a version of the lunge movement pattern, which is a key exercise to master. Some lifters feel less knee pressure when completing the barbell reverse lunge than when performing the regular barbell lunge. The lifter may also employ more weight during the lunge with a barbell than they might with a dumbbell or bodyweight variant. How to Do It? Stand straight and secure a handle at chest level to a cable stack. Grip the handle to your chest, having feet wide open (shoulder-width apart) in an athletic base position. Squeeze the handle horizontally to extend as you exhale. Go back to the initial position for fulfilling desired reps. Tips for Reverse Lunges with a Barbell Reverse lunges are a more sophisticated progression that should only be attempted after achieving hip and core stability. When returning to the beginning position, resist the temptation to lead the movement with your shoulders by hyperextending your spine. Instead, use effort from your lower body to propel the action. Both of your legs should be at 90 degrees at the knees at the bottom of the exercise. If you want to activate the quads in any lunge or split squat pattern, concentrate on taking a little smaller stride and driving up into the ball of the foot. Focus on taking a little longer stride and driving up through the heel of the foot if you want to engage the glutes and hamstrings during any kind of lunge or split squat routine.

Exercise Description Main Target Muscles Quads Secondary Target Muscles Abs, Adductors, Calves, Glutes, Hamstrings, Shoulders, Traps, Upper Back Workout Type Strength Gym Gear Dumbbell Fitness Level Intermediate Compound/Isolated Compound Power Move Push Target Muscle: Quads Single-Leg Squat Overview This is an exemplary exercise to build strong quads. It helps rectify the muscle imbalances that might occur due to prolonged bilateral leg movements. The exercise works amazingly in challenging your balance, working on your core muscles, and enhancing your ability to control. It tones your legs and glutes and exceptionally builds your flexibility. While this is considered to be ideal with an accessory, you can also make this a bodyweight exercise, depending upon your fitness goals. How to Do It Assume a split stance position. It would require you to place one of your feet on a bench behind you, with the other leg standing straight. Hold a dumbbell by your side with a neutral grip. Flex your front knee to the point where your back knee gets in contact with the ground. Drive through the entire front foot to get to the starting position. Repeat for the desired number of reps. Single-Leg Squat Tips Position your back foot to the height of your knee or slightly below that. Keeping it too high can excessively extend your lumbar spine. Assume a smaller split stance to target your quads more efficiently. You will be driving through the ball of the foot in this case. In order to target your hamstrings or glutes, try taking a slightly larger split stance. You will be driving through the heel of the foot in this case. You can slightly lean forward to complete the movement. You do not necessarily have to stay upright through the entire exercise. It will help keep your lumbar spine neutral.

Exercise Description Main Target Muscles Quads Secondary Target Muscles Glutes, Hamstrings, Core Workout Type Strength Gym Gear Bodyweight Fitness Level Beginner Compound/Isolated Compound Power Move Push Target Muscle Group: Quad Squat Pulse Overview The pulse squat is a variation of squats that builds muscles in the legs, in particular. It places special focus on the quads. This is a fundamental exercise that must be included in routine exercises irrespective of the fitness goals. It is extremely beneficial for hip muscles, calves, hamstrings, abs, glutes, and lower back. It can develop exceptional strength and power in your body. It holds the ability to crush calories, strengthen the core, prevent injuries, and boost athletic ability. Several variations of squats can be performed with different weights and resistance bands or simply with your body weight. Wide-legged squat, which involves taking a wider stance, sumo squats, barbell squat, dumbbell squat, goblet squat, etc., are all types of squats that keep adding challenge to your routine. How To Do It? Start with 2-3 sets of 8-15 repetitions for the squat pulse. Your ability to maintain good technique through all sets and repetitions will determine which sets and repetitions you choose. Standing with your feet shoulder-width apart, turn your toes slightly inward, and place your feet on the ground. Keep your core firm and your shoulders back. Look straight ahead. Squat down and bend your knees so that your thighs are parallel to the ground. Do not round your lower back or let your knees drop or fall out. Place your feet on the floor, and then raise your heels a bit. Return to the starting position and continue with the same motion. Keep pulsing throughout your set. Then, stand up and finish. Exercise Tips This is an easy and safe squat form, especially if you struggle with a barbell squat. Adjust your toe angle as per your comfort and requirement. Experiment with it to find the ideal one. When you push yourself back, make sure to drive through the entire foot and not just the ball. Drop your hips down, not back.

Exercise Description Main Target Muscles Quads Secondary Target Muscles Abs, Adductors, Biceps, Calves, Forearms, Glutes, Hamstrings, Shoulders, Traps, Triceps, Upper Back Workout Type Olympic Weightlifting Gym Gear Kettlebell Fitness Level Beginner Compound/Isolated Compound Power Move Push Target Muscle Group: Quads Clean and Press Overview The kettlebell clean and press push is a variation on the clean and press total-body exercise. The kettlebell clean and press is a combination of the kettlebell clean and the kettlebell presses. The exercise's clean portion targets the upper body, core, and traps. The upper and lower push muscles are worked in the press portion. The kettlebell clean and press is a very explosive movement that uses almost every muscle in your body. These movements are especially useful for athletes or anyone looking to increase their explosiveness. How to Do it Start by standing with your feet shoulder-width apart and your kettlebell in front of you. Bend down and grab the kettlebell with both hands, then stand up and press the kettlebell overhead. Lower the kettlebell back down to your chest and repeat. Make sure to keep your core engaged and your back straight throughout the entire movement. Kettlebell Clean and Press Tips Olympic lifting is not about brute strength, but efficiency. First, master the hip hinge to learn how to use kettlebells efficiently. Only then move on to kettlebell swings. To generate momentum, use your hips. It's all about using your lower body to move and control the kettlebell effectively. With your wrist neutral, place the bell in the front rack position.

Exercise Description Main Target Muscles Core Secondary Target Muscles None Workout Type Strength Gym Gear Dumbbell/weight plate Fitness Level Intermediate Compound/Isolated Isolation Power Move Pull Target Muscles: Core Decline Weighted Sit Up Overview The weighted decline sit ups are a great way to target the muscles in your stomach area. By adding weight to your body, you are able to increase the intensity of the exercise and really work those muscles. This is a great exercise for people who are looking to tone their stomach area and get rid of that stubborn belly fat. How to Do it Start by lying on the decline bench with your feet hooked under the pads and your weight in your lap. Slowly sit up while contracting your abs and exhaling. Once you are sitting all the way up, slowly lower yourself back down to the starting position. Repeat for desired reps. Decline Weighted Sit up Tips Adding weights can target your core harder Keeping the back straight and not rounding it as you come towards the knees is the real trick in this exercise
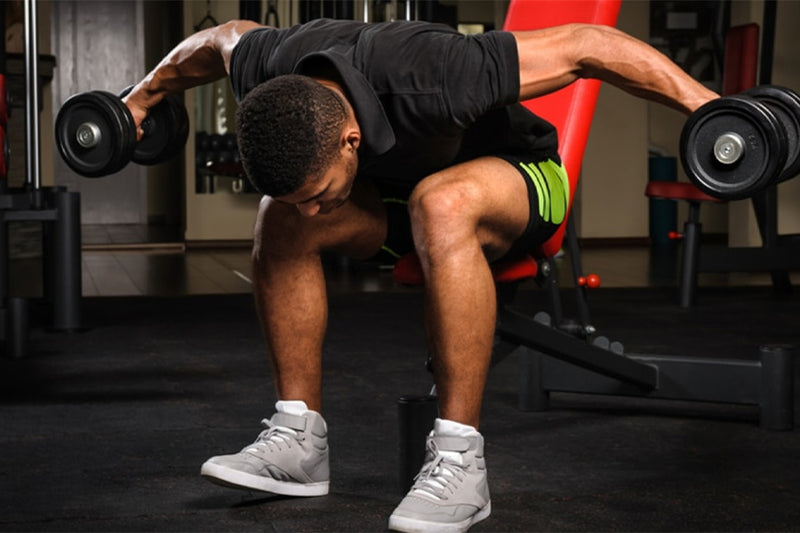
Exercise Description Main Target Muscles Shoulders Secondary Target Muscles Triceps, Middle Back Force Type Pull Workout Type Strength Training Gym Gear Dumbbell, Flat Bench Fitness Level Intermediate Compound/Isolated Isolated Target Muscles: Shoulders, Triceps, Middle Back Seated Rear Dumbbell Lateral Raise Overview Rear lateral raise is among the exercises that promote the rear deltoids' strength and hypertrophy (growth in size). It is also known as the bent-over lateral raise. You can find these little muscles on the backs of your shoulders. Rear lateral raises enhance good posture and facilitate both everyday and sports activity. How to Do It? Sit on a bench while leaning slightly forward with dumbbells in your hands. Keep your palms facing one another directly under your shoulders. Maintaining your arms straight, exhale. Now raise the dumbbells to your sides and towards your upper back simultaneously with a shrugging movement. Continue until your arms become parallel to the ground, keeping them straight. Inhale and lower the dumbbells while maintaining the forward lean in your torso, returning to the starting position. Seated Rear Dumbbell Lateral Raise Tips Ensure that your back is not rounded. Extend your chest out to assist your lower back naturally arched. Breathe. When lifting dumbbells, remember to breathe out. At the top position, concentrate on tightening the shoulder blades together.
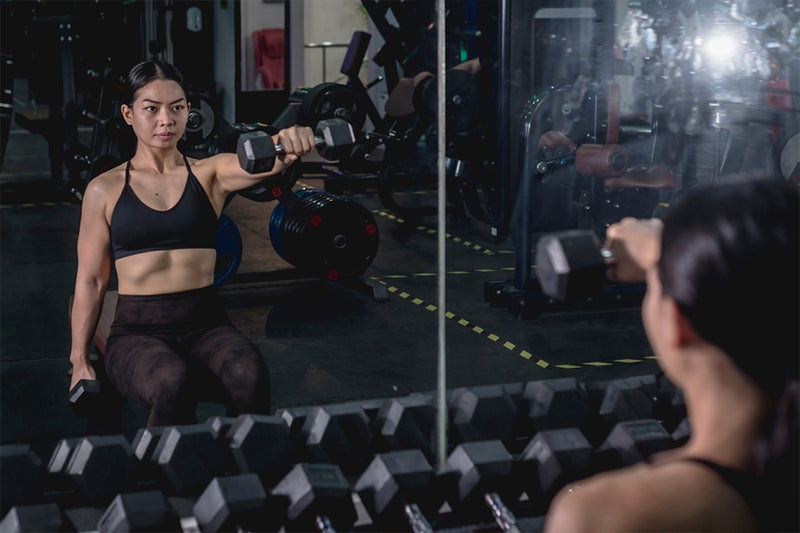
Exercise Description Main Target Muscles Shoulders Secondary Target Muscles None Workout Type Strength Training Gym Gear Dumbbell Fitness Level Beginner Compound/Isolated Isolation Power Move Pull Targeted Muscles: Shoulders Seated Dumbbell Front Raise Overview Dumbbell front raises are an excellent exercise for strengthening your arms and enhancing posture. The anterior deltoid muscles at the front of the shoulders are the objective of this exercise. Strong shoulders are necessary for proper posture, as we all know. The rotator cuff muscles, which are in charge of supporting the shoulder joint, are strengthened due to the dumbbell front raise. By stretching your chest and front of the shoulders, this exercise can also help you increase your range of motion and avoid injuries. How to Do It? Start by sitting on a bench with your feet shoulder-width apart and holding a dumbbell in each hand at arm's distance in front of you with your palms facing your thighs. Slowly raise the dumbbells to your shoulder height. Hold the dumbbells approximately 4 inches away from your body. Pause for a few seconds when you reach the top before lowering them back down to the initial position. That's one rep. Repeat for the desired number of reps. Seated Dumbbell Front Raise Tips Start from lightweights. You can increase your weight as you get comfortable. Keep your abdominal muscles pulled in, and don’t swing the weights as you raise and lower them. Avoid arching your back as you lift the weights. Instead, keep your spine in a neutral position.
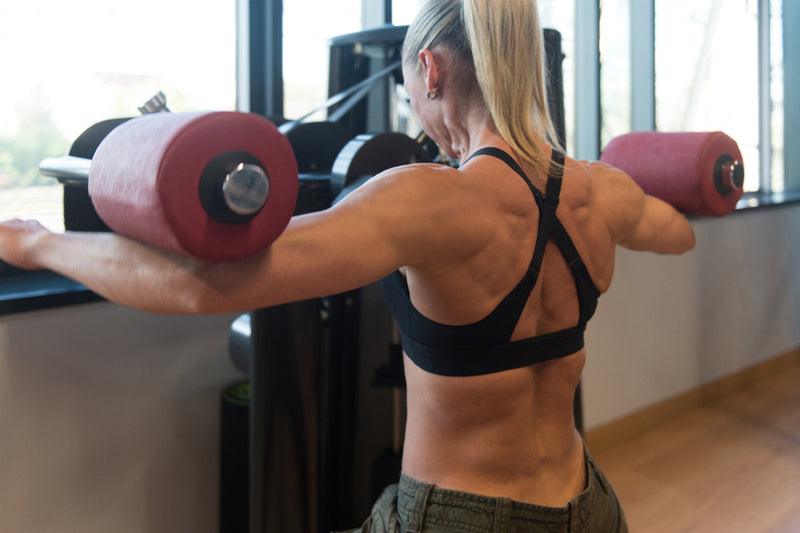
Exercise Description Main Target Muscles Shoulders Secondary Target Muscles None Workout Type Strength Gym Gear Machine Fitness Level Beginner Compound/Isolated Isolated Power Move Push Target Muscle: Shoulders Machine Side Lateral Raises Overview Side lateral raise is a powerful shoulder-strengthening exercise that targets the lateral head of the deltoid muscles in the shoulder. When done frequently, this can aid in developing stronger, wider shoulders. You only need a couple of light dumbbells or a machine and enough shoulder range of motion to abduct your arms, which involves moving the weights out and away from your body until they create a "T" shape at your shoulders. How to Do It? Start by choosing the weight you want to utilize on the stack of a lateral raise machine. Sit facing the machine with your feet flat on the floor and about shoulder-width apart. Adjust the seat height. Grip the handles while securing your arms to the cushion. Look directly forward. Now is the time to start the exercise. Push the weight until your forearms are just above parallel while keeping your elbows bent and moving at the shoulders. At the movement's peak, tighten your shoulders, then slowly start decreasing the weight while utilizing the same semicircle motion you used to elevate it. Repeat as many times as needed. Machine Side Lateral Raises Tips The form is more crucial than weight in this isolated exercise, so keep it in check. Use the tight form to keep the delts working. Use your entire range of motion. Throughout the movement, maintain as much body stillness as possible, moving only your shoulders.
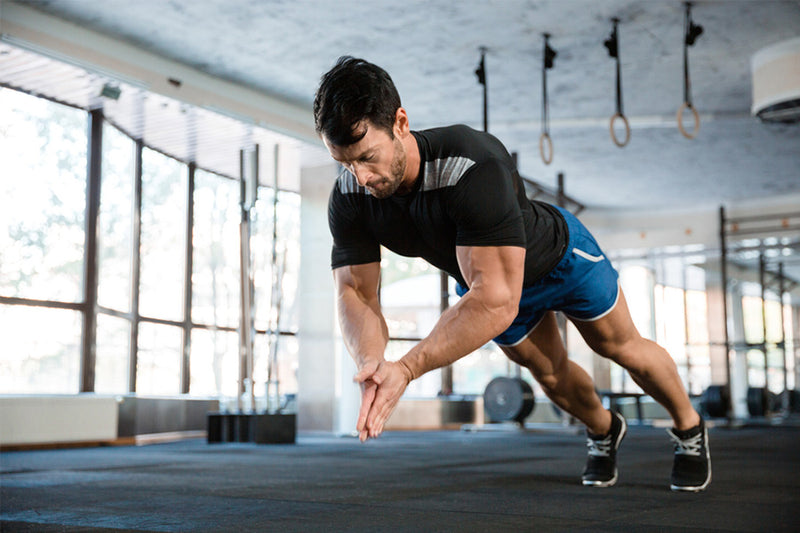
Exercise Description Target Muscle Group Shoulder, Chest, and Arms Secondary Muscles Triceps Brachii Exercise Type Strength Equipment Required Bodyweight Experience Level Advanced Compound/Isolated Compound Force Type Push Targeted Muscles: Shoulder, Chest, and Arms Hand Clap Push Up Over View The muscles that are targeted in hand clap push up are the chest, shoulders, and triceps. There are many benefits to training the shoulder, chest, and arms. These muscles help to stabilize the shoulder joint, and they also help to generate power when we push or pull. Additionally, strong shoulders, chest, and arms can help to improve our posture and prevent injuries. How to Do It? To perform a hand clap push up, start in a standard push up position. Lower yourself down to the ground, and then explosively push off of the ground and clap your hands together in mid-air. Return to the starting position and repeat. Make sure that you keep your core engaged throughout the entire movement to avoid injury. Tips for Performing Hand Clap Push Ups Before attempting a hand clap push up, it is important to build up your strength and stability by performing regular push ups and other exercises that target the shoulder, chest, and arms. Once you have built up your strength, make sure that you warm up thoroughly before starting your workout. When performing the hand clap push up, be sure to keep your core engaged and avoid arching your back. If you feel any pain in your shoulders, chest, or arms, stop immediately and consult a doctor or certified personal trainer.
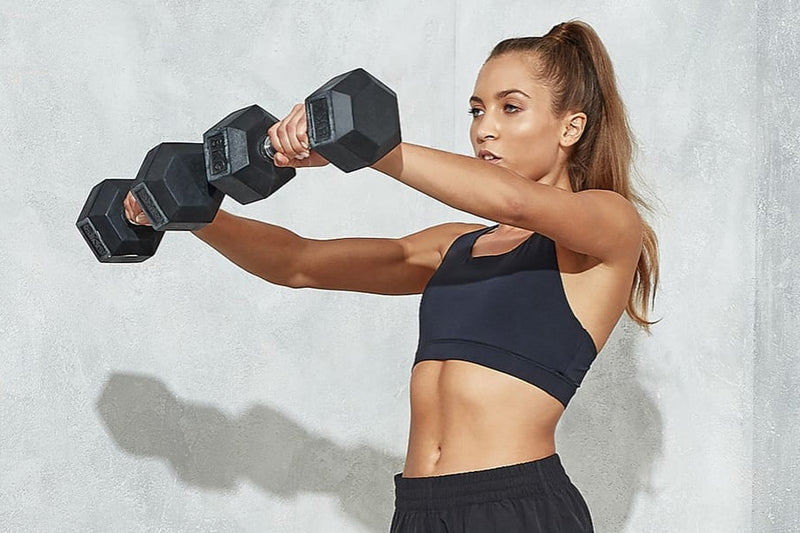
Exercise Description Main Target Muscles Shoulders Secondary Target Muscles None Workout Type Strength Training Gym Gear Dumbbell Fitness Level Beginner Compound/Isolated Isolation Power Move Pull Target Muscle: Shoulders Dumbbell Front Raise Overview From firming up your arms to improving your posture, dumbbell front raise is an excellent exercise. This move targets the anterior deltoid muscles located at the front of the shoulders. As we all know, strong shoulders are essential for good posture. The dumbbell front raise also helps to strengthen the rotator cuff muscles, which are responsible for stabilizing the shoulder joint. In addition, this exercise can help to improve your range of motion and prevent injuries by stretching your chest and front of the shoulders. How to Do Start by standing with your feet shoulder-width apart and holding a dumbbell in each hand at arm's length in front of you with your palms facing your thighs. Slowly raise the dumbbells up to shoulder height. Hold the dumbbells roughly 4 inches away from your body. Pause for a moment when you reach the top before lowering them back down to the starting position. That's one rep. Repeat for the desired number of reps. Dumbbell Front Raise Tips Use a lightweight to start. You can increase the weight as you get comfortable. Keep your abdominal muscles pulled in, and avoid swinging the weights as you raise and lower them. Don't arch your back as you lift the weights. Instead, keep your spine in a neutral position. To make this exercise more challenging, try lifting one dumbbell at a time.
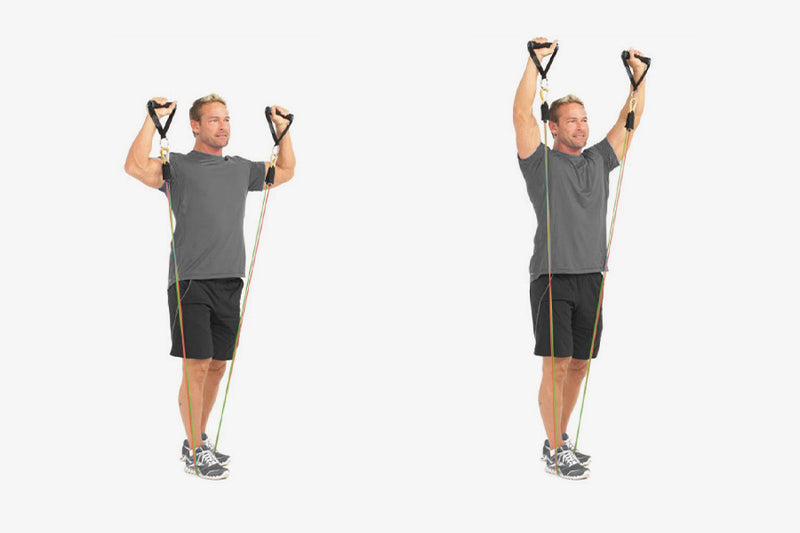
Exercise Description Main Target Muscles Shoulders Secondary Target Muscles Traps, Abs, Triceps Workout Type Strength Gym Gear Bands Fitness Level Beginner Compound/Isolated Compound Power Move Pull Target Muscle: Shoulders Standing Band Shoulder Press Overview The Standing Band Shoulder Press is a great exercise for overall shoulder development. By using a band, you can create resistance in all directions, which is essential for balanced muscle growth. Additionally, the Standing Band Shoulder Press allows you to keep good form while still challenging your muscles, which is important for preventing injuries. How to Do Start by standing with your feet shoulder-width apart, step on one side of the band and hold the other side of the resistance band in each hand with your palms facing forward. Raise your arms up to shoulder height, keeping your elbows and wrists in line with your shoulders. From here, press the bands overhead, extending your arms fully. Return to the starting position. Repeat for the desired number of reps. Standing Band Shoulder Press Tips Keep your abdominal muscles pulled in tight and avoid arching your back throughout the exercise. Don't let your elbows flare out to the sides as you press the bands overhead. Focus on pressing from your shoulder, not just your arms. Keep the momentum out of the way.
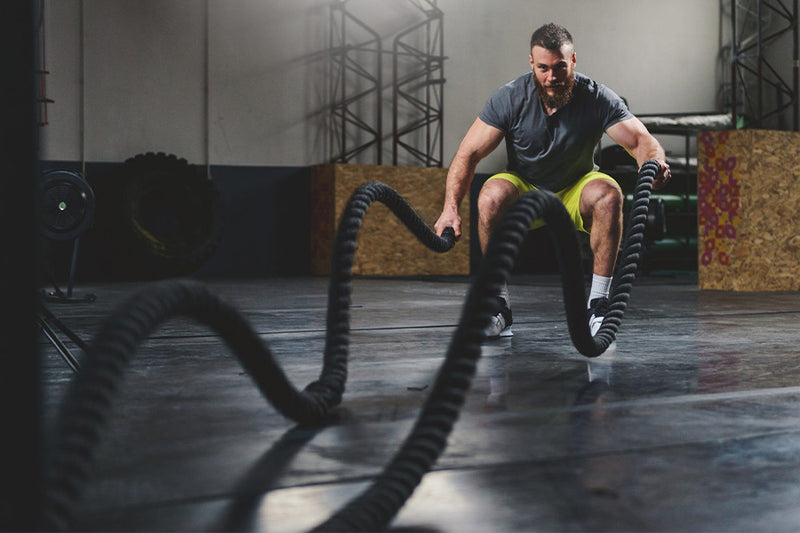
Exercise Description Main Target Muscles Shoulders Secondary Target Muscles Abs, Forearms, Lats, Traps Workout Type Conditioning Gym Gear Rope Fitness Level Beginner Compound/Isolated Compound Power Move Push Target Muscle: Shoulders Battle Rope Slams Overview Battle Rope Slams is a powerful exercise that primarily targets your shoulders, core, and arms. It is a great exercise for improving your overall strength and conditioning. Whether you are performing shoulder workouts or push workouts, this would be an exceptional exercise to be incorporated into your workout routine. How to Do It Start by gripping the rope in both hands with your feet shoulder-width apart. Raise the rope over your head and then slam it down onto the ground as hard as you can. Do it in a wave-like motion by fully extending your arms and hips before slamming. Repeat this movement for 30 seconds to 1 minute. Battle Rope Slam Tips The heavier the rope, the more challenging the exercise will be. If you are new to this battle rope exercise, start with a lighter rope and gradually work your way up. Be sure to keep your core squeezed throughout the entire exercise. This will help you maintain good form and prevent injuries. Keep your arms slightly bent as you slam the rope down. This will help protect your shoulders from injury. Focus on using your shoulders and arms to generate the power for the exercise. Your legs should be used primarily for stability.
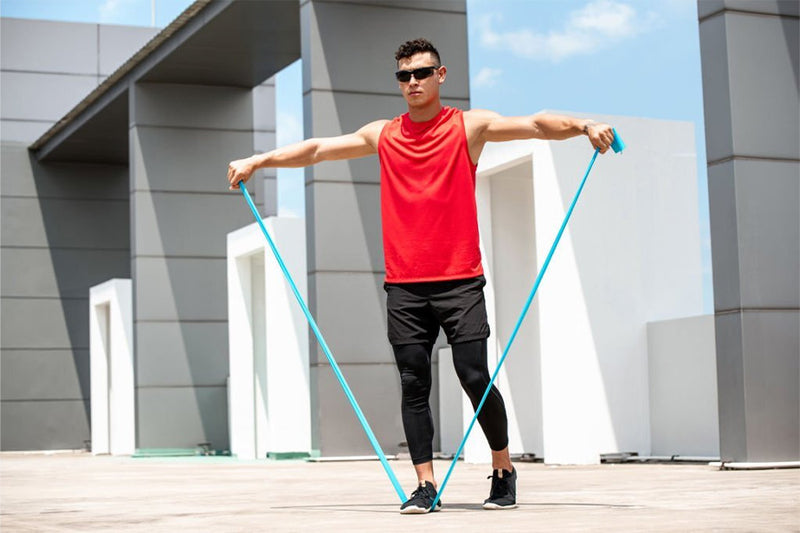
Exercise Description Main Target Muscles Shoulders Secondary Target Muscles None Workout Type Strength Gym Gear Band Fitness Level Beginner Compound/Isolated Isolation Power Move Pull Target Muscle: Shoulders Banded Lateral Raise Overview The lateral raise is a great move for toning the shoulders. Using a resistance band forces you to use more stabilizer muscles, which helps to create a more well-rounded workout. It provides constant resistance throughout the entire range of motion, which helps to better target the shoulder muscles. Third, the resistance band can be easily adjusted to provide different levels of difficulty, making it a great exercise for both beginners and advanced athletes How to Do It Start by standing up straight, feet shoulder-width apart, with a resistance band looped around both wrists in front of you. Keeping your core engaged, raise your arms out to the sides until they’re parallel with the ground. Pause for a moment, then slowly lower your arms back to the starting position. Repeat for the desired number of reps Banded Lateral Raise Tips Keep your shoulders down and your core engaged throughout the exercise. Don’t swing your arms as you raise them; use controlled motions only. If the resistance band is too light, try a heavier one. If it’s too heavy, try a lighter one. If you have any pain in your shoulders or elbows, stop the exercise and consult a doctor or physical therapist
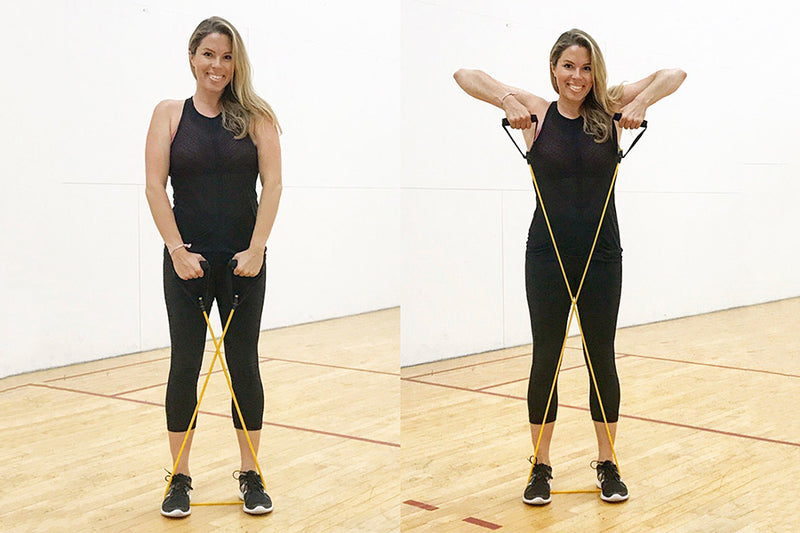
Exercise Description Main Target Muscles Shoulders Secondary Target Muscles Biceps, Traps, Upper Back Workout Type Strength Gym Gear Bands Fitness Level Beginner Compound/Isolated Compound Power Move Pull Target Muscle: Shoulders Banded Upright Row Overview If you're looking for a workout that hits multiple muscle groups at once, you can't go wrong with the upright row. This move is especially effective when done with a resistance band, as it allows you to really maximize the tension on your muscles. The upright row targets your shoulders, biceps, and traps, making it a great exercise for building overall upper-body strength. It also helps improve posture and can be used as part of a warm-up or cool-down routine. Plus, the band provides a challenge that helps you maintain good form throughout the entire movement. So if you're looking for a versatile and effective exercise, be sure to give the upright row a try. How to Do Begin by standing on the center of the resistance band, and hold the band with your palms facing your body. Keeping your feet shoulder-width apart, bend your knees slightly and hinge at your hips to lower your torso until it’s nearly parallel to the floor. From here, press through your heels to return to standing, and as you do, row the band up toward your chest, leading with your elbows. When the band reaches chest level, pause and squeeze your shoulder blades together before slowly lowering them back to the starting position. Repeat for the desired number of reps. Exercise Tips Make sure to keep your core engaged throughout the movement to avoid arching your back. If the band is too light, try doubling it up or using a heavier resistance. For an added challenge, you can also do this exercise with one arm at a time.
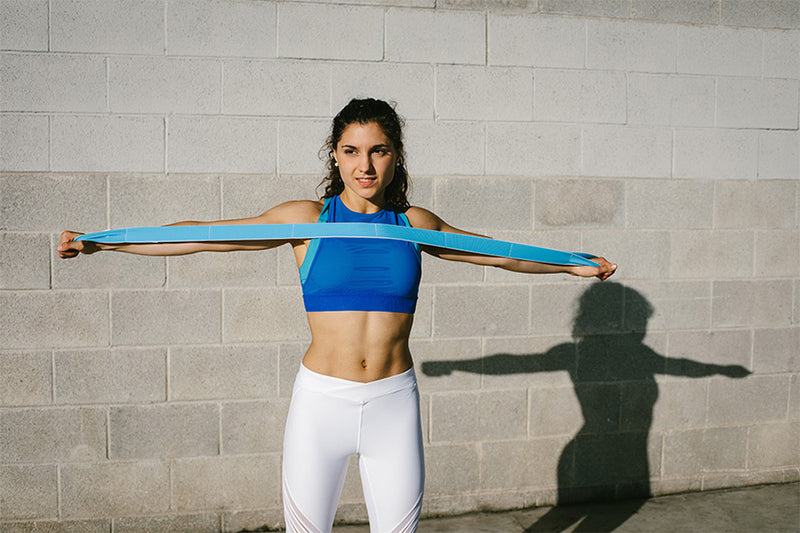
Exercise Description Main Target Muscles Shoulders Secondary Target Muscles Traps, Upper Back Workout Type Activation Gym Gear Bands Fitness Level Beginner Compound/Isolated Compound Power Move Pull Target Muscle: Shoulders Band Pull Apart Overview If you're looking for a workout that targets multiple muscle groups and gets your heart rate up, you can't go wrong with a pull-apart with a resistance band. This exercise is ideal for beginners and experts alike, and it can be performed anywhere with minimal equipment. Plus, it's a great way to improve your posture and prevent injuries. It also enhances your range of motion and flexibility. How to Do Use a resistance band that provides sufficient resistance. Anchor the band around a sturdy object at about chest height. Grasp the band with your palms facing each other, and step away from the anchor point until there is tension on the band. Keeping your shoulders down and your core engaged, exhale as you slowly pull the band apart, maintaining tension on the band throughout the movement. Pull it till it nearly touches your chest Inhale as you return to the starting position. Exercise Tips Maintain a neutral spine throughout the movement. Make sure your head does not get forward. In order to target your upper back, keep a slight bend in your elbows. If you wish to intensify the workout, try to focus on pushing your hands apart after you have pulled the band apart.
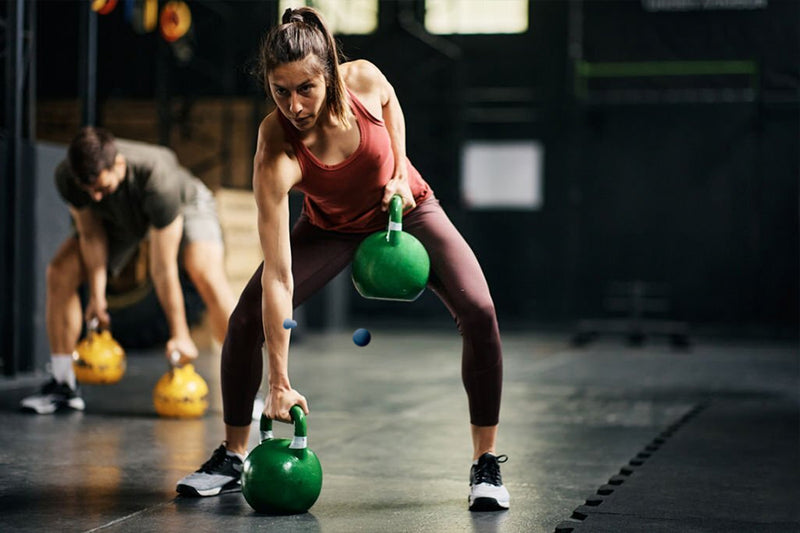
Exercise Description Main Target Muscles Shoulders, Core, Back Secondary Target Muscles Abs, Adductors, Biceps, Forearms, Glutes, Hamstrings, Shoulders, Traps, Triceps, Upper and Lower Back Workout Type Olympic Weightlifting Gym Gear Kettlebell Fitness Level Intermediate Target Muscle Group: Back/Core Kettlebell Gorilla Overview Gorilla rows, as you would expect, are an excellent back-builder and a welcome alternative for the common bent-over, T bar, single-arm dumbbell and single-arm dumbbell row that most exercisers rely upon. The gorilla row is the perfect option if you are tired of the same old back exercises, and want to increase your strength and size to the silverback level. How to Do It? Two kettlebells should be placed on the ground, about hip-width apart. The handles should be parallel. Your kettlebells should be parallel to your feet. To grasp the handles, bend your knees slightly and hinge forward from your hips. To make room for the weights, push your knees forward. Keep your core firm and ensure your lower back is not round. Keep one kettlebell in your hand and row the other weight back towards your hip. Keep your wrist straight and lead with your elbow. The kettlebell should be lowered to the ground, and you can then do the same thing on the other side. For the remaining set, continue to alternate your arms. Kettlebell Gorilla Tips Experiment with head position and see which option (looking forward vs. packing the neck) works better for you. Keep same tone through your abdominals as you pull the kettlebells into your body to ensure you don’t arch excessively through your spine. Don’t allow momentum to dictate the movement, control the kettlebells throughout each rep. If you feel your biceps are overused and your back remains underactive, consider utilizing a false grip (i.e. don’t wrap the thumb around the handle). Don’t allow the head to jut forward as you pull.
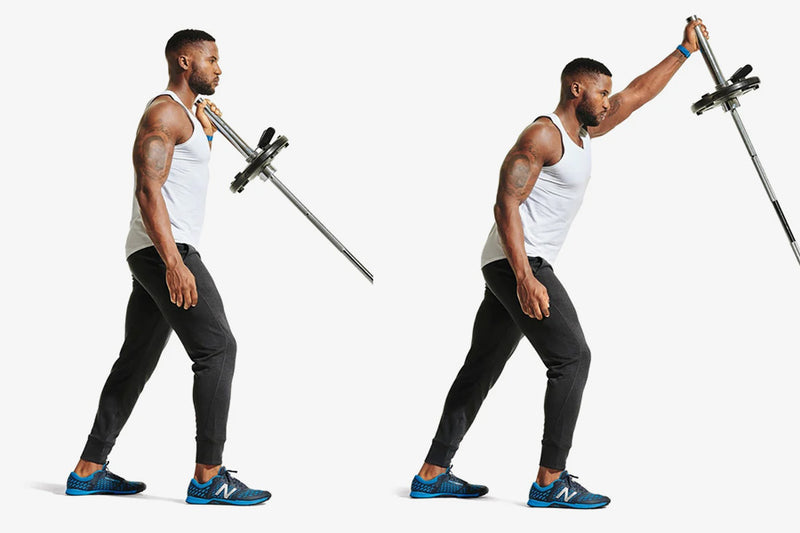
Exercise Description Main Target Muscles Shoulders Secondary Target Muscles Abs, Traps, Triceps Workout Type Strength training Gym Gear Barbell Fitness Level Intermediate Compound/Isolated Compound Power Move Push Target Muscles: Shoulders, Abs, Traps, Triceps Single Arm Landmine Press Overview The single-arm landmine press is a variation of the shoulder press that focuses on shoulder muscles. This will also train the triceps and traps muscles indirectly. Each deltoid is worked unilaterally by the single-arm landmine press. This allows you to isolate each side, ensuring that they grow and strengthen simultaneously. How to Do It? First, stand with your spine straight, and your feet should be wide open. Hold the barbell in one hand while keeping the other on your ribs to watch your spinal alignment. Breathe deeply and push to lockout by stretching the elbow and the shoulder, keeping the barbell in place. Slowly bring the barbell down to your shoulder's starting position. Single Arm Landmine Press Tips When the knee is in flexion, press with the opposite arm. Allowing the head to lean forward considerably is not a good idea. Exhale as you squeeze the bicep towards the ear. Look for lack of thoracic spine extension or shoulder flexion if you feel any pressure in your neck or traps throughout the action. Maintaining strain on the shoulders by keeping the elbows slightly bent at the top and without locking out completely. If you can't lock your elbows out overhead, it could indicate inadequate shoulder mobility caused by upward scapular rotation. Make sure your rib cage isn't protruding and that you're not in a position of severe hyperextension. To avoid yourself from overreach as you press, have a staggered stance.
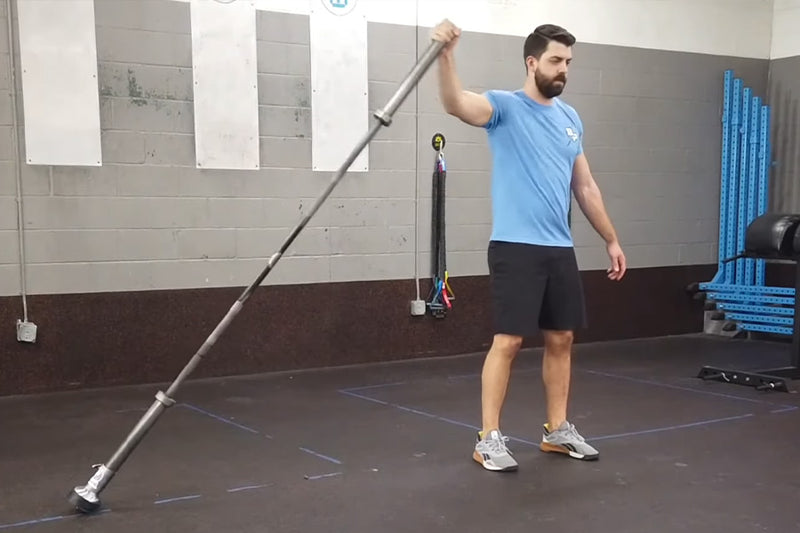
Exercise Description Main Target Muscles Shoulders Secondary Target Muscles Traps Force Type Pull Workout Type Strength training Gym Gear Landmine Fitness Level Intermediate Compound/Isolated Isolated Target Muscles: Shoulders Landmine Lateral Raise Overview The landmine lateral rise is a variation of the lateral raise that requires you to move in a relatively fixed plane of movement. It's a shoulder workout that focuses on the muscles in the shoulder. The landmine lateral raise involves the rear delts to a little larger extent than other standing lateral raise variants. How to Do It? Stand straight with your spine stable and your feet in a squat pose. With one hand, use a pronated grip to grasp the barbell to your body's front. Raise your arm over your torso, retaining the elbow stretched, and stand tall at the top. Drop the barbell back to the initial position slowly and steadily. Repeat until the desired number of reps. Landmine Lateral Raise Tips As you elevate the barbell, ensure you are not leaning backwards. Inhale as you lower the barbell and exhale as you lift it to the top of the action. Try soft tissue work for the pecs and thoracic spine in case you're having shoulder soreness at the top of the action. Allowing the head to lean forward considerably is not a good idea. Make sure your rib cage isn't protruding and that you're not in a position of severe hyperextension.
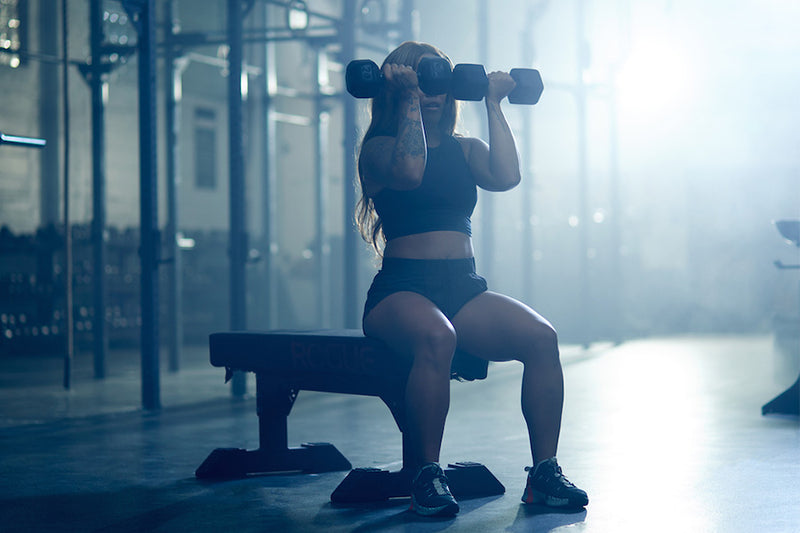
Exercise Description Main Target Muscles Shoulders Secondary Target Muscles Traps, Triceps Force Type Push Workout Type Strength Training Gym Gear Dumbbell Fitness Level Intermediate Compound/Isolated Compound Target Muscles: Glutes and Quads Lateral Jumps Overview This exercise is a famous variation of the seated dumbbell press, strengthening your shoulder muscles. It is also called seated Arnold press and is named after Arnold Schwarzenegger. This exercise targets the heads of deltoids, making them stronger. Because of the long period under strain, the exercise is excellent for people seeking aesthetic advantages. Still, you can also practice it as an accessory activity for those wanting to gain strength. How to Do It? Experiment with different toe angles to determine what feels best for you. Drive through the whole foot, aiming for three points of contact: the big toe, the small toe, and the heel. Some forward translation of the knees over the toes is acceptable as long as the knees do not deviate inward or outward significantly. If they wish to stay upright, those with longer femurs will have to allow their knees to come forward more. Neck posture is also extremely personal; some people like a neutral neck position (keeping the chin tucked throughout the lift), while others prefer to stare straight ahead. Experiment with each to find which one suits your body the best. Don't overextend the knees, but make sure they're approximately over or slightly outside the 2nd toe. Dumbbell Arnold Press Tips Maintain a flat back against the pad for the entire exercise. Allowing the head to lean forward considerably is not a good idea. Exhale as you squeeze the bicep towards the ear. Maintaining strain on the shoulders by leaving the elbows slightly bent at the top and without locking out completely. If you can't lock your elbows out overhead, it could be a sign of poor shoulder mobility caused by upward scapular rotation.
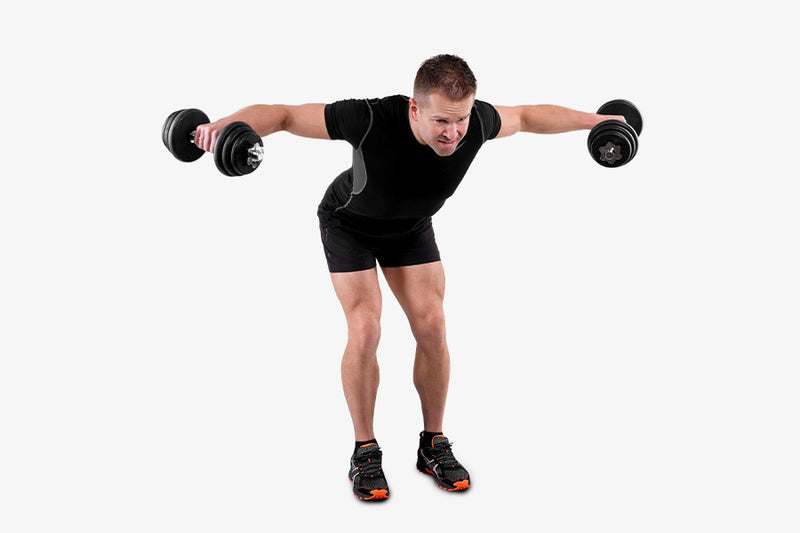
Exercise Description Main Target Muscles Shoulder Secondary Target Muscles Traps. triceps Workout Type Strength Gym Gear Dumbbell Fitness Level Beginner Compound/Isolated Isolated Power Move Pull Target Muscle Group: Shoulders Bent-Over Dumbbell Reverse Fly Overview The bent-over dumbbell reverse fly (also known as the bent-over rear delt fly) is a great exercise for building your shoulders. The bent-over dumbbell reverse fly is a popular tool for lifting. This technique targets the rear delts, which can be a weak muscle for many lifters. How To Do It? Take a few steps back to an open area and select the weight you want. Keep your hips aligned with the ground. Then, let your arms hang straight from the shoulders and hinge from the hips. Take a deep breath and draw the dumbbells towards the ceiling with the rear deltoids. Slowly lower dumbbells to their original position. Continue repeating until you reach the desired number of repetitions. Tips for Reverse Flying with Bent Over Dumbbells You should focus on the rear deltoid muscles and not the scapular retractors. Shoulder blade movement should be restricted. Do not arch your back during the top movement. Keep your abs straight. You can bend 90 degrees if you are unable to hinge. If this happens, continue the exercise as normal. You can also do the exercise sitting down. The dumbbell movement can cause shoulder pain. To prevent this, rotate the dumbbells so that the thumbs face away from each other and the palms face forward. Externally, this is known as a supinated grasp and can externally rotate your shoulder. Do not sway your head during the movement. This is about stimulating a small muscle group. Don't rely on momentum, but instead focus on the movements. Allow your arms to move, but don't restrict the elbows.
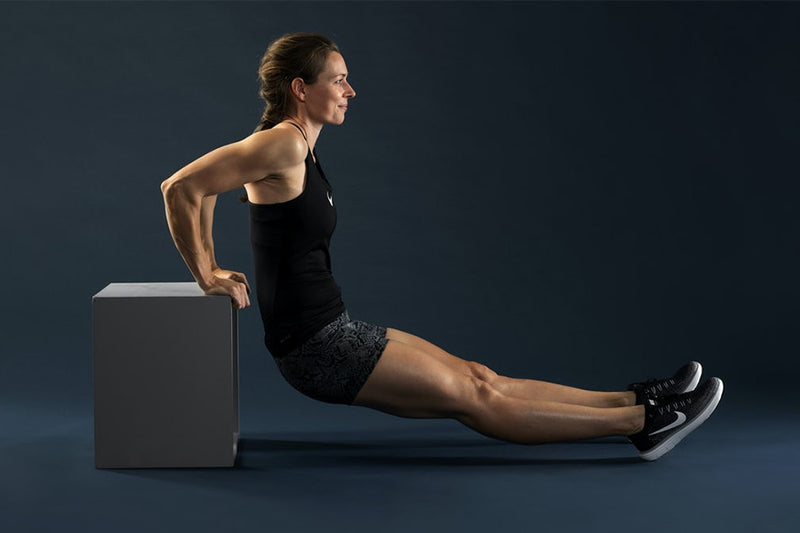
Exercise Description Main Target Muscles Pectoral, triceps and neck muscles Secondary Target Muscles Shoulders Workout Type Bodyweight/ strength Gym Gear Bench Fitness Level Intermediate Compound/Isolated Compound Power Move Push Dips Overview If you are not in the mood to lift weights and still want solid arms and shoulders, then dip it a bit! Dips are the perfect bodyweight exercises for your arms and shoulders. They are versatile, and you can do them almost anywhere. No equipment is needed. Just a bench or a chair, and you are good to go! How To Do It? Sit on the edge of a chair, bench, or a step and grip the edge next to your hips. Your legs should be extended, and your feet should be hip-width apart with the heels firm on the ground. Press your palms to lift your body, balancing your entire weight on your palms and heels and body forming a straight line. Lower yourself by bending your elbows. Keep the movement controlled and slow. Repeat as many times as you can Tips on Dips Keep your shoulders down during triceps dips. Maintaining a long neck throughout will bring the expected results. Do not Dip too low: putting excessive strain on your shoulders will only cause harm.
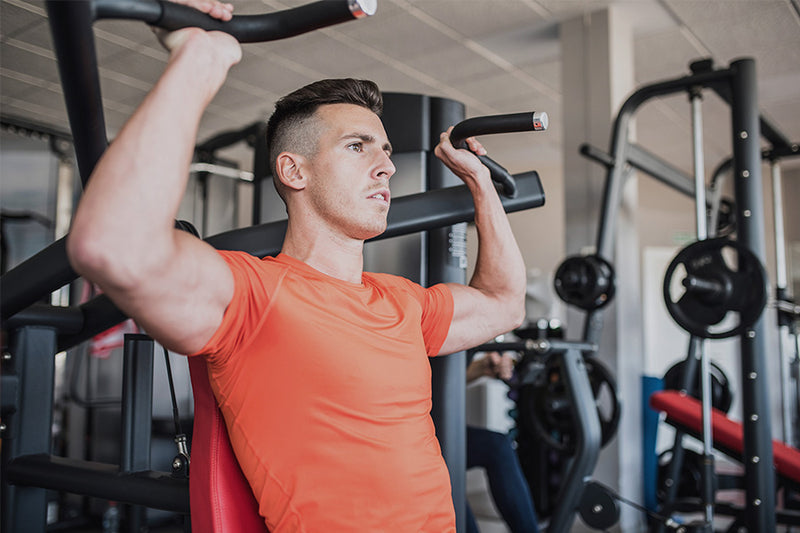
Exercise Description Main Target Muscles Shoulder Secondary Target Muscles Chest Workout Type Strength Gym Gear Chest Press Machine Fitness Level Intermediate Compound/Isolated Compound Power Move Push Target Muscles: Shoulder, Chest Front Shoulder Press Overview A shoulder press machine can help you build a stronger and bigger shoulder. You can add weights to the machine to add resistance to the exercise. However, if you are new to the shoulder press machine, make sure to start with lesser or zero weight. Using the machine helps in the isolation of your deltoid muscles. You also need to have the optimal core strength to do the exercise. You can add this exercise to your upper body or arm and back workouts. How to Do It Adjust the seat of the machine to your height. Sit on the seat. The bar of the machine should be at shoulder height. Your back should be against the pad, and your feet pressed and flat on the floor. You should bend your knees at a 90-degree angle. Hold the bars with an overhand grip. Your elbows should be bent. Lift the weight over your head. Pause at the top but avoid locking your elbows. Lower the bars in a slow and controlled motion. Front Shoulder Press Tips Start with a comfortable weight. Gradually add the weight to the machine. Focus on engaging your core muscles.
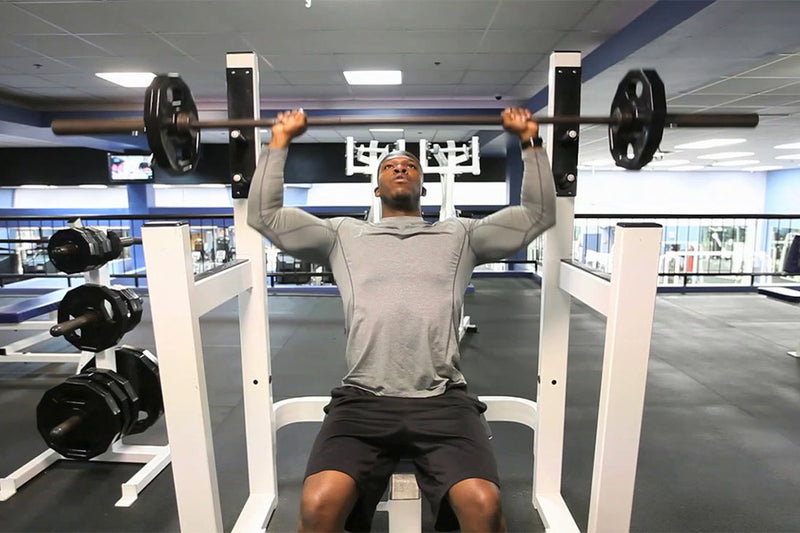
Exercise Description Main Target Muscles Shoulder Secondary Target Muscles Traps, Triceps Workout Type Strength Gym Gear Barbell Fitness Level Beginner Compound/Isolated Compound Power Move Push Target Muscle Group: Shoulders Seated Barbell Shoulder Press Overview The seated shoulder press with a barbell is a variation on the overhead press. It's used to strengthen and build muscle and shoulder strength. Vertical presses, such as the seated shoulder press with a barbell, are basic movements to train and should be included in your exercise routines. You can experiment with different variations until you find the most comfortable one, and then continue working on it. You can include the seated shoulder press with your shoulder exercises, push workouts, and full-body workouts. How To Do It? Sit on a bench with a barbell in your hands, palms facing forward. From here, press the barbell up above your head, extending your arms fully. Return to the starting position and repeat for the desired number of repetitions. Tips for Seated Barbell Shoulder Press At the top, reach high, and don't be afraid to keep your shoulders and back down. Allow your elbows to turn and point outward at the top of the movement, but keep them tucked into your ribcage at the bottom. You can control the bar by rolling your wrists in extension. Instead, think about "rolling your knuckles towards the ceiling." Press down on your abs, but don't lean back too much. Imagine that you are trying to see out the top of a window. Your ears should align with your biceps. Try a wider grip or one of the vertical pressing techniques listed on the site if your shoulders are bothering you during the movement.
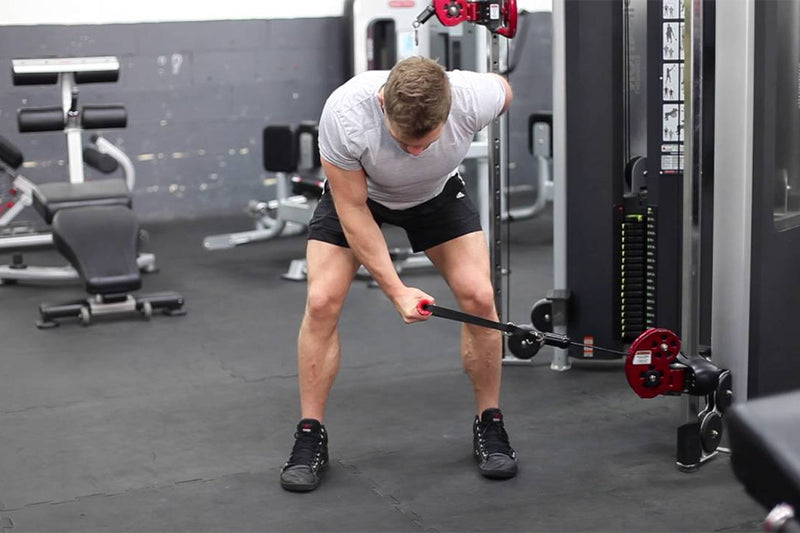
Exercise Description Main Target Muscles Shoulders Secondary Target Muscles None Workout Type Strength Gym Gear Cable Fitness Level Beginner Compound/Isolated Isolated Power Move Pull Target Muscle Group: Shoulders Single Arm Reverse Cable Fly Overview Single Arm Reverse Cable Fly is a resistance exercise that targets the rear shoulders as well as the major upper back muscles. It can be done at the gym or at home with just a pair of dumbbells. You can also add the reverse fly to your upper-body strength-training program. How to Do It Attach a single handle cable extension to a low pulley on a cable machine. Grasp the handle with your right hand and stand facing the machine with your feet shoulder-width apart. Bend your torso forward at a 45-degree angle and bring your right arm across your body so that your elbow stays close to your ribs and your palm is facing away from you. This is your starting position. Keeping your torso stationary, raise the handle diagonally across your body until your arm is fully extended and parallel to the floor. Reverse up your motion to the starting position. Complete your desired number of repetitions and then repeat with your left arm. Single Arm Reverse Cable Fly Tips Keep your weights light and practice good form. Take a deep breath and squeeze your shoulder blades. Only move your shoulders. Your body should remain as still as possible, and your arms should maintain the same form throughout your movement. It is a good idea to start with your weakest arm. Many people will find that it is their left arm.
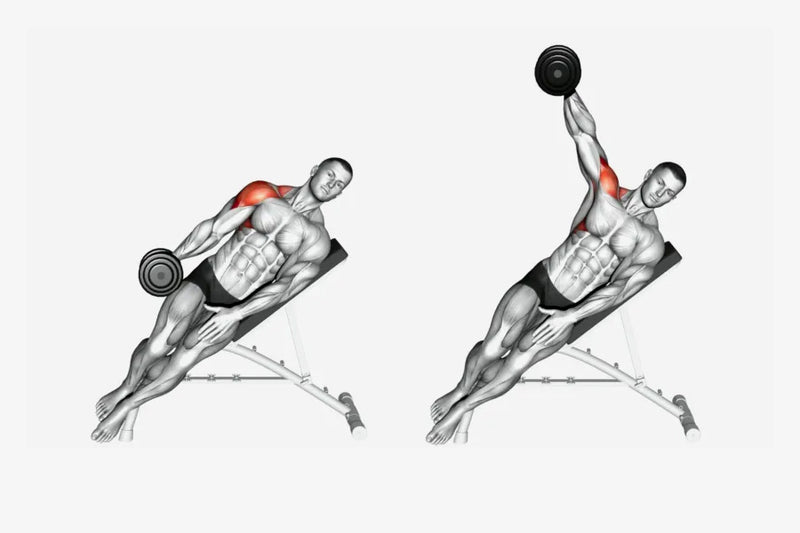
Exercise Description Main Target Muscles Shoulders Secondary Target Muscles None Workout Type Strength Gym Gear Dumbbell Fitness Level Beginner Compound/Isolated Isolated Power Move Pull Target Muscle Group: Shoulders Inclined Dumbbell Side Lateral Raises Overview The inclined dumbbell side lateral raises is an isolation exercise that is single-joint for the deltoid (especially the middle). This exercise will increase your shoulder mass and width. A great lateral head can give you the appearance of having wide shoulders. Although it can be difficult for beginners to do incline side laterals, they are an interesting variation of traditional lateral raises. How to Do it For starting position, grab a dumbbell with your right hand and lie down on your left side on an inclined bench. The angle should be between 40-60 degrees. Place the dumbbell on your right side, with your palm facing your thigh. Without bending your elbow, lift your arm so that it aligns with your shoulder rotating your palm inward. Keep your weight under control. Continue for the prescribed number of repetitions with your right hand. Then switch to your left arm. Inclined Dumbbell Side Lateral Raises Tips Here are some helpful tips about performing lateral dumbbell incline-side-lying dumbbell raises safely and effectively. During the lift, you should slightly bend your elbow. Your working arm should be parallel to your body in the final position. Ensure that your palm faces forward at the end of each movement. Keep your focus on the slow, controlled movements throughout the exercise.
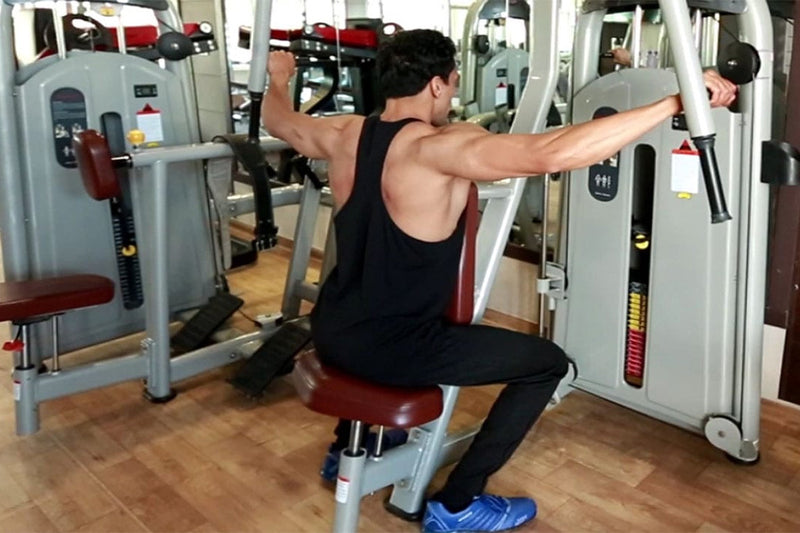
Exercise Description Main Target Muscles Shoulders Secondary Target Muscles Traps Workout Type Strength Gym Gear Machine Fitness Level Beginner Compound/Isolated Isolated Power Move Pull Target Muscle Group: Shoulders and Traps Machine Reverse Fly Overview The machine reverse fly is a machine version of the bent-over dumbbell reverse fly. It targets the shoulder rear delt muscles. The machine reverse fly can be used to isolate the rear delt muscles and stabilize the core. Rear delts are often an underactive and lagging muscle group. Therefore, it is important to train them in your workout program. How to Do It While seated, face the fly machine with your chest against it and your torso in front of the handles. Reach forward and grab each handle with a neutral or pronated grip. Contract your rear delts while keeping your elbows bent. Then open your arms in a reverse fly motion. Slowly lower your handles to their original position. Repeat until you reach the desired number of reps. Machine Reverse Fly Tips You should ensure that the movement is entirely by the upper arm, moving in the shoulder socket, and not scapular retract. The shoulder blades should not move drastically - there might be some retraction, but nothing too dramatic. Do not allow your head to protrude forward while wide open your arms.

Exercise Description Main Target Muscles Shoulders Secondary Target Muscles Traps, Triceps Workout Type Strength Gym Gear Machine Fitness Level Beginner Compound/Isolated Compound Power Move Push Target Muscle Group: Shoulder Machine Shoulder Press Overview The machine shoulder press is a variation on the seated shoulder press used to strengthen the shoulder muscles. The machine shoulder press is a form of pressing that emphasizes the shoulders. The fixed movement pattern of a machine makes it simpler to isolate certain muscle groups. If you are working on hypertrophy, the machine shoulder press should be added at the end of your shoulder exercise after you have used other compound variations to strengthen your push muscles. How to Do it With the handles at approximately shoulder height, sit down in the machine. Use a neutral or pronated grip to grab the handles. Take a deep breath and push directly overhead. Slowly lower your handles to return them to their original position. Continue repeating until you reach the desired number. Exercise Tips Do not allow your head to protrude too far. Press the bicep towards the ear, and exhale when you do. You should seek treatment if you feel pressure in your neck, traps, or shoulders during the movement. Keep your elbows slightly bent at the top but not locked out completely. This will help keep tension off the shoulders. You may have poor shoulder mobility due to the inability to lock the elbows overhead.

Exercise Description Main Target Muscles Shoulder Secondary Target Muscles Traps, Upper back Workout Type Strength Gym Gear Cables Fitness Level Beginner Compound/Isolated Compound Power Move Pull Target Muscle Group: Shoulder Incline Cable Front Raise Overview The incline cable front raise targets the shoulders. It is performed at an angle, allowing for more motion than standing or upright-seated raises. The incline cable front raise hits the shoulders at a different angle. As part of shoulder-focused or upper-body training, raise variations can be performed for moderate to higher reps (e.g., 8-12 reps per set). How to Do it Hold the cable holder in each hand and sit down on an incline bench. Keep your arms straight in front and your palms down. The cable should be about an inch higher than your thighs. This is your starting position. Slowly lift the cable to just above your shoulders. Keep your elbows locked. For a second, squeeze at the top. As you inhale, lower your arms to the starting position. Continue repeating until you reach the maximum number of repetitions. Exercise Tips Each time you hit the muscle, you can adjust the angle. Keep your head resting down against the bench and your legs on the floor at all times.

Exercise Description Main Target Muscles Shoulders Secondary Target Muscles Triceps Workout Type Strength Gym Gear Dumbbell Fitness Level Intermediate Compound/Isolated Compound Power Move Push Target Muscle Group: Shoulders Smith Machine Seated Overhead Press Overview A smith machine seated shoulder press is a workout that primarily targets the shoulder muscles. This exercise can be performed with a moderate weight and higher reps to build muscle or with a heavy weight and lower reps to build strength. Either way, this exercise will help you achieve your fitness goals. The benefits of this particular workout are many, but some of the most notable benefits include increased muscular endurance and strength and improved joint stability. Additionally, this exercise can also help to improve your posture and reduce your risk of injuries in the future. How to Do It To set up the shoulder press for the Smith machine, place a bench in the smith machine and adjust the back so that it is at a 90-degree angle. Now, sit down on the bench and adjust the bar's position so that it falls just in front of your face. Next, add the desired weight and sit down on the bench. You can un-rack the weights by bending your elbows. This is the starting position. Slowly lower the weight until it is below your chin. Pause and then lift the bar back up to its starting position. Repeat for desired reps. Exercise Tips The smith machine shoulder press is an option for heavy lifting without using a spotter. Do not lock your elbows at the top of the movement. To reduce your chances of sustaining a shoulder injury, always warm up your muscles first. Always lower the bar under your chin to complete a full range of motion.

Exercise Description Main Target Muscles Shoulders Secondary Target Muscles Triceps Workout Type Strength Gym Gear Dumbbell Fitness Level Beginner Compound/Isolated Compound Power Move Push Target Muscle Group: Shoulders One Arm Seated Palms in Dumbbell Press Overview The One Arm Seated Palms in Dumbbell Press is a great exercise for targeting your shoulders as well as your chest and triceps. This move can be performed with either a dumbbell or a barbell, and there are variations that you can use to target different areas of your muscles. For example, you can use a narrower grip to target your inner triceps, or a wider grip to target your outer triceps. You can also vary the weight and number of reps to suit your own fitness level. How to Do it Get an adjustable angle bench, and set your back at 90 degrees. Place your left hand on a dumbbell and place it on the bench. Raise the dumbbell to shoulder height, and twist your palm so that your shoulder is in front of you (neutral grip). For stability, keep your back flat against the backrest and your feet planted on the ground. This is the ideal starting position. Keep your eyes forwards and slowly lift the dumbbell above your head until your arm is almost fully extended. Don't pause at the top. Instead, immediately lower the dumbbell to its starting position. Continue for the desired number of reps and repeat the workout with your right arm. Exercise Tips Many lifters allow their form to deteriorate and lift heavier weights too fast. This can sometimes lead to injury, which could limit your shoulder gains. Use the widest range of motion with controlled movements throughout the exercise. You can do this exercise while sitting on a flat bench. However, a backrest is recommended for people with lower back problems.

Exercise Description Main Target Muscles Traps Secondary Target Muscles Abs, Adductors, Biceps, Calves, Glutes, Hamstrings, Quads, Shoulders, Upper Back Workout Type Weightlifting Gym Gear Barbell Fitness Level Beginner Compound/Isolated Compound Power Move Pull Target Muscles: Traps Sumo Deadlift to High Pull Overview Sumo High Pull is a high variation; an exercise practiced to focus on the muscles of the traps and shoulders. In addition, it's a combination of a deadlift with an upright row. It targets the upper back and hamstrings. This workout is based on explosive movements, and traps respond well to such movements, which in return help in muscle growth. How to Do It? Add weights to the barbell and set it in front of you on the ground. Now stand by keeping your shins at a distance of 2 to 3 inches away from the barbell. Bend your knees, go down, and hold the barbell in the middle by keeping a space of 6 inches between your hands. Keep your feet 4 to 6 inches wider than your shoulders width apart. Now pull up the barbell by standing straight and holding it near your chin with the elbows pointed out. Lower the barbell to the hips, reverse the movement, push the hips back and hinge forward. Place the barbell on the floor, rest and repeat the reps as necessary. Sumo Deadlift to High Pull Tips The distance between legs ranges from individual to individual. Instead of wasting time calculating the stance width, check what feels good on your hips, giving you more power. The sumo pull is slightly different as it focuses on wedging your hips into the bar and getting them closer. Prevent the bars from drifting away by focusing on your lats. Squeeze the lats, keep the bars in a close position and allow them to travel in a straight way. The hips should be lower than the shoulders, allowing the knees to track over the floor. You can spread your feet apart to activate your glute muscles and balance your knee joints. Now comes the neck position. You can work in a neutral and slightly up position and choose the one that suits your body. Your toe angle will depend on the hip anatomy. So, adjust it accordingly. Make sure you hold the bars tightly. Hold it tightly as if trying to leave your fingerprints on it. Ensure your armpits are in the correct position so the bar can travel vertically. This way, the shins will become vertical and move off the way as your knees extend. Do not put the entire weight on the heels; instead, focus on driving through the whole foot. Your target should be 3 points, i-e, heel, big toe and little toe.

Exercise Description Main Target Muscles Traps Secondary Target Muscles None Force Type Pull Workout Type Strength Training Gym Gear Machine Fitness Level Beginner Compound/Isolated Isolated Target Muscles: Traps Machine Shrugs Overview If you're looking for a way to build bigger, wider shoulders, the smith machine shrug exercise is a great option. This exercise targets the traps, which are the muscles that run from the neck's base to the shoulders' tops. The smith machine allows you to safely lift heavy weights and get a deep stretch at the bottom of the movement, making it ideal for building mass. How to Do It? Load up the weight you intend to use on a smith machine to prepare for the smith machine shrug. Standing with your feet about shoulder-width apart, face the bar. Your hands should be roughly shoulder-width apart when you take the bar with an overhand grip and palms facing down. Pick up the barbell and release the safety while bending only at the knees. Let your shoulders droop as far as they will go while holding the barbell close to your torso. This is where the exercise will begin. Slowly raise your shoulders as high as you can. After pausing, bring the barbell back to its starting position gradually. Repeat for desired reps. Machine Shrugs Tips Use your traps, not your biceps, to lift the weight. The barbell shrug exercise is more complicated and will benefit you more if you pause at the top. At the top of each rep, try pausing for a count of 1-3. There is no advantage to shrugging with your shoulders rolled forward or back. Raise and lower the barbell in a straight line.

Exercise Description Target Muscle Group Trapezius Secondary Muscles Splenius Capitis, Seminispinalis Capitis, Suboccipitals Exercise Type Strength Equipment Required Neck Harness With Weight Plates Experience Level Beginner Compound/Isolated Isolated Force Type Pull Targeted Muscles: Trapezius Neck Extention Overview The muscles in the neck help us move our head around, and they also help us keep our head up. If we don't use these muscles often, they can get weak and we can start to experience pain or problems with our neck. That's why it's important to work these muscles regularly, so we can keep them strong and healthy. The muscles that work when you do neck extension are the trapezius and the sternocleidomastoid. These muscles help you extend your neck and lookup. You can work these muscles by doing exercises like a crunch or a reverse crunch. You can also do neck extensions with weights to increase the resistance. Make sure to use proper form when doing these exercises to avoid any injuries. How To Do It Lie down on a surface with your face facing the floor Keep your hands by your sides Lift up your chin towards the ceiling Return back to the original position Neck Extention Tips When doing neck extension exercises, make sure to always use proper form. This will help prevent any injuries from happening. If you're not sure how to do an exercise correctly, ask a trainer or another fitness professional for help. Be sure to start with lighter weights and increase the weight gradually as you get stronger. This will help minimize the risk of injury. Stop doing any exercises that cause pain or discomfort.

Exercise Description Main Target Muscles Traps Secondary Target Muscles Shoulder, Upper back Workout Type Strength Gym Gear Dumbell Fitness Level Beginner Compound/Isolated Isolated Power Move Pull Target Muscle Group: Traps Dumbbell Shrug Overview The dumbbell shrug is an exercise that works the muscles in your upper back and shoulders. This exercise is important because it helps to strengthen these muscles, which can help to improve your posture and prevent pain in these areas. Additionally, strong upper back and shoulder muscles can help to increase your range of motion and improve your overall strength. You can include dumbbell shrugs in your shoulder exercises, back exercises, and upper body workouts, as well as your full-body workouts. How to Do it Start by standing up straight with your feet shoulder-width apart and holding a dumbbell in each hand. Then, raise your shoulders up towards your ears as high as you can and hold for a count of two. Slowly lower your shoulders back down to the starting position and repeat. Continue repeating until you reach the desired number. Dumbbell Shrug Tips Be sure to keep your back straight and your chest up throughout the exercise. Raise your shoulders as high as you can and hold for a count of two before lowering them back down Use a weight that is heavy enough to challenge your muscles but not so heavy that it causes you pain If you are new to this exercise, start with lighter weights and gradually increase the amount of weight as you get stronger.

Exercise Description Main Target Muscles Traps Secondary Target Muscles Lats, Shoulders Workout Type Strength Gym Gear Cable Fitness Level Beginner Compound/Isolated Compound Power Move Pull Target Muscle: Traps Wide Grip Cable Upright Row Overview The wide grip cable upright row, a variation of the upright row, is an exercise that builds the muscles in the traps and shoulders. The cable pulley machine can be very useful as it maintains tension on the target muscle groups while you move the weight. Some people prefer to avoid upright rows as they can cause shoulder pain and impingement. Try it out to determine if this is something you should avoid. How to Do It Attach a straight bar to the cable and position it in the lowest possible position. Grab the handle by reaching down with a wide grip, and then stand straight with your arms fully extended. Exhale and pull the pulley up to your chin, keeping your elbows close to your body. Pause for a moment at the top of the movement, and then slowly lower the pulley back to the starting position. Continue repeating until you reach the desired number. Wide Grip Cable Upright Row Tips A rope attachment can be used if the straight-bar version of this exercise is too strenuous for your shoulders or wrists. Keep your elbows up, but keep the upper arms parallel to the ground. This could increase the chance of impingement. You may feel pain in your shoulders while you move. To lift the shoulders and expand the subacromial space, squeeze the traps. Do not allow your back to arch when pulling the cable upwards. Don't let excess weight dictate your body's mechanics. Additional momentum can shift the weight to compensatory muscles if there is excess movement. Keep your elbows up, and your head straight.

Supercharge your muscles! Get strong triceps with these proven Isolation Exercises for Maximum Muscle Activation and a powerful, sculpted physique.

Exercise Description Main Target Muscles Triceps Secondary Target Muscles None Force Type Push Workout Type Strength Training Gym Gear Dumbbell Fitness Level Beginner Compound/Isolated Isolated Targeted Muscles: Triceps Description The Tricep Kickback is a popular isolation exercise that targets the triceps muscles, located at the back of the upper arm. This exercise can be performed using a dumbbell and can be done either standing or with the support of a flat bench. Tricep Kickbacks are a versatile and effective addition to any upper body or arm-focused workout routine. Step-By-Step Instructions Select a dumbbell of appropriate weight, considering your strength and fitness level. It's always best to start with a lighter weight to perfect your form before progressing. Stand with your feet shoulder-width apart, holding the dumbbell in one hand. Slightly bend your knees and hinge forward at the hips, keeping your back straight and nearly parallel to the floor. Position your upper arm close to your body and parallel to the ground, with your elbow bent at a 90-degree angle. This is your starting position. Optional: To perform this exercise using a flat bench, place one knee and the same-side hand on the bench for support, with your other foot flat on the ground. Follow the same upper body positioning as described above. Exhale as you extend your arm backward, straightening your elbow and keeping your upper arm stationary. Focus on contracting your triceps during this movement. Pause for a moment at the top of the movement, with your arm fully extended and your triceps engaged. Inhale as you slowly return to the starting position, bending your elbow back to a 90-degree angle. Repeat for the desired number of repetitions on one side before switching to the other arm. Tips and Safety Precautions Warm up your upper body and triceps with dynamic stretching or light exercises before attempting Tricep Kickbacks. Keep your back straight and your core engaged throughout the exercise to maintain stability and protect your lower back. Focus on slow, controlled movements, and avoid using momentum to lift the weight. Ensure your upper arm remains stationary and close to your body, moving only your forearm during the exercise. Start with a lighter weight to perfect your form before progressing to heavier loads. Avoid locking your elbow at the top of the movement to maintain tension in the triceps and prevent strain on the joint.

Exercise Description Target Muscle Group Triceps Secondary Muscles None Exercise Type Strength Equipment Required Dumbbell Experience Level Beginner Compound/Isolated Isolated Force Type Push (Bilateral) Targeted Muscle: Triceps Seated Overhead Dumbbell Extension Overview A two-arm seated overhead dumbbell extension is the version of the dumbbell tricep extension workout that targets the triceps specifically. Exercises that target the long head of the triceps are efficient when done overhead. You'll look to have a bigger tricep overall if your long head is bigger and denser. Triceps isolation exercises like this are beneficial for individuals aiming for looks. They can also benefit people who want to strengthen their pressing muscles in general. How to Do It? Place an adjustable bench at a 90-degree angle and choose the desired weight from the rack. Position yourself by sitting up straight and raising the dumbbell to the top of your shoulder. Inhale deeply, wrap your hands around the weight, and then raise it overhead. Lock your elbows and carefully lower the dumbbell behind your head while maintaining an overlapping grasp. Drive the dumbbell back to the beginning position by extending the elbows and flexing the triceps once your forearms reach parallel or below. Repeat for the desired number of reps. Tips for Seated Overhead Dumbbell Extension Maintain tension in your glutes and abs to keep your ribcage down and avoid overextending your lumbar spine. Tension and the mind-muscle connection can be improved by performing the exercise with a slow eccentric (lowering component). Keep a relatively neutral head position; avoid allowing the neck to thrust forward as this could put too much pressure on the cervical spine.

Exercise Description Main Target Muscles Triceps Secondary Target Muscles None Workout Type Strength Gym Gear Machine Fitness Level Beginner Compound/Isolated Isolated Power Move Push Target Muscle: Triceps Machine Tricep Extension Overview The machine tricep extension is a weight training exercise that targets the triceps brachii, a three-headed muscle located on the back of the upper arm. The machine tricep extension is an effective way to build strength and size in the triceps and can be incorporated into a variety of workout routines. When performed correctly, the exercise is relatively safe and easy to perform. Once you've mastered the form, you can add more weight to challenge yourself further. Give the machine tricep extension a try next time you're at the gym! How to Do To start, get in a seated position and grab the handles with a neutral grip. Extend your elbows and press the handles outward. Slowly revert to the starting position. Repeat for the desired number of reps. Exercise Tips To ensure the tension, keep your elbows slightly away from being completely locked out. Do not let your lower back arch. Make sure you keep looking ahead and not on your sides as it can lead to cervical injuries.

Exercise Description Main Target Muscles Triceps Secondary Target Muscles Forearms Workout Type Strength Gym Gear Pull Up Resistance and Workout Bands or Fabric Resistance Bands Fitness Level Beginners Compound/Isolated Isolation Power Move Pull Target Muscle: Triceps Banded Triceps Extension Overview If you're looking to target your triceps, then triceps extension with a resistance band is a great option. This exercise is relatively simple to do, but it's very effective in building strength in your triceps. If you're running out of time to go to the gym but still want your arms to look pumped, this variation is your perfect solution. How to Do It Attach a band to a stable anchor point. Make sure it's above your head height and assume a standing position. Take a neutral grip over the band and slightly lean forward. Now slowly pull the band by flexing your triceps. Keep pulling it till you feel your elbows almost locked out. Return it to the starting position under controlled movement. Repeat for the desired number of reps. Banded Triceps Extension Tips Your shoulder blades should not tilt forward. In order to maintain tension in your triceps, do not lock your elbows completely. Don't let your elbows extend and move in front of your body.

Exercise Description Main Target Muscles Triceps Secondary Target Muscles None Workout Type Strength Training Gym Gear Barbell Fitness Level Beginner Compound/Isolated Isolation Power Move Push Target Muscle: Triceps Description The Seated Barbell French Press, also known as the Seated Barbell Triceps Extension, is an effective strength exercise that targets the triceps muscles. This exercise is performed while seated, which helps to isolate the triceps by minimizing the involvement of other muscle groups. The Seated Barbell French Press can be integrated into any upper body workout, particularly those focusing on arm strength and development. Step-By-Step Instructions Set up a flat bench or a utility seat with back support. Ensure that it's stable and secure. Load the barbell with the appropriate weight, considering your strength and fitness level. Always start with a lighter weight to perfect your form before progressing. Sit on the bench or utility seat with your feet firmly planted on the ground, shoulder-width apart. Hold the barbell with a narrow grip, hands approximately shoulder-width apart or slightly closer, palms facing away from you. Carefully lift the barbell over your head, extending your arms fully. This is your starting position. Inhale as you slowly lower the barbell behind your head by bending your elbows, keeping your upper arms stationary and close to your head. Lower the barbell until your forearms are roughly parallel to the ground or slightly below, maintaining control and ensuring your elbows don't flare out. Exhale as you press the barbell back up to the starting position, using your triceps to extend your arms fully. Repeat for the desired number of repetitions, maintaining proper form throughout the exercise. Tips and Safety Precautions Warm up your upper body and triceps with dynamic stretching or light exercises before attempting the Seated Barbell French Press. Keep your back flat and pressed against the back support throughout the exercise to prevent excessive strain on the lower back. Focus on slow, controlled movements, and avoid using momentum to lift the weight. Ensure your elbows remain stationary and close to your head, avoiding any outward movement. Start with a lighter weight to perfect your form before progressing to heavier loads. If you experience pain or discomfort in your wrists, try using an EZ curl bar or dumbbells as an alternative. Always have a spotter nearby when lifting heavy weights to ensure safety and proper form.

Exercise Description Main Target Muscles Triceps Secondary Target Muscles None Workout Type Strength Gym Gear Cable machine Fitness Level Beginner Compound/Isolated Isolation Power Move Pull Target Muscle: Triceps Rope Tricep Extension Overview Triceps rope extensions are a great exercise for targeting the triceps muscles. By holding the rope in both hands and extending the arms straight, you can really work those triceps! This exercise can be done with a light weight to start, and then gradually increase the weight as you get stronger. How to Do it Start by standing tall with your feet hip-width apart, holding a rope in both hands. Bend your elbows and bring the rope behind your head, keeping your upper arms close to your ears. Exhale as you extend your elbows to straighten your arms, contracting your triceps muscles. Inhale and slowly release back to the starting position. Rope Tricep Extension Tips Keep your shoulders fixed. Keeping the elbow static will give a better burn to your triceps.

Exercise Description Main Target Muscles Tricep brachii Secondary Target Muscles Forearms Workout Type Strength Gym Gear Dumbbell Fitness Level Beginner Compound/Isolated Isolation Power Move Push Target Muscle: Triceps Brachii Dumbbell Tricep kickback Overview This is an isolation technique in which you target your triceps with a pushing technique instead of pulling weight (most exercises are pulling exercises). This is an exclusive tricep exercise that bears fruit quite soon if done right. How to Do It Stand on the left side of the bench, place your right knee and right hand on the bench. You will have to bend over at this point. With a neutral grip, pick up the dumbbell with your left hand. Keep your back straight throughout. Tuck in your left arm close to your torso and bend at the elbow, forming a 90-degree angle with your upper arm and forearm. This is the starting position. Moving only the elbow, raise the dumbbell behind you until your arm is fully stretched. Stop, and lower the dumbbell back to the starting position. Repeat this movement as many times as you can. Tips on Dumbbell Tricep Kickback Keep your back straight for better tricep engagement. Try to engage your triceps intentionally.

Exercise Description Main Target Muscles Triceps Secondary Target Muscles None Workout Type Strength Gym Gear Cable Fitness Level Beginner Compound/Isolated Isolation Power Move Push Target Muscle: Triceps Cable Press Down Overview This is a variation of the cable extension exercise that is popularly known to build tricep muscles. The exercise engages your core, shoulders, and back which builds overall strength to improve your athletic performance. If you want to enhance your endurance level, then this exercise ensures you build it adequately. Individuals also require isolation in order to perform this exercise properly. This is a fundamental skill that proves to be beneficial in performing many other exercises. How to Do It Attach the bar to the stack as high as possible. Grab the bar and hinge your hips forward a little. Keep the grip pronated i.e., facing down and hinge your hips. Extend the elbows, flex the triceps and pull the handle down till you feel your elbows almost locked. Slowly return back to the start position. Repeat for the desired number of reps. Cable Press Down Tips Do not lock your elbows out completely. This is important if you want to maintain tension in your triceps. Your elbows should not move in front of your body as you extend towards the bottom of the movement. This would hurt your elbow joints terribly. Your shoulder blades should not tilt as you stretch your elbows.

Exercise Description Main Target Muscles Triceps Secondary Target Muscles Chest, Shoulders Workout Type Strength Gym Gear Bodyweight Fitness Level Beginner Compound/Isolated Compound Power Move Push Target Muscle: Triceps Tricep Dips Overview Tricep dips are a strengthening exercise that keeps an isolated focus on your triceps. It increases your range of motion and builds strength in your entire upper body. The exercise is super effective for your shoulders and arms as well. The strength-building workouts are effective in burning a significant number of calories, regardless of which version you do. Tricep dips may be done on the machine or using two sturdy chairs. To add more complexity to the workout, you can wear a weighted vest or dip belt to hang weights, making it an all-body exercise to reach your fitness goals. How to Do It There are two techniques to this exercise, one focuses on your triceps while the other focuses on your chest. The latter works pretty hard on your triceps. To begin, hold the dip bars ensuring an inward grip. You can adjust the bars to your shoulder-width if they are adjustable. Jump off the ground to shift your weight on the bars. Ensure to keep your body as straight as possible. Your legs should be hanging down. Facing forward, lower yourself till your elbows are parallel to your shoulders. Raise your body back up. Do not lock your elbows. Repeat for the desired number of reps. Tricep Dips Tips Do not lower yourself too far down as it should put unnecessary strain on your shoulders. Ensure to squeeze your triceps at the peak of the movement. Do not lock your arms at the top of the movement. Keep your rep timing slow to make the most of the workout.

Exercise Description Main Target Muscles Triceps Secondary Target Muscles Chest and Shoulders Workout Type Strength Gym Gear Barbell Fitness Level Beginner Compound/Isolated Compound Power Move Push Target Muscle: Triceps Close Grip Bench Press Overview The close grip bench press is a variation of the traditional bench press that targets the muscles in your chest more effectively. This exercise can be performed with either a barbell or dumbbells, and is a great way to add variety to your workout routine. How to Do It Lie on the bench with your feet flat on the floor. Grip the barbell with your hands placed closer than the standard bench press, almost shoulder-width apart. Engage your core and squeeze your shoulder blades together to get into position. Lower the bar in a slow, controlled way. Press up with power, and slowly return to the starting position. Keep your elbows close to your sides: this is better for tricep engagement. Tips on Close Grip Bench Press Do not place your hands too close; it can injure your wrists because the weight will become too unstable for you. Start with light weights; master stability through it and then increase the load.

The Tricep Overhead Extension is a variation of the triceps extension that isolates and focuses on your triceps. The triceps are large muscles located on the back of the upper arm. Learn more about this exercise in this blog.

Exercise Description Main Target Muscles Triceps Secondary Target Muscles None Workout Type Strength Gym Gear Barbell or EZ Bar Fitness Level Intermediate Compound/Isolated Isolation Power Move Push Target Muscle: Triceps Incline SkullCrusher Overview The skull crusher is a strengthening exercise that helps with tricep strength and mass gains. The isolation exercise allows you to focus fully on your triceps by enabling all the energy to flow in the specific area. With the exercise, you can work on your muscles unilaterally or bilaterally, which defines the versatility of the workout. It also improves your wrist and elbow strength, enhancing your overall technique. As you will be holding and moving the weight up and down, you will also experience a drastic change in your grip. This benefit comes in handy with many other exercises that involve dumbbells and barbells. How To Do It? Set up the inclined skull crusher to around 30-45 degrees. Pick the desired barbell. Sit down on the bench and hold the barbell on your thighs. Lay down, extend your arms and pull the barbell over your head. Keep an overhand grip on the barbell. Now extend the barbell straight up in the air over your head. Keep your arms slightly bent to maintain tension in your triceps. This is your starting position. Keeping your elbows fixed, lower the barbell to the forehead. Pause, then push the barbell above the extended position again. Without locking your arms, go on with another rep. Repeat for the desired number of reps. Incline Skull Crusher Tips You will experience your elbows flaring out towards the sides, but ensure to keep them tucked in. Keep your movements slow and controlled throughout the exercise.